一、引言
首先在此非常感谢电子发烧友论坛给与的试用测评机会,同时也非常感谢 Sipeed矽速科技提供的 设备 ,让我有机会能够去体验这款高性能 AI 视觉处理板--MaixCAM Pro 。
二 、完成内容介绍
1.小车通过巡线到达指定位置
2.小车通过对物品花色的识别,自动达到目标位置
在这篇文章中我主要介绍寻线方面的相关操作
三 、视觉巡线
from maix import camera, display, image

cam = camera.Camera(320, 240)
disp = display.Display()

# thresholds = [[0, 80, 40, 80, 10, 80]]      # red
thresholds = [[0, 80, -120, -10, 0, 30]]    # green
# thresholds = [[0, 80, 30, 100, -120, -60]]  # blue

while 1:
    img = cam.read()

    lines = img.get_regression(thresholds, area_threshold = 100)
    for a in lines:
        img.draw_line(a.x1(), a.y1(), a.x2(), a.y2(), image.COLOR_GREEN, 2)
        theta = a.theta()
        rho = a.rho()
        if theta > 90:
            theta = 270 - theta
        else:
            theta = 90 - theta
        img.draw_string(0, 0, "theta: " + str(theta) + ", rho: " + str(rho), image.COLOR_BLUE)

    disp.show(img)
具体链接:https://wiki.sipeed.com/maixpy/doc/zh/projects/line_tracking_robot.html
虽然官方有相关的视觉巡线例程,但通过顶部的视频可以发现寻仙部分的S弯角度过大,所以需要对此作出一些特殊处理。
- 识别部分
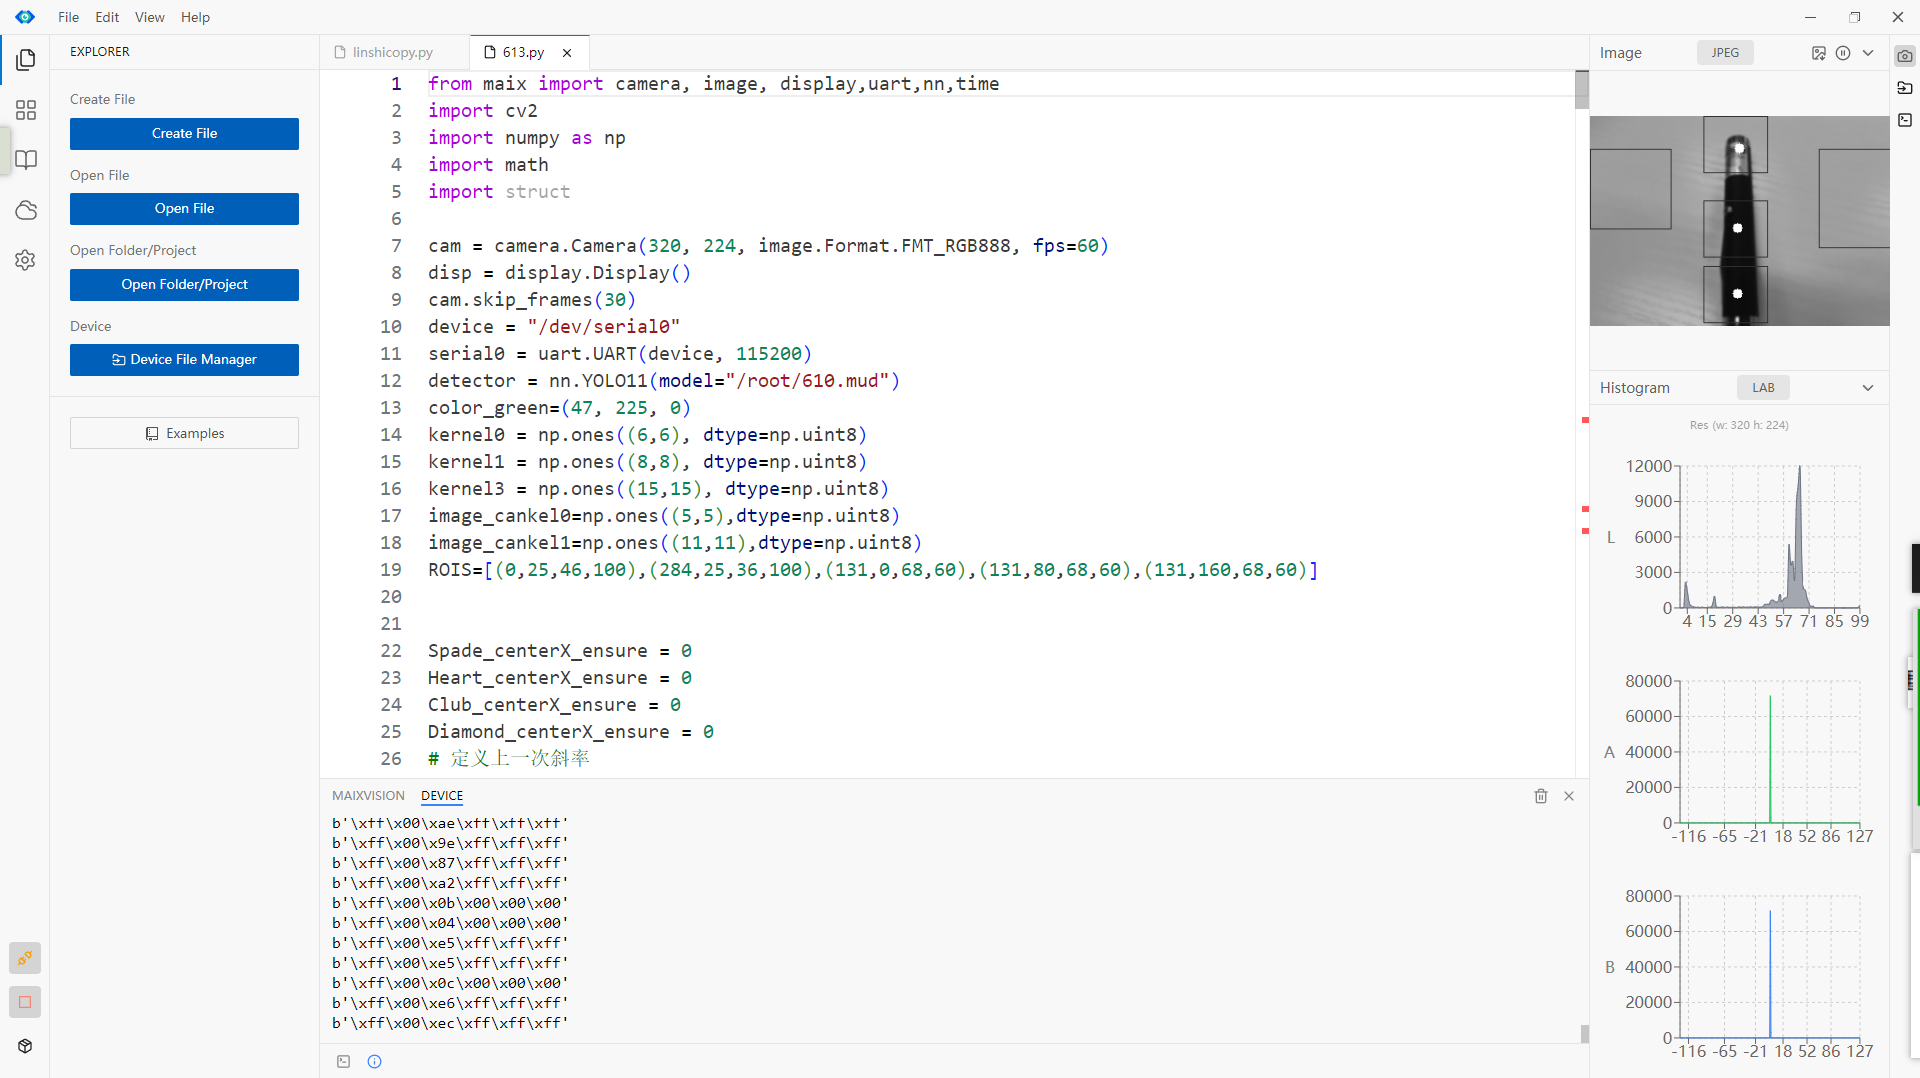
为此,我选择使用5点法来解决这一问题,即在摄像头画面中选择5个固定的ROI区域进行寻找色块。
相关解释见图中注释 **
img = image.image2cv(img,ensure_bgr=False,copy=True)
img = cv2.cvtColor(img, cv2.COLOR_BGR2GRAY)
img = cv2.GaussianBlur(img, (5, 5), 0, 0)
_, binary = cv2.threshold(img, 80, 255, cv2.THRESH_BINARY_INV)
binary0 = cv2.morphologyEx(binary, cv2.MORPH_DILATE, kernel1, iterations=1)
binary1 = cv2.morphologyEx(binary0, cv2.MORPH_DILATE, kernel0, iterations=1)
binary2 = cv2.morphologyEx(binary1, cv2.MORPH_DILATE, kernel3, iterations=1)
cv2.rectangle(img, (0, 35), (86, 120), color_green, 1)
cv2.rectangle(img, (244, 35), (320, 140), color_green, 1)
cv2.rectangle(img, (121, 0), (189, 60), color_green, 1)
cv2.rectangle(img, (121, 90), (189, 150), color_green, 1)
cv2.rectangle(img, (121, 160), (189, 220), color_green, 1)
roi1 = binary2[35:120, 0:86] # 左
roi2 = binary2[35:140, 244:320] # 右
roi3 = binary2[0:60, 121:189] # 上
roi4 = binary2[90:150, 121:189] # 中
roi5 = binary2[160:220, 121:189] # 下
contours1, _ = cv2.findContours(roi1, cv2.RETR_EXTERNAL, cv2.CHAIN_APPROX_SIMPLE)
contours2, _ = cv2.findContours(roi2, cv2.RETR_EXTERNAL, cv2.CHAIN_APPROX_SIMPLE)
contours3, _ = cv2.findContours(roi3, cv2.RETR_EXTERNAL, cv2.CHAIN_APPROX_SIMPLE)
contours4, _ = cv2.findContours(roi4, cv2.RETR_EXTERNAL, cv2.CHAIN_APPROX_SIMPLE)
contours5, _ = cv2.findContours(roi5, cv2.RETR_EXTERNAL, cv2.CHAIN_APPROX_SIMPLE)
if contours3:
max_one3 = max(contours3, key=cv2.contourArea)
rect3 = cv2.minAreaRect(max_one3)
(x3, y3), _, _ = rect3
x3 = x3 + 121
y3 = y3
cv2.circle(img, (int(x3), int(y3)), 5, (255, 0, 0), -1)
if contours4:
max_one4 = max(contours4, key=cv2.contourArea)
rect4 = cv2.minAreaRect(max_one4)
(x4, y4), _, _ = rect4
x4 = x4 + 121
y4 = y4 + 90
cv2.circle(img, (int(x4), int(y4)), 5, (255, 0, 0), -1)
if contours5:
max_one5 = max(contours5, key=cv2.contourArea)
rect5 = cv2.minAreaRect(max_one5)
(x5, y5), _, _ = rect5
x5 = x5 + 121
y5 = y5 + 160
cv2.circle(img, (int(x5), int(y5)), 5, (255, 0, 0), -1)
通过这些基础的操作就可以完成一般弯道的识别了,但如果遇到这种角度很大的弯道就需要加上一些特殊处理,例如:在特定位置识别给原基础上加上一个角度。 效果见底部视频 **
if contours3 and contours4 and contours5:
if (not (y3 - y4)) == 0 and (not (y4 - y5)) == 0:
Angle_straight1 = ((x3 - x4) / (y3 - y4))
Angle_straight2 = ((x4 - x5) / (y4 - y5))
k_list = Angle_straight1 * 0.2 + Angle_straight2 * 0.8
else:
k_list = 0
if not contours1 and contours2:
contours1_list = 1
else:
if contours1 and not contours2:
contours2_list = 2
elif not contours3 and contours4 and contours5:
if not (y4 - y5) == 0:
Angle_straight3 = ((x4 - x5) / (y4 - y5))
k_list = Angle_straight3
else:
k_list = 0
if not contours1 and contours2:
contours1_list = 1
else:
if contours1 and not contours2:
contours2_list = 2
else:
k_list = 0
if (contours3 and not contours4 and not contours5) or (not contours3 and contours4 and not contours5) or (not contours3 and not contours4 and contours5):
k_list = 0
if not contours1 and contours2:
contours1_list = 1
else:
if contours1 and not contours2:
contours2_list = 2
if not contours3 and not contours4 and not contours5:
k_list = 0
if not contours1 and contours2:
contours1_list = 1
else:
if contours1 and not contours2:
contours2_list = 2
if contours1_list == 1:
k_list -= 0.5
elif contours2_list == 2:
k_list += 0.4
2.转化和计算部分
即将视觉得到的数据转化为小车需要的角度
def Angle(K_list):
global Angle_saved
if K_list == 0:
Angle_list = 0
else:
a_list = math.atan(K_list)
Angle_list = math.degrees(a_list)
Angle_saved = Angle_list
img.draw_string(15, 15, 'Angle='+str(Angle_list), image.Color.from_rgb(255, 0, 0),scale=1.5)
print("{}".format(Angle_list))
Angle_list = Angle_list*100
Angle_list =int (Angle_list)
实现效果如图,分别对应上述所说的普通情况和大角度S弯


机器学习YOLO11离线训练效果见下篇文章 **
 /9
/9 


 工商网监
湘ICP备2023018690号
工商网监
湘ICP备2023018690号


 1374
1374

 淘帖
淘帖


