本文是在官方SDK仓的README基础上,在Ubuntu 22.04系统上搭建的开发环境。内容是对官方README.md的翻译,以及本人实验过程中的发现的缺失步骤的补充。
一、SDK简介
VisionFive2 SDK包含u-boot、OpenSBI、linux 内核、设备树、ramdisk 映像和 rootfs 映像等相关源码,Linux内核版本为 5.15。
VisionFive2 SDK顶层目录可以看到,主要有如下目录:

其中非常重要的五个目录为:
- buildroot,根文件系统源码
- linux,内核源码
- opensbi,SBI(Supervisor Binary Interface)源码,RISC-V特有的
- soft_3rdpart,三方IP的二进制软件包,例如GPU驱动等
- u-boot,bootloader源码
二、准备工作
主机系统,我用的是Ubuntu 22.04 Desktop。
apt软件源替换为科大镜像:
deb http://mirrors.ustc.edu.cn/ubuntu/ jammy main restricted
deb http://mirrors.ustc.edu.cn/ubuntu/ jammy-updates main restricted
deb http://mirrors.ustc.edu.cn/ubuntu/ jammy universe
deb http://mirrors.ustc.edu.cn/ubuntu/ jammy-updates universe
deb http://mirrors.ustc.edu.cn/ubuntu/ jammy multiverse
deb http://mirrors.ustc.edu.cn/ubuntu/ jammy-updates multiverse
deb http://mirrors.ustc.edu.cn/ubuntu/ jammy-backports main restricted universe multiverse
deb http://mirrors.ustc.edu.cn/ubuntu jammy-security main restricted
deb http://mirrors.ustc.edu.cn/ubuntu jammy-security universe
deb http://mirrors.ustc.edu.cn/ubuntu jammy-security multiverse
替换软件源之后,更新包索引:
$ sudo apt update
安装必要的工具:
$ sudo apt-get install build-essential automake libtool texinfo bison flex gawk   \\
g++ git xxd curl wget gdisk gperf cpio bc screen texinfo unzip libgmp-dev       \\
libmpfr-dev libmpc-dev libssl-dev libncurses-dev libglib2.0-dev libpixman-1-dev \\
libyaml-dev patchutils python3-pip zlib1g-dev device-tree-compiler dosfstools   \\
mtools kpartx rsync
安装最新版的 git-lfs 支持:
$ curl -s https://packagecloud.io/install/repositories/github/git-lfs/script.deb.sh | sudo bash
$ sudo apt-get install git-lfs
三、SDK源码获取
克隆官方的VisionFive2 SDK源码仓,然后更新各个子模块:
$ git clone https://github.com/starfive-tech/VisionFive2.git
$ cd VisionFive2
$ git checkout JH7110_VisionFive2_devel
$ git submodule update --init --recursive
**重要,**更新所有子模块仓中的LFS大文件:
$ git submodule foreach git lfs pull
PS:官方的README.md少了这一步骤,编译过程中发现有文件下载失败,网上搜索一圈后发现,这里需要下载LFS文件。
四、SDK源码构建
如果上述步骤都没有问题,则执行如下命令开始构建:
$ make -j$(nproc)
PS: buildroot构建过程中需要下载软件包,因此需要确保构建过程中网络畅通,否则将会失败。
另外,构建过程比较消耗CPU,如果是虚拟机,需要多分配一些CPU和内存资源。官方文档说——完成的构建树将消耗大约 18G 的磁盘空间。buildroot构建根文件系统的过程比较慢,可以通过编译目录大小大致估计进度。
该命令将会生成image.fit文件,并且会在 work/ 目录下生成u-boot-spl.bin.normal.out , visionfive2_fw_payload.img 文件。
生成后,最终的 work目录布局如下:
work/
├── visionfive2_fw_payload.img
├── image.fit
├── initramfs.cpio.gz
├── u-boot-spl.bin.normal.out
├── linux/arch/riscv/boot
    ├── dts
    │   └── starfive
    │       ├── jh7110-visionfive-v2-ac108.dtb
    │       ├── jh7110-visionfive-v2.dtb
    │       ├── jh7110-visionfive-v2-wm8960.dtb
    │       ├── vf2-overlay
    │       │   └── vf2-overlay-uart3-i2c.dtbo
    └── Image.gz
buildroot、uboot、linux、busybox的配置命令:
$ make buildroot_initramfs-menuconfig
$ make buildroot_rootfs-menuconfig
$ make uboot-menuconfig
$ make linux-menuconfig
$ make -C ./work/buildroot_initramfs/ O=./work/buildroot_initramfs busybox-menuconfig
$ make -C ./work/buildroot_rootfs/ O=./work/buildroot_rootfs busybox-menuconfig
用于构建单个包或模块的命令:
$ make vmlinux
$ make uboot
$ make -C ./work/buildroot_rootfs/ O=./work/buildroot_rootfs busybox-rebuild
$ make -C ./work/buildroot_rootfs/ O=./work/buildroot_rootfs ffmpeg-rebuild
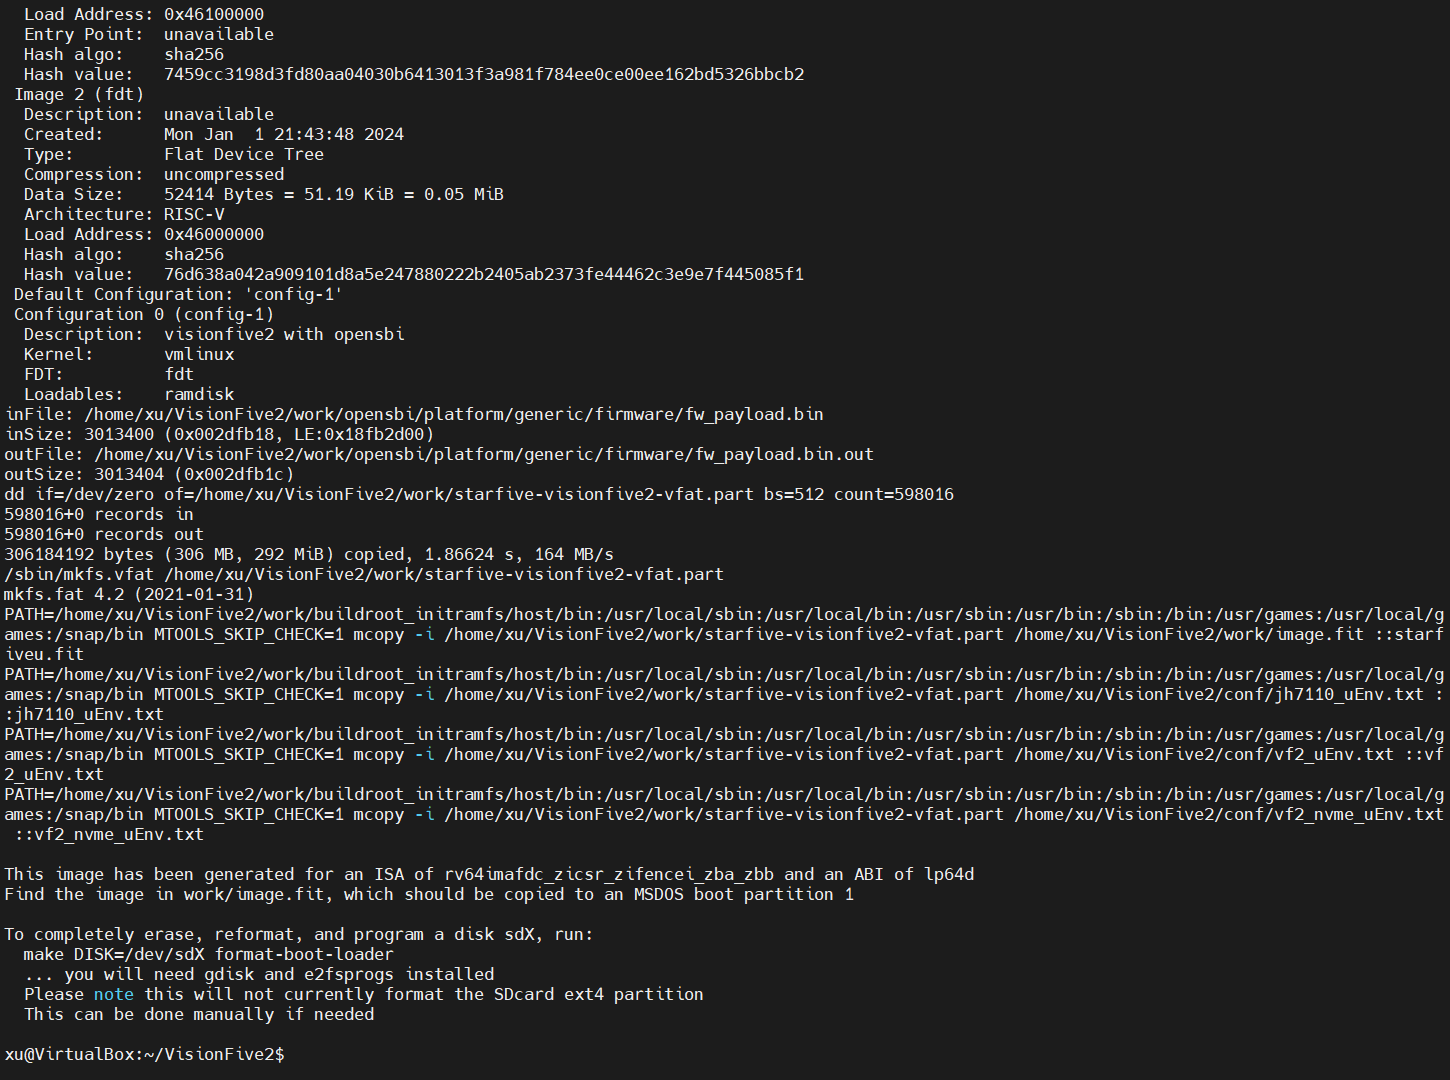
编译成功后,命令行输出如下:

五、通过网络和u-boot运行
这里需要注意,主机和开发板的网络需要确保能够互通,可以通过ping命令测试。
Windows上的TFTP服务器可以使用tftpd64: https://pjo2.github.io/tftpd64/
启动过程中,敲回车进入u-boot命令行:
U-Boot SPL 2021.10 (Oct 31 2022 - 12:11:37 +0800)
DDR version: dc2e84f0.
Trying to boot from SPI
OpenSBI v1.0
____ _____ ____ _____
/ __ \\ / ____| _ \\_ _|
| | | |_ __ ___ _ __ | (___ | |_) || |
| | | | '_ \\ / _ \\ '_ \\ \\___ \\| _ < | |
| |__| | |_) | __/ | | |____) | |_) || |_
\\____/| .__/ \\___|_| |_|_____/|____/_____|
| |
|_|
Platform Name : StarFive VisionFive V2
Platform Features : medeleg
Platform HART Count : 5
Platform IPI Device : aclint-mswi
Platform Timer Device : aclint-mtimer @ 4000000Hz
Platform Console Device : uart8250
Platform HSM Device : ---
Platform Reboot Device : ---
Platform Shutdown Device : ---
Firmware Base : 0x40000000
Firmware Size : 360 KB
Runtime SBI Version : 0.3
Domain0 Name : root
Domain0 Boot HART : 3
Domain0 HARTs : 0*,1*,2*,3*,4*
Domain0 Region00 : 0x0000000002000000-0x000000000200ffff (I)
Domain0 Region01 : 0x0000000040000000-0x000000004007ffff ()
Domain0 Region02 : 0x0000000000000000-0xffffffffffffffff (R,W,X)
Domain0 Next Address : 0x0000000040200000
Domain0 Next Arg1 : 0x0000000042200000
Domain0 Next Mode : S-mode
Domain0 SysReset : yes
Boot HART ID : 3
Boot HART Domain : root
Boot HART Priv Version : v1.11
Boot HART Base ISA : rv64imafdcbx
Boot HART ISA Extensions : none
Boot HART PMP Count : 8
Boot HART PMP Granularity : 4096
Boot HART PMP Address Bits: 34
Boot HART MHPM Count : 2
Boot HART MIDELEG : 0x0000000000000222
Boot HART MEDELEG : 0x000000000000b109
U-Boot 2021.10 (Oct 31 2022 - 12:11:37 +0800), Build: jenkins-VF2_515_Branch_SDK_Release-10
CPU: rv64imacu
Model: StarFive VisionFive V2
DRAM: 8 GiB
MMC: sdio0@16010000: 0, sdio1@16020000: 1
Loading Environment from SPIFlash... SF: Detected gd25lq128 with page size 256 Bytes, erase size 4 KiB, total 16 MiB
*** Warning - bad CRC, using default environment
StarFive EEPROM format v2
--------EEPROM INFO--------
Vendor : StarFive Technology Co., Ltd.
Product full SN: VF7110A1-2243-D008E000-00000001
data version: 0x2
PCB revision: 0xa1
BOM revision: A
Ethernet MAC0 address: 6c:cf:39:00:14:5b
Ethernet MAC1 address: 6c:cf:39:00:14:5c
--------EEPROM INFO--------
In: serial@10000000
Out: serial@10000000
Err: serial@10000000
Model: StarFive VisionFive V2
Net: eth0: ethernet@16030000, eth1: ethernet@16040000
switch to partitions
mmc1 is current device
found device 1
bootmode flash device 1
Failed to load 'uEnv.txt'
Can't set block device
Hit any key to stop autoboot: 0
StarFive #
u-boot环境设置开发板的本机IP地址(由于没有DHCP,不能自动获取,需要手动设置):
setenv ipaddr 192.168.xxx.xxx
设置成功后,可以用PC ping一下测试。
板子上实测,发现这一步互相无法ping通(遂放弃后续操作,换编译SD卡映像的方式了):

u-boot环境设置TFTP服务器IP地址:
setenv serverip 192.168.xxx.xxx;
设置之前,也可以通过ping命令测试能否达到服务器IP(u-boot环境有ping命令)。
加载映像到内存:
tftpboot ${loadaddr} image.fit;
PS:这一步是从TFTP服务器上将镜像下载下来,保存到内存中。
启动映像:
bootm start ${loadaddr};
bootm loados ${loadaddr};
run chipa_set_linux;
run cpu_vol_set;
booti ${kernel_addr_r} ${ramdisk_addr_r}:${filesize} ${fdt_addr_r};
当您看到 buildroot login: 消息时,恭喜您,启动成功。
默认用户名 root,密码 starfive。
buildroot login:root
Password: starfive
六、生成可启动的SD卡镜像
如果不想通过网络和u-boot运行SDK系统,也可以制作SD卡镜像,默认大小是16GB。
可以通过如下命令生成SD卡映像文件:
$ make -j$(nproc)
$ make buildroot_rootfs -j$(nproc)
$ make img
构建成功,将会输出work/sdcard.img文件。
生成之后,可以通过dd命令(Linux或Mac)或者Rufus将其写入到TF卡上。
七、问题解决
常见问题是:构建过程中报错img-gpu-powervr-bin-1.17.6210866.tar.gz无法下载:
https://github.com/starfive-tech/VisionFive2/issues/5
解决方法:安装git-lfs并同步lfs文件,前文有描述。
八、参考链接
- VisionFive2 SDK源码仓: https://github.com/starfive-tech/VisionFive2
- VisionFive2 SDK快速开始指南: https://doc.rvspace.org/VisionFive2/SDK_Quick_Start_Guide/index.html
 /9
/9 