计划中想做一个Zigbee的数据收集终端,节点采集传感数据,Zigbee网关通过串口把节点的数据送给OK3568。今天打算使用Qt实现一个串口调试助手。然后在基于这个界面逐步实现数据采集App.
1.本文的目标
编写一个基于Qt的串口调试软件,可以通过软件实现收发循环通讯测试。
软件发送的数据,经串口收发短接,能够在串口助手中正确接收到自己发送的数据;
串口助手接受到的数据会在软件的接收文本框中显示;
通过TTL 串口连接Zigbee模块,并显示接收到Zigbee模块的数据;
2.OK3568的串口资源
OK3568 串口支持奇、偶校验,8 位数据位和1 位停止位。
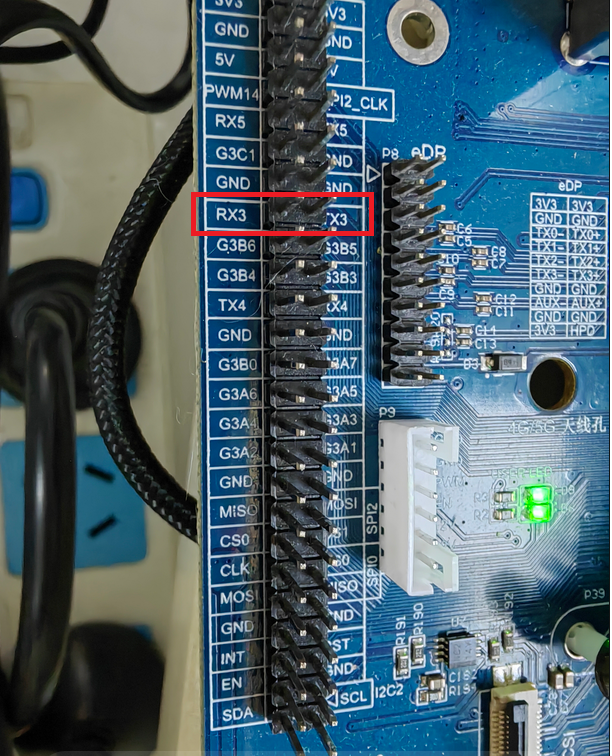
在进行串口回环测试前,请先将需要测试的串口短接。OK3568平台底板原理图中标示引出的UART3、UART4、UART5、UART8共4路串口,其中UART2为调试串口,UART8为蓝牙串口。UART3和UART4、UART5在开发板中的默认设备名称分别为ttyS3、ttyS4,ttyS5在此以测试UART3串口为例,按照开发板原
理图(P7)短接UART3的收发引脚,分别对应PIN36,PIN35。实物图如下:
3. QSerialPort
3.1 QSerialPort简介
QSerialPort提供了访问串口的接口函数。
使用辅助类QSerialPortInfo可以获取可用的串口信息。将QSerialPortInfo辅助类对象做为参数;
使用setPort()或setPortName()函数可以设置要访问的串口设备。
QSerialPort 构造函数:
QSerialPort::QSerialPort(QObject *parent = Q_NULLPTR)
QSerialPort::QSerialPort(const QString &name, QObject *parent = Q_NULLPTR)
QSerialPort::QSerialPort(const QSerialPortInfo &serialPortInfo, QObject *parent = Q_NULLPTR)
3.2 QSerialPortInfo简介
QSerialPortInfo类提供已有串口设备的信息。使用QSerialPortInfo类的静态成员函数生成QSerialPortInfo对象的链表。链表中的每个QSerialPortInfo对象代表一个串口,每个串口可以使用端口名、系统定位、描述、制造商查询。QSerialPortInfo类对象也可以用做QSerialPort类的setPort()成员函数的参数。
QSerialPortInfo构造函数:
QSerialPortInfo::QSerialPortInfo(const QSerialPort &port)
QSerialPortInfo::QSerialPortInfo(const QString &name)
QSerialPortInfo::QSerialPortInfo(const QSerialPortInfo &other)
3.3 部分代码解析
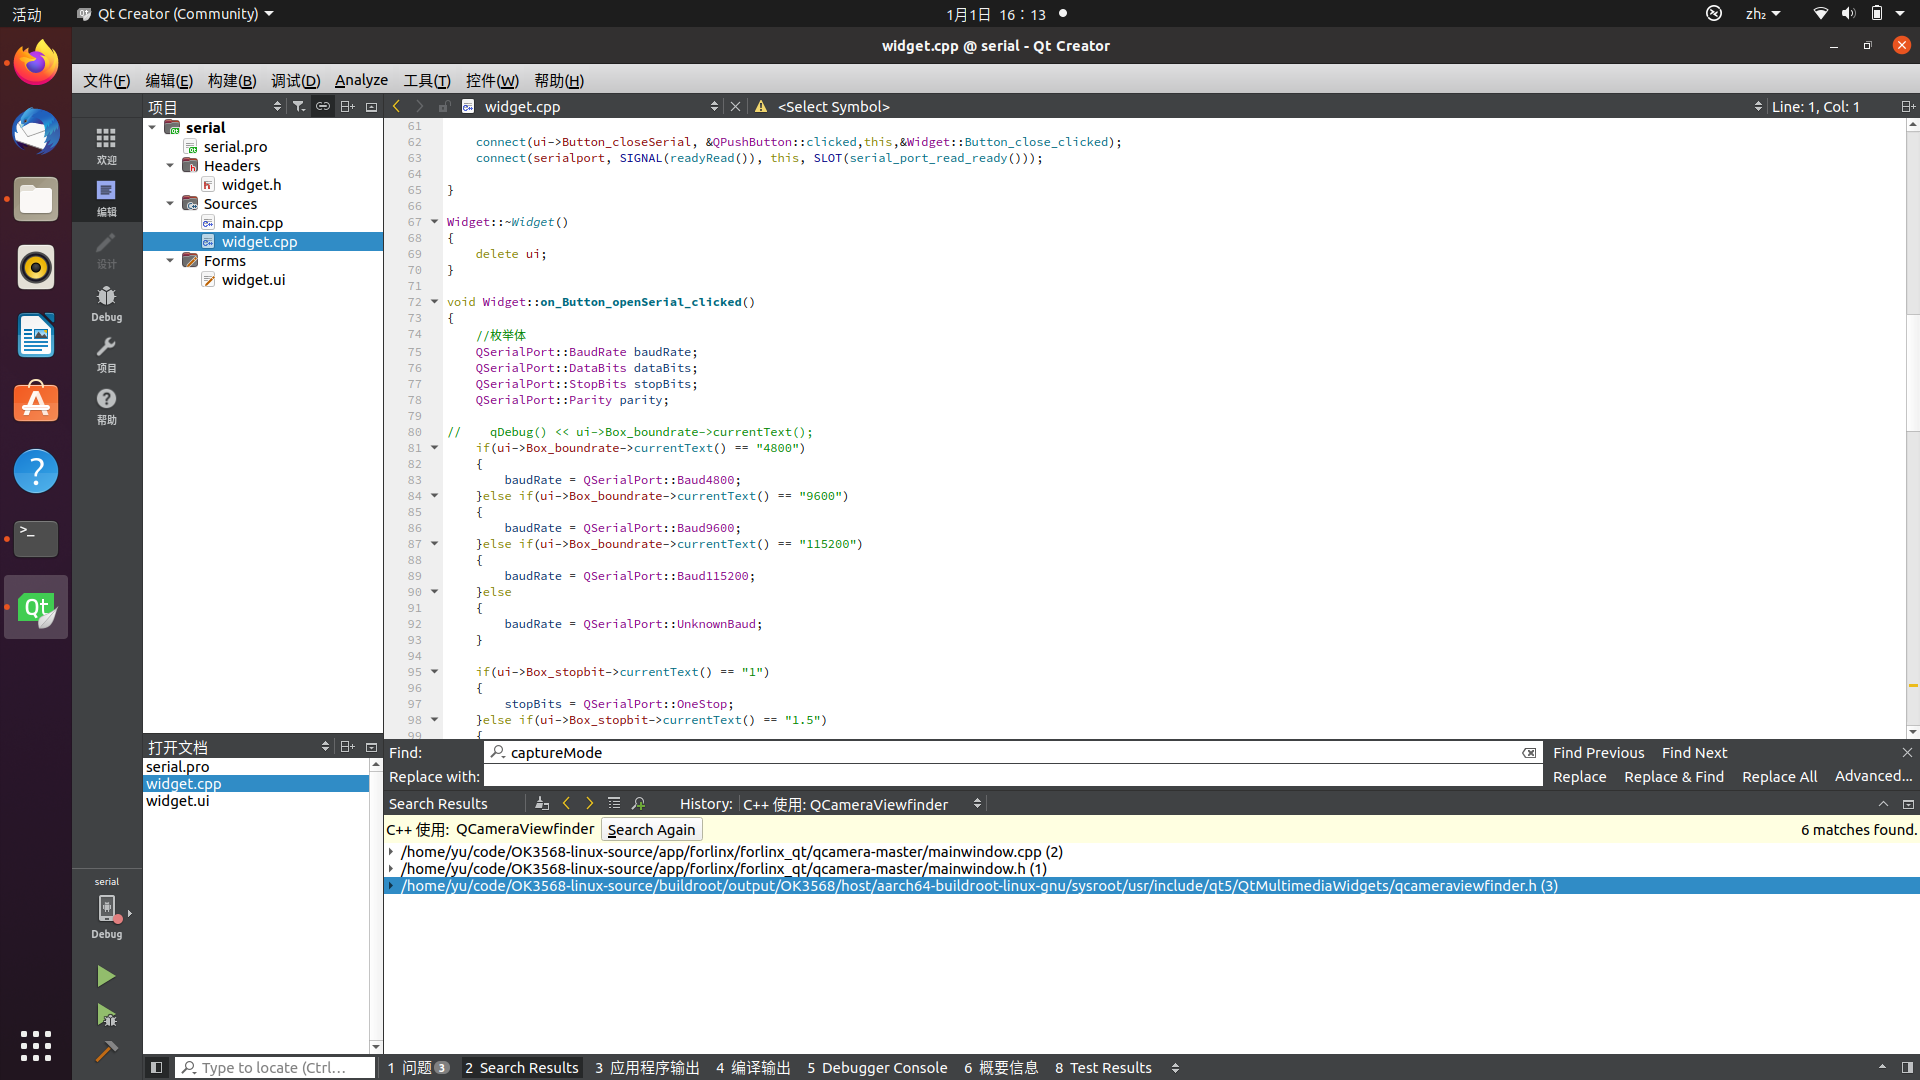
- 界面代码
Widget::Widget(QWidget *parent) :
QWidget(parent),
ui(new Ui::Widget)
{
ui->setupUi(this);
this->setFixedSize(QSize(560, 480));
ui->TextReceive->setReadOnly(true);
ui->Box_boundrate->addItem("4800");
ui->Box_boundrate->addItem("9600");
ui->Box_boundrate->addItem("115200");
ui->Box_boundrate->setCurrentIndex(1);
ui->Box_data->addItem("8");
ui->Box_data->addItem("7");
ui->Box_data->addItem("6");
ui->Box_data->addItem("5");
ui->Box_data->setCurrentIndex(0);
ui->Box_stopbit->addItem("1");
ui->Box_stopbit->addItem("1.5");
ui->Box_stopbit->addItem("2");
ui->Box_stopbit->setCurrentIndex(0);
ui->Box_chack->addItem("NULL");
ui->Box_chack->setCurrentIndex(0);
ui->Box_stream->addItem("NULL");
ui->Box_stream->setCurrentIndex(0);
serialport = new QSerialPort(this);
foreach (const QSerialPortInfo &info, QSerialPortInfo::availablePorts()) {
serialNamePort<<info.portName();
}
ui->Box_serial->addItems(serialNamePort);
this->startTimer(100);
connect(ui->Button_closeSerial, &QPushButton::clicked,this,&Widget::Button_close_clicked);
connect(serialport, SIGNAL(readyRead()), this, SLOT(serial_port_read_ready()));
}
2.Qt Creator 打开工程
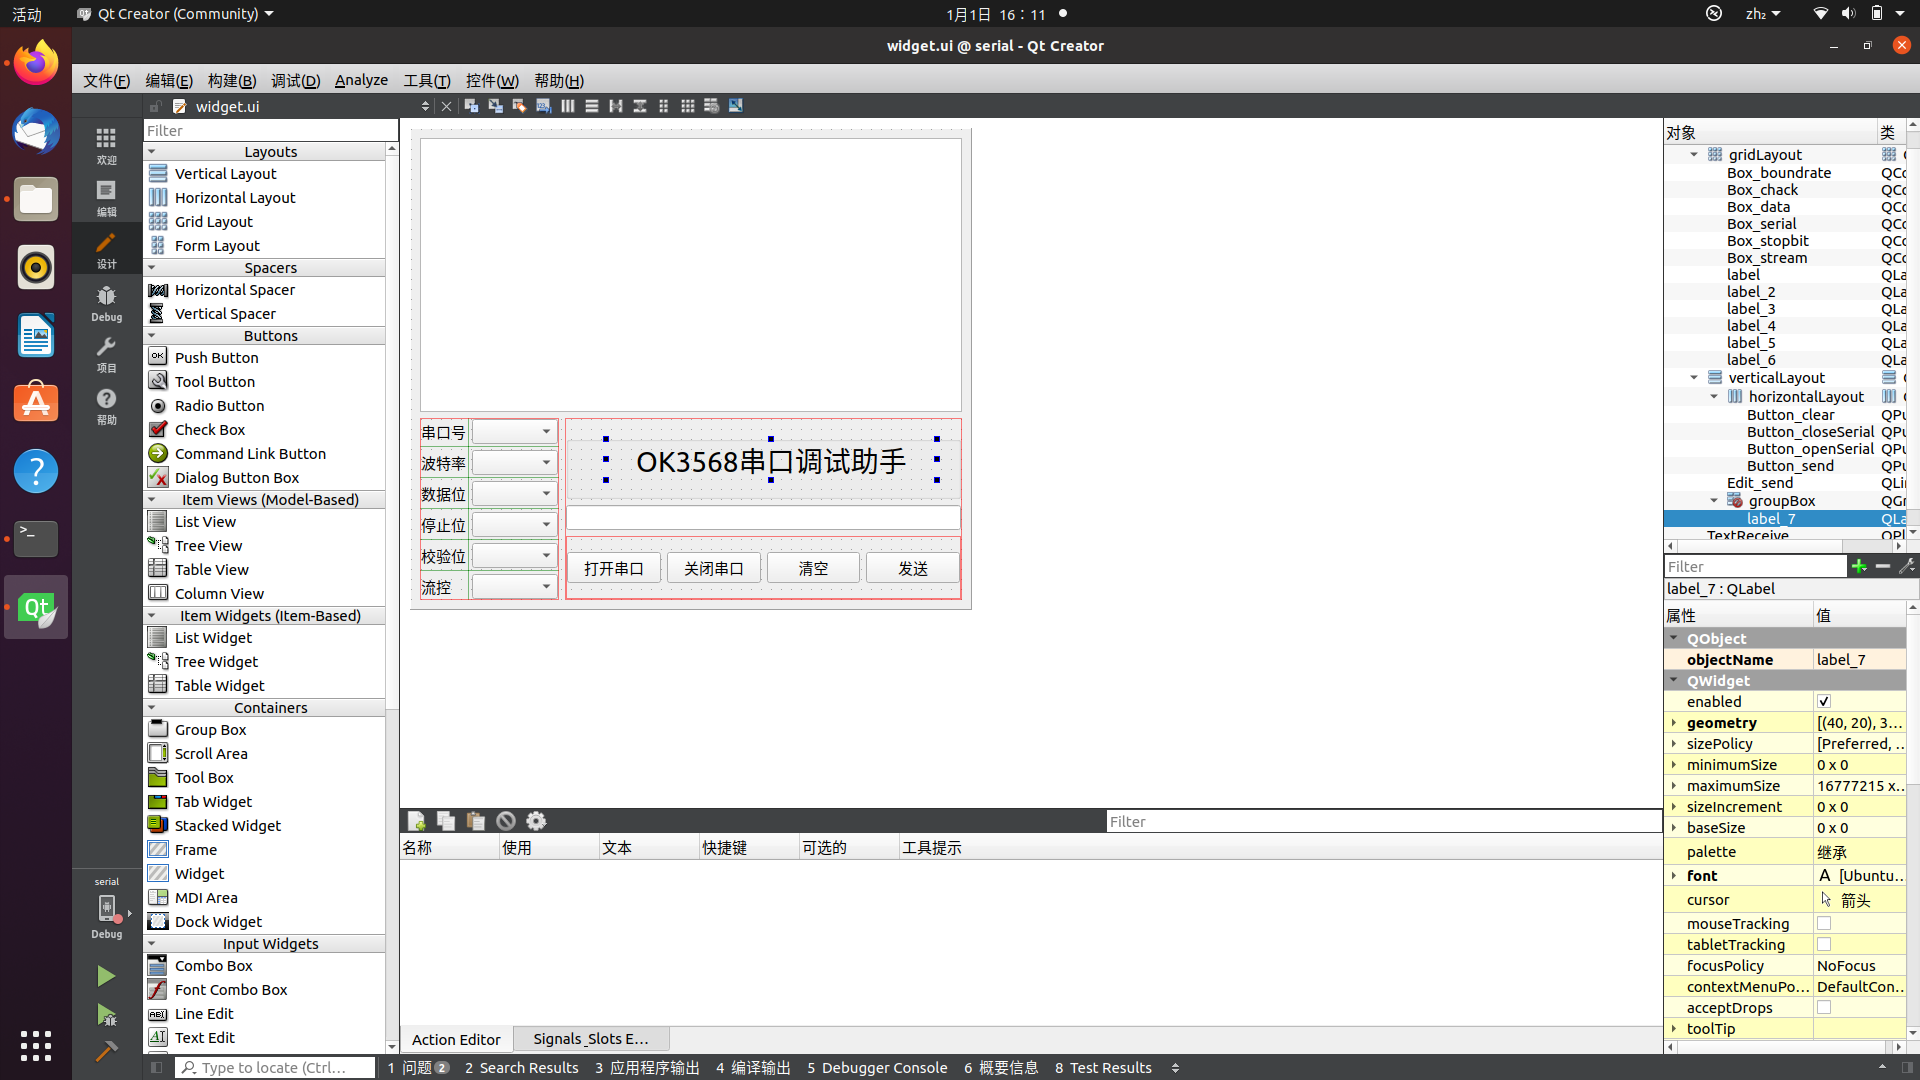
- UI 界面
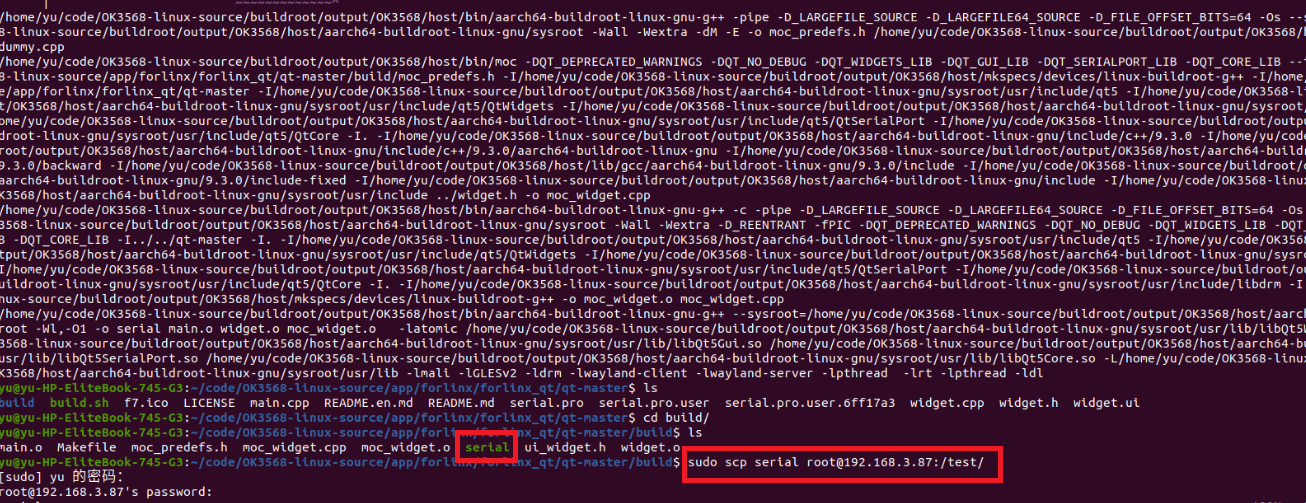
4.生成可执行文件
4.1编译生成可执行文件, 通过网络传送到开发板
4.2 开发板查看并运行可执行文件
把可执行文件从编译机上拷贝到开发板根目录test 文件夹下面,查看文件夹内容,新增serial 可执行文件如下:
[root@ok3568:/test]
fltest_opencv_eye helloworld mqtt_pro serial
fltest_qt_qcamera libQt5Qmqtt.so.1.0.2 qCamera
运行可执行文件:
[root@ok3568:/test]# ./serial
QStandardPaths: wrong permissions on runtime directory /var/run, 7755 instead of 7700
qt.qpa.wayland: No shell integration named "xdg-shell" found
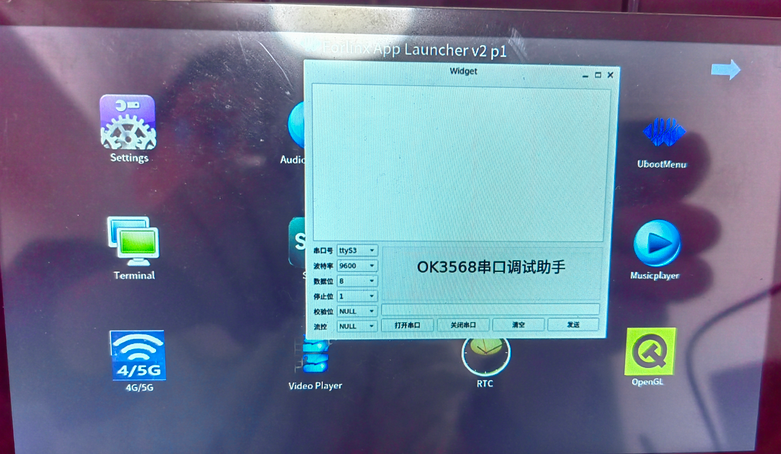
终端显示:
5 演示视频
 电子发烧友论坛
 /9
/9 


 淘帖
淘帖 1625
1625


