准备
下载Demo代码
https://github.com/renesas/ra-fsp-examples/tree/master/example_projects/ek_ra4m2
基于\ra-fsp-examples\example_projects\ek_ra4m2\sci_uart\sci_uart_ek_ra4m2_ep\keil\sci_uart_ek_ra4m2_ep.uvprojx
工程测试
需要线修改Debug配置。
Systick
ra-fsp-examples\example_projects\ek_ra4m2\sci_uart\sci_uart_ek_ra4m2_ep\keil\ra\arm\CMSIS_5\CMSIS\Core\Include\core_cm3.h
中
__STATIC_INLINE uint32_t SysTick_Config(uint32_t ticks)
{
if ((ticks - 1UL) > SysTick_LOAD_RELOAD_Msk)
{
return (1UL);
}
SysTick->LOAD = (uint32_t)(ticks - 1UL); /* set reload register */
NVIC_SetPriority (SysTick_IRQn, (1UL << __NVIC_PRIO_BITS) - 1UL); /* set Priority for Systick Interrupt */
SysTick->VAL = 0UL; /* Load the SysTick Counter Value */
SysTick->CTRL = SysTick_CTRL_CLKSOURCE_Msk |
SysTick_CTRL_TICKINT_Msk |
SysTick_CTRL_ENABLE_Msk;
return (0UL); /* Function successful */
}
之前分析过sys时钟为100MHz
所以设置100000个时钟tick就是1000uS即1mS。
SysTick_Config(100000);
然后使能中断
NVIC_EnableIRQ(SysTick_IRQn);
中断处理
void SysTick_Handler(void)
{
static uint32_t s_time_u32 = 0;

static uint32_t s_tmptime_u32 = 0;

static uint8_t s_tog_u8 = 0;

s_time_u32++;

s_tmptime_u32++;

if(s_tmptime_u32 >= 1)

{

	  s_tmptime_u32 = 0;

		if(s_tog_u8 == 0)

		{

			s_tog_u8=1;

			R_IOPORT_PinWrite(&g_ioport_ctrl,BSP_IO_PORT_04_PIN_05,BSP_IO_LEVEL_HIGH);

		}

		else

		{

			R_IOPORT_PinWrite(&g_ioport_ctrl,BSP_IO_PORT_04_PIN_05,BSP_IO_LEVEL_LOW);

			s_tog_u8=0;

		}

}
}
其中R_IOPORT_Open (&g_ioport_ctrl, &g_bsp_pin_cfg);进行了IO初始化
ra-fsp-examples\example_projects\ek_ra4m2\sci_uart\sci_uart_ek_ra4m2_ep\keil\ra_gen\pin_data.c中
g_bsp_pin_cfg_data
{

    .pin = BSP_IO_PORT_04_PIN_05,

    .pin_cfg = ((uint32_t) IOPORT_CFG_PORT_DIRECTION_OUTPUT | (uint32_t) IOPORT_CFG_PORT_OUTPUT_LOW)
},
配置P405输出
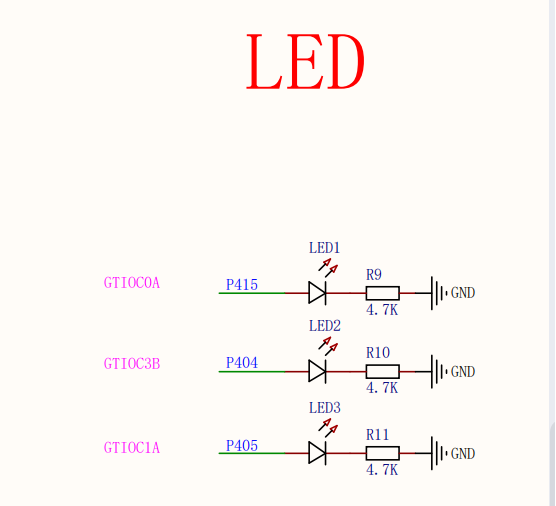
原理图可以看到该引脚控制LED,我们就用这个引脚测试

测试
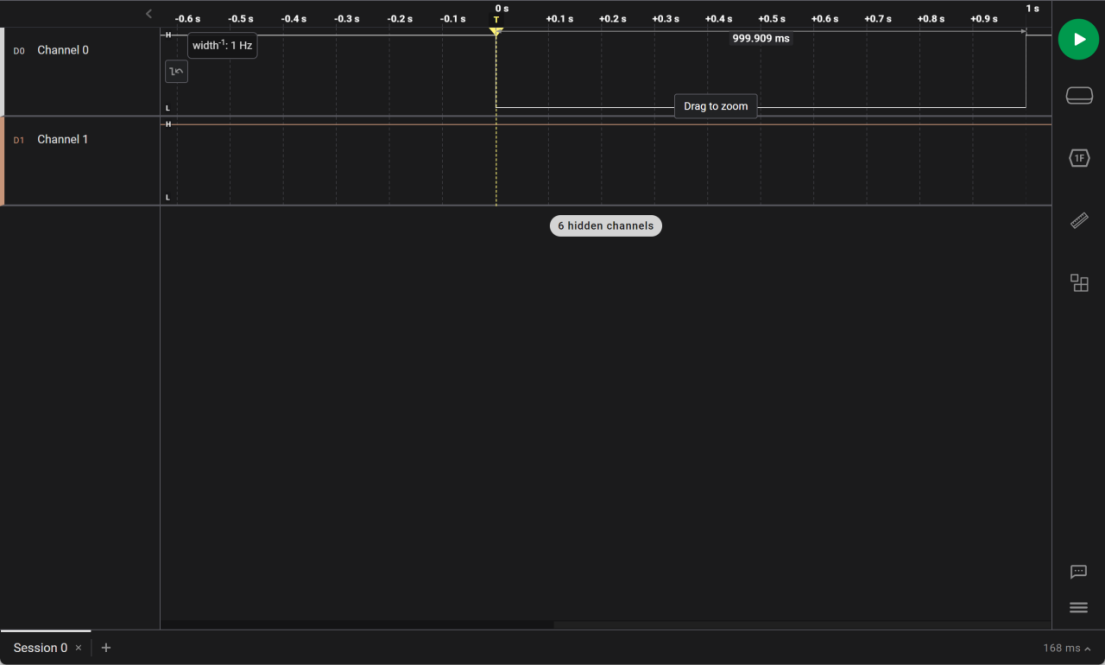
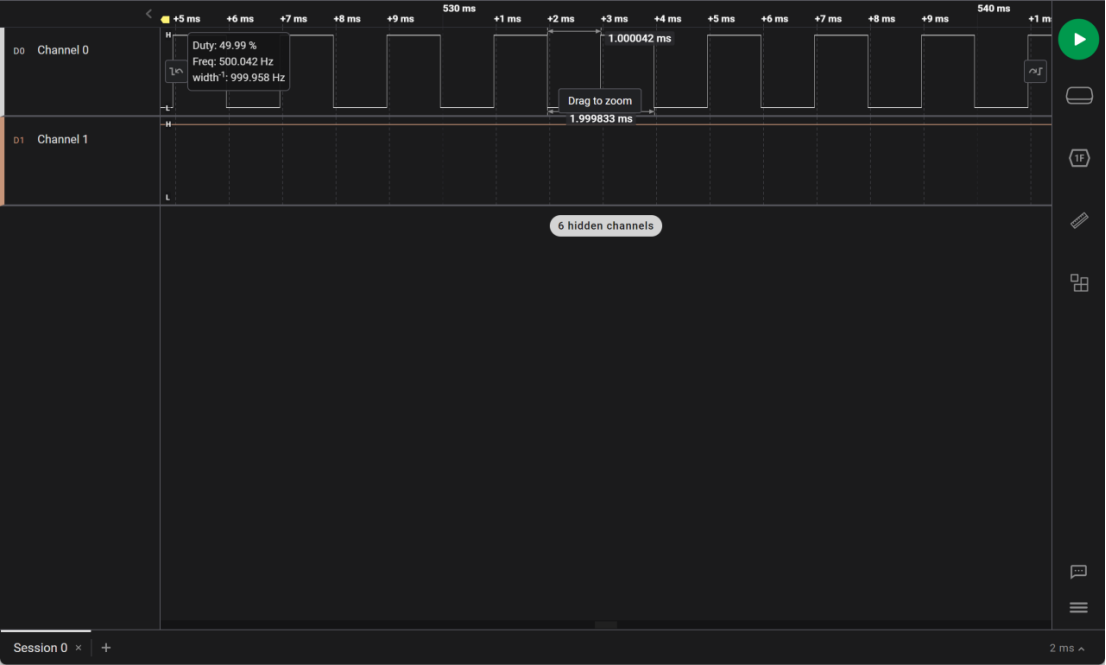
设置1S和1mS翻转一次P405,
1S翻转一次时可以看到LED闪烁。
逻辑分析仪分别测量时间,可以看到时间比较准确。
1mS时实际对应的是1.999833/2=0.9999165mS.
当然这里还有逻辑分析仪本身的误差(24MHz采样),和翻转IO本身需要的时间没有考虑。


总结
本次测试了systick定时器,以及其精度,后面就可以利用该时间作为时间戳,后面coremark测试需要用到时间。
 /9
/9 