使用了一段时间Purple Pi开发板后,进行了相关的了解,在macOS上,建立了对应的C开发环境。
一、开机自动联网:
为了方便操作,让Purple Pi开发板开机就自动连接了WiFi,以便对外提供SSH服务。
要开机自动连入无线路由器,需要使用vi工具,需要进行如下的操作:
-
设置WiFi连接信息:/etc/wpa_supplicant.conf,注意仅限2.4GHz
#file /etc/wpa_supplicant.conf
 ctrl_interface=/var/run/wpa_supplicant

 network={
         ssid="WiFi名称"
         psk="WiFi密码"
         key_mgmt=WPA-PSK
         priority=2
 }
-
设置开机自动启动WiFi连接:/customer/demo.sh
# file /customer/demo.sh
 # 最后一行添加:
 /etc/route/WifiWan_2EthLan.sh &
-
重启生效:
reboot
-
重启后,查看网络连接信息:
ip addr show wlan0
-
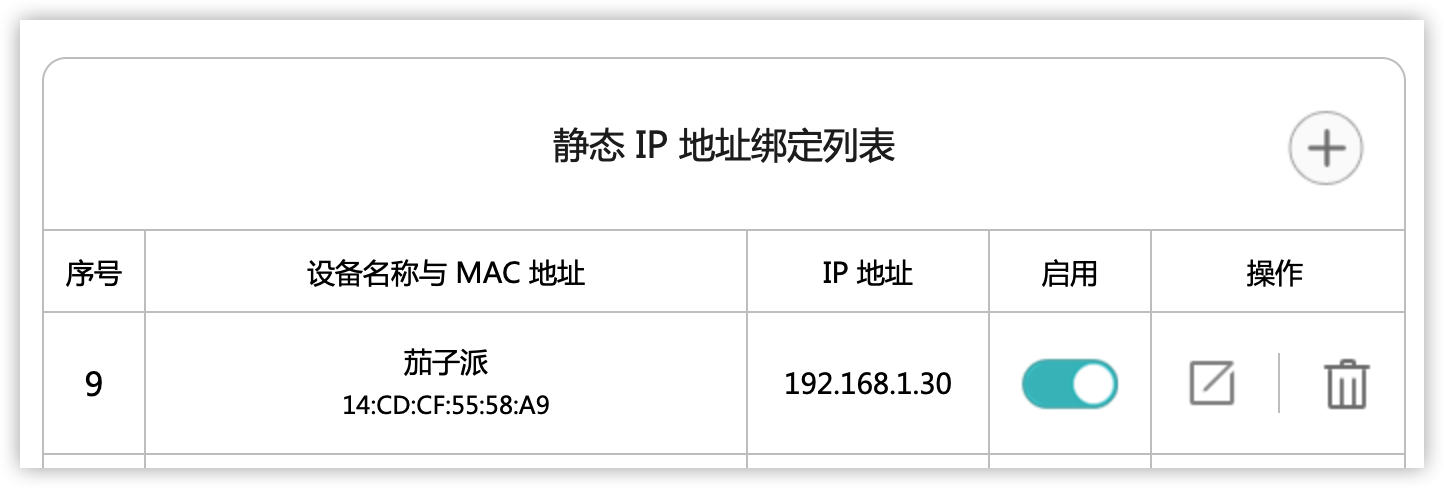
在无线路由器上,设定mac和ip绑定,以免重启更换ip

-
使用ssh连接开发板
ssh root@192.168.1.30
到这里,就能够通过ssh来连接到开发板进行操作了,不用再连usb线了。
二、建立开发环境:
- 通过
uname指令,可以获取到当前操作系统的信息:
Linux buildroot 4.9.84 #736 SMP PREEMPT Thu Aug 4 10:07:16 CST 2022 armv7l GNU/Linux
- 通过
cat /proc/cpuinfo 指令,可是查看CPU的信息:
processor : 0
model name : ARMv7 Processor rev 5 (v7l)
BogoMIPS : 11.93
Features : half thumb fastmult vfp edsp thumbee neon vfpv3 tls vfpv4 idiva idivt vfpd32 lpae evtstrm
CPU implementer : 0x41
CPU architecture: 7
CPU variant : 0x0
CPU part : 0xc07
CPU revision : 5
processor : 1
model name : ARMv7 Processor rev 5 (v7l)
BogoMIPS : 11.93
Features : half thumb fastmult vfp edsp thumbee neon vfpv3 tls vfpv4 idiva idivt vfpd32 lpae evtstrm
CPU implementer : 0x41
CPU architecture: 7
CPU variant : 0x0
CPU part : 0xc07
CPU revision : 5
Hardware : SStar Soc (Flattened Device Tree)
Revision : 0000
Serial : 0000000000000000
从上述信息中可以看出,CPU是armv7,那么只需要下载armv7的gcc编译链,就能够进行程序开发了。虽然我是在macOS下面进行的,实际上Linux下面的操作也类似,Windows上面要进行基本的编译,也类似,可参考。
macOS下的编译链,可以从以下网址下载arm-unknown-linux-gnueabihf:
thinkski/osx-arm-linux-toolchains: Pre-built ARM/Linux C cross-compilers for MacOS (github.com)
这里有几个概念,需要注意一下:
- arm-none-eabi-gcc:用于编译 ARM 架构的裸机系统
- arm-none-linux-gnueabi-gcc:主要用于基于ARM架构的Linux系统
- arm-linux-gnueabi:适用于armel架构
- arm-linux-gnueabihf:适用于armhf两个不同的架构
根据Purple Pi开发板的CPU及系统,使用arm-linux-gnueabihf即可。
下载解压后,将编译链bin目录给设置的PATH中:
cd arm-unknown-linux-gnueabihf/bin/
echo $(pwd)
export PATH=$(pwd):$PATH
也可以在shell配置文件中,将上述目录,设置到PATH中。
设置完成后,就可以写一个小小的demo.c程序测试了:
#include <stdio.h>
int main()
{
    printf("I am Purple Pi!");
    return 0;
}
然后编译,并上传到开发板:
arm-unknown-linux-gnueabihf-gcc demo.c -o demo
scp demo root@192.168.1.30:/root/
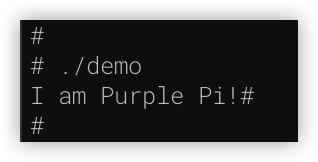
再到开发板上运行即可:【注意cd切换到/root/再执行】

现在可以正常开发编译程序了。开发工具,可以选择VsCode或者任何其他的IDE都成。
三、使用C语言点灯
根据之前的 【触觉智能 Purple Pi开发板试用】交通灯测试 的经验,我们只要在C中,通过sysfs控制GPIO即可,也就是:
- 通过/sys/class/gpio/export来启用GPIO87
- 通过/sys/class/gpio/gpio87/direction写入out,设置为输出
- 通过/sys/class/gpio/gpio87/value写入1或者0,输出高低电平
具体代码test_gpio_led.c如下:
#include <stdlib.h>
#include <stdio.h>
#include <string.h>
#include <unistd.h>
#include <fcntl.h>
#define SYSFS_GPIO_EXPORT "/sys/class/gpio/export"
#define SYSFS_GPIO_RST_PIN_VAL "87"
#define SYSFS_GPIO_RST_DIR "/sys/class/gpio/gpio87/direction"
#define SYSFS_GPIO_RST_DIR_VAL "out"
#define SYSFS_GPIO_RST_VAL "/sys/class/gpio/gpio87/value"
#define SYSFS_GPIO_RST_VAL_H "1"
#define SYSFS_GPIO_RST_VAL_L "0"
int main()
{
int fd;
printf("open %s\n", SYSFS_GPIO_EXPORT);
fd = open(SYSFS_GPIO_EXPORT, O_WRONLY);
if (fd == -1)
{
printf("ERR: export open error.\n");
return EXIT_FAILURE;
}
printf("export %s\n", SYSFS_GPIO_RST_PIN_VAL);
write(fd, SYSFS_GPIO_RST_PIN_VAL, sizeof(SYSFS_GPIO_RST_PIN_VAL));
close(fd);
printf("open %s\n", SYSFS_GPIO_RST_DIR);
fd = open(SYSFS_GPIO_RST_DIR, O_WRONLY);
if (fd == -1)
{
printf("ERR: direction open error.\n");
return EXIT_FAILURE;
}
printf("set out for %s\n", SYSFS_GPIO_RST_PIN_VAL);
write(fd, SYSFS_GPIO_RST_DIR_VAL, sizeof(SYSFS_GPIO_RST_DIR_VAL));
close(fd);
printf("open %s\n", SYSFS_GPIO_RST_VAL);
fd = open(SYSFS_GPIO_RST_VAL, O_RDWR);
if (fd == -1)
{
printf("ERR: value open error.\n");
return EXIT_FAILURE;
}
while (1)
{
printf("\tset high for %s\n", SYSFS_GPIO_RST_PIN_VAL);
write(fd, SYSFS_GPIO_RST_VAL_H, sizeof(SYSFS_GPIO_RST_VAL_H));
usleep(1000000);
printf("\tset low for %s\n", SYSFS_GPIO_RST_PIN_VAL);
write(fd, SYSFS_GPIO_RST_VAL_L, sizeof(SYSFS_GPIO_RST_VAL_L));
usleep(1000000);
}
close(fd);
return 0;
}
然后编译并上传到开发板:
arm-unknown-linux-gnueabihf-gcc test_gpio_led.c -o test_gpio_led
scp test_gpio_led.c root@192.168.1.30:/root/
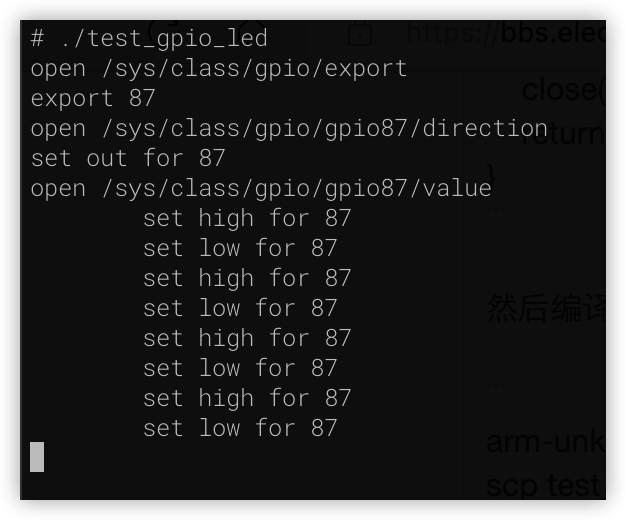
再到开发板上执行:【注意cd切换到/root/再执行】

现在,连接到GPIO87上的LED,就开始闪烁了。
 /9
/9 