概述
本实验使用Unionpi Tiger开发套件并烧录OpenHarmony-3.1-Release,Windows 安装DevEco Studio 3.0.0.900
实现一个滚动抽奖页面小游戏,Unionpi Tiger开发板实际演示效果如下

点击开始进行滚动,点击停止依次停止三个滚动框
1 新建工程
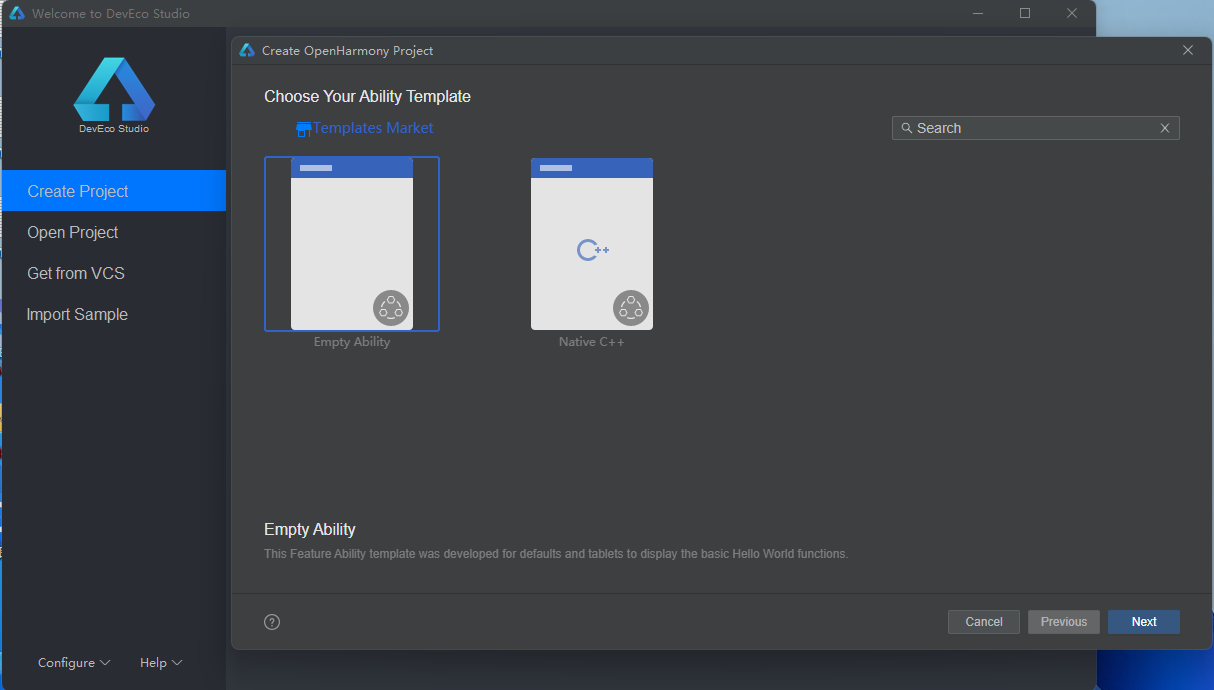
打开DevEco Studio 3.0.0.900新建一个Empty Abiliity 工程,如下图
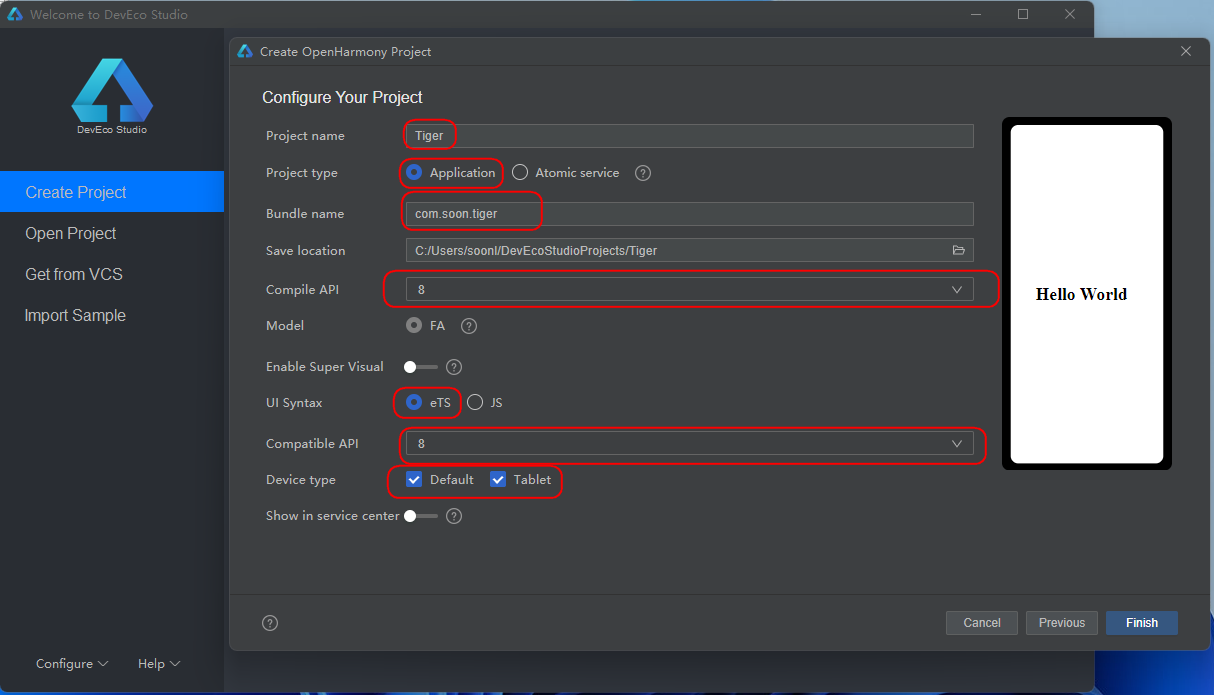
工程配置参考如下
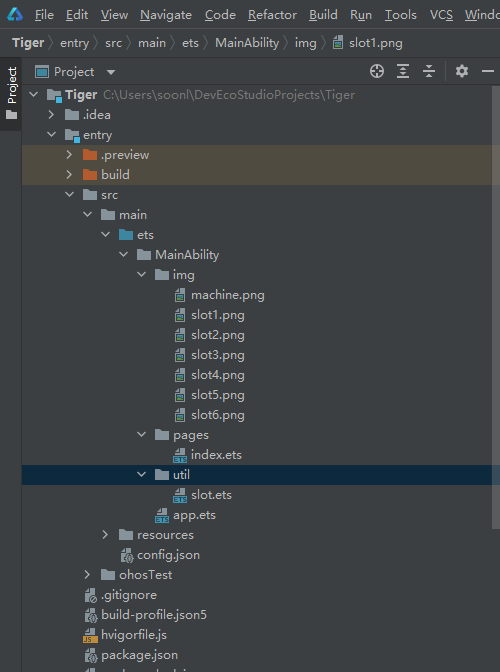
整个工程目录结果预览(部分目录手动添加见下文说明)
2 新建一个滚动图片组件
因为三个滚动图片是可以复用的,所以我们直接写成组件的方式。实现方法如下
2.1 新建文件夹util和img
在entry/src/main/ets/MainAbility下新建util文件夹和img文件夹,并在img目录下添加图片文件slot1~slot6的图片资源(可以自行找想要的图片,建议使用正方形的PNG,案例中大小为200*200)
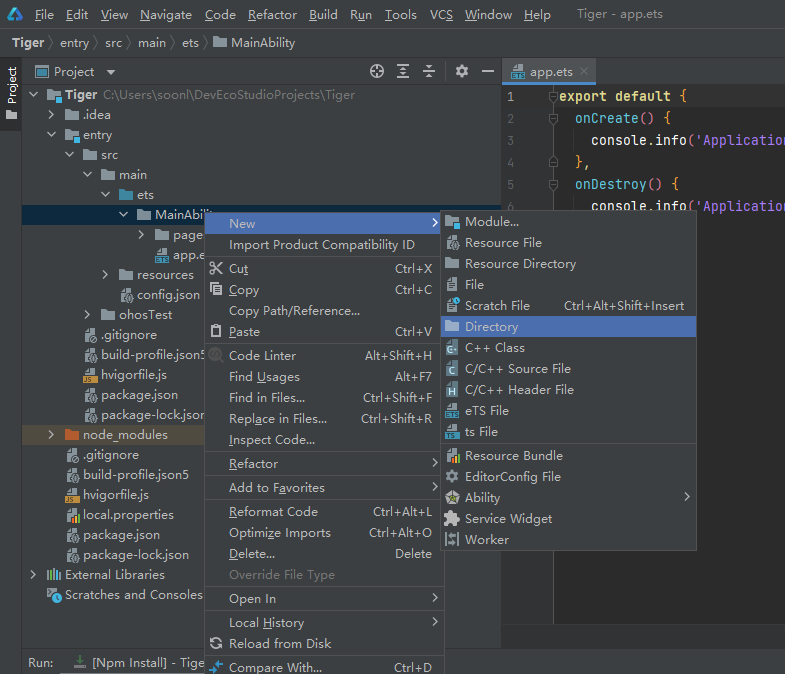
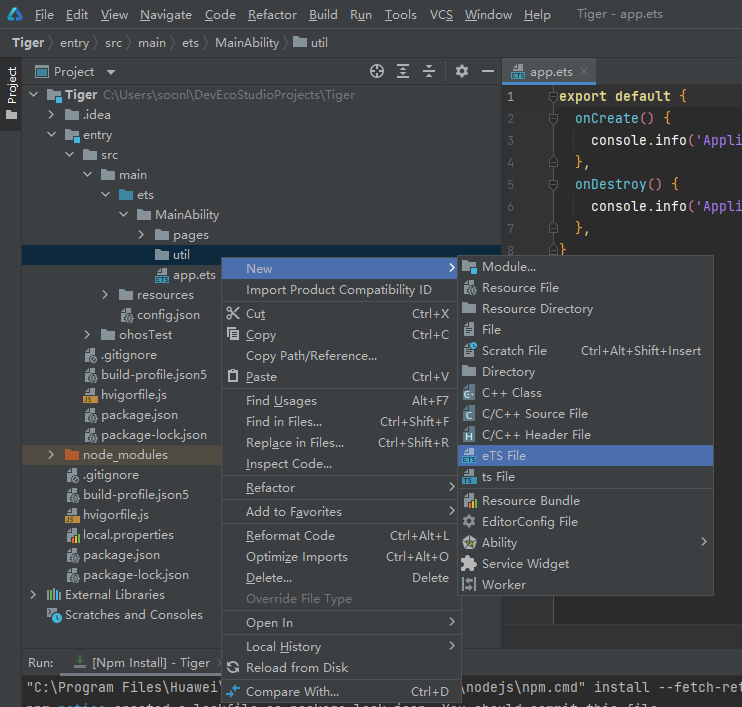
新建文件方式如下截图在MainAbility下右键选择New->Directory输入文件夹名字(util或img)后按Enter键新建
2.2 在util目录下新建slot.ets
在entry/src/main/ets/MainAbility/util目录下右键选择New->eTS File输入slot后按Enter键新建
2.3 slot.ets滚动组件的实现代码
使用ImageAnimator帧动画组件来实现逐帧播放图片的能力,可以配置需要播放的图片列表,每张图片可以配置时长。详细介绍参考
ImageAnimator
slot.ets代码如下,代码见注释说明
@Component
export struct slot {
@Link state: AnimationStatus
@Link hitNumber: number
@Link slotWidth: string | number
@Link slotHeight: string | number
build() {
Stack() {
ImageAnimator()
.images([
{
src: '/img/slot1.png',
duration: 100
},
{
src: '/img/slot2.png',
duration: 100
},
{
src: '/img/slot3.png',
duration: 100
},
{
src: '/img/slot4.png',
duration: 100
},
{
src: '/img/slot5.png',
duration: 100
},
{
src: '/img/slot6.png',
duration: 100
}
])
.state(this.state)
.reverse(false)
.fixedSize(true)
.preDecode(this.hitNumber)
.fillMode(FillMode.Forwards)
.iterations(-1)
.onStart(() => {
console.info('Start')
})
.onPause(() => {
console.info('Pause')
})
.onRepeat(() => {
console.info('Repeat')
})
.onCancel(() => {
console.info('Cancel')
})
.onFinish(() => {
console.info('Finish')
})
}
.height(this.slotHeight)
.width(this.slotWidth)
}
}
如果想要先预览下效果可以按以下修改slot.ets,这样子就能进行预览了。
@Entry
@State state: AnimationStatus = AnimationStatus.Running
@State hitNumber: number = 3
@State slotWidth: number = 100
@State slotHeight: number = 100
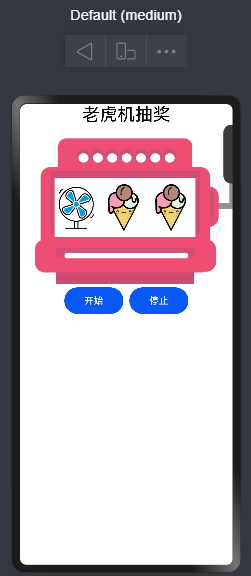
预览效果如下:
3 整个页面的实现
3.1 slot.ets 的引用
引用方式如下通过import直接导入
import { slot } from '../util/slot';
3.2 完整的页面代码
主要包含标题、背景图片、滚动图片组件、及两个按键,具体实现代码如下。
import { slot } from '../util/slot';
@Entry
@Component
struct Index {
@State message: string = '抽奖'
@State hitID1: number = Math.floor(Math.random() * 5)+1
@State state1: AnimationStatus = AnimationStatus.Paused
@State hitID2: number = Math.floor(Math.random() * 5)+1
@State state2: AnimationStatus = AnimationStatus.Paused
@State hitID3: number = Math.floor(Math.random() * 5)+1
@State state3: AnimationStatus = AnimationStatus.Paused
@State slotWidth: string = '80vp'
@State slotHeight: string = '80vp'
build() {
Row() {
Column() {
Text(this.message)
.fontSize('30vp')
.height('30vp')
Row() {
Row() {
slot({
state: $state1,
hitNumber: $hitID1,
slotWidth: $slotWidth,
slotHeight: $slotHeight
})
slot({
state: $state2,
hitNumber: $hitID2,
slotWidth: $slotWidth,
slotHeight: $slotHeight
})
slot({
state: $state3,
hitNumber: $hitID3,
slotWidth: $slotWidth,
slotHeight: $slotHeight
})
}.margin({left:'35vp', top: '10vp'})
}
.backgroundImage('/img/machine.png')
.backgroundImageSize({height:'100%',width:'100%',})
.backgroundImagePosition({x:'0vp',y:'0vp'})
.height('280vp')
.width('360vp')
.margin({top:'0vp',left:'40vp'})
Row() {
Button('开始')
.width('100vp')
.height('45vp')
.padding('5vp')
.margin({top:'0vp',left:'0vp'})
.onClick(() => {
console.info('START');
setTimeout(()=>{
this.state1 = AnimationStatus.Running;
console.info('ChangeSlot1Running');
},500)
setTimeout(()=>{
this.state2 = AnimationStatus.Running;
console.info('ChangeSlot2Running');
},1000)
setTimeout(()=>{
this.state3 = AnimationStatus.Running;
console.info('ChangeSlot3Running');
},1500)
})
Button('停止')
.width('100vp')
.height('45vp')
.padding('5vp')
.margin({top:'0vp',left:'10vp'})
.onClick(() => {
console.info('STOP');
if(this.state1 == AnimationStatus.Paused
&& this.state2 == AnimationStatus.Paused
&& this.state3 == AnimationStatus.Running) {
this.hitID3 = Math.floor(Math.random() * 5)+1;
console.info('pause number3=' + this.hitID3);
this.state3 = AnimationStatus.Paused;
}
if(this.state1 == AnimationStatus.Paused
&& this.state2 == AnimationStatus.Running
&& this.state3 == AnimationStatus.Running) {
this.hitID2 = Math.floor(Math.random() * 5)+1;
console.info('pause number2=' + this.hitID2);
this.state2 = AnimationStatus.Paused;
}
if(this.state1 == AnimationStatus.Running
&& this.state2 == AnimationStatus.Running
&& this.state3 == AnimationStatus.Running) {
this.hitID1 = Math.floor(Math.random() * 5)+1;
console.info('pause number1=' + this.hitID1);
this.state1 = AnimationStatus.Paused;
}
})
}
}
.width('100%')
.height('100%')
.align(Alignment.Center)
}
.height('100%')
}
}
横屏预览效果如下

竖屏预览效果如下
4 签名打包HAP并运行
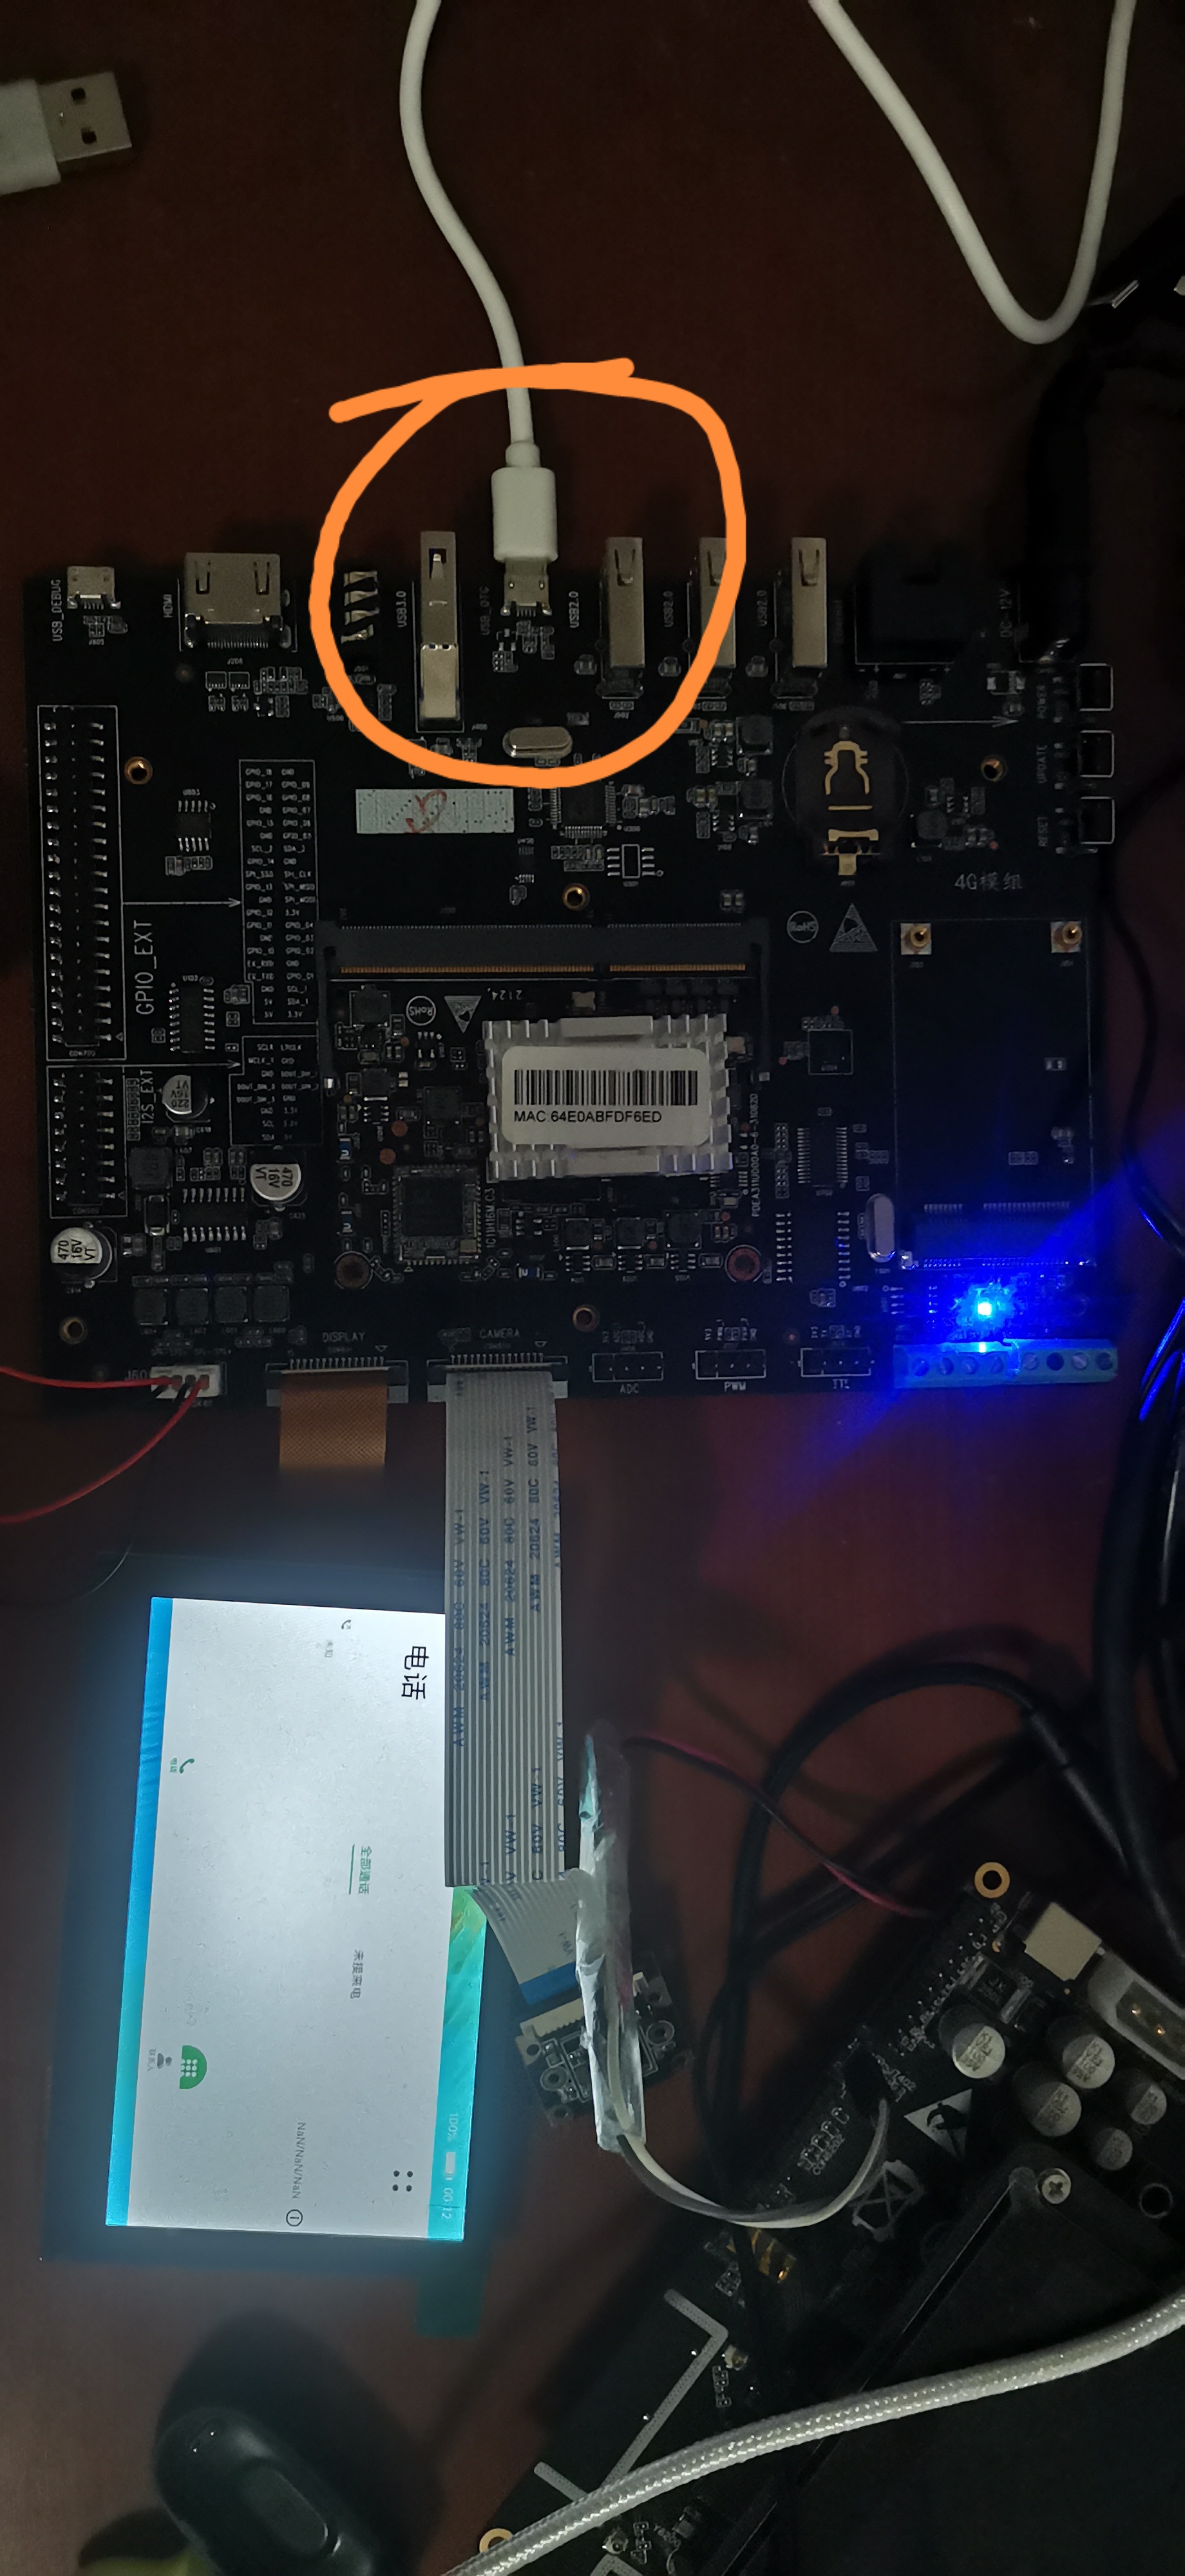
在OTG连接Unionpi Tiger开发板后
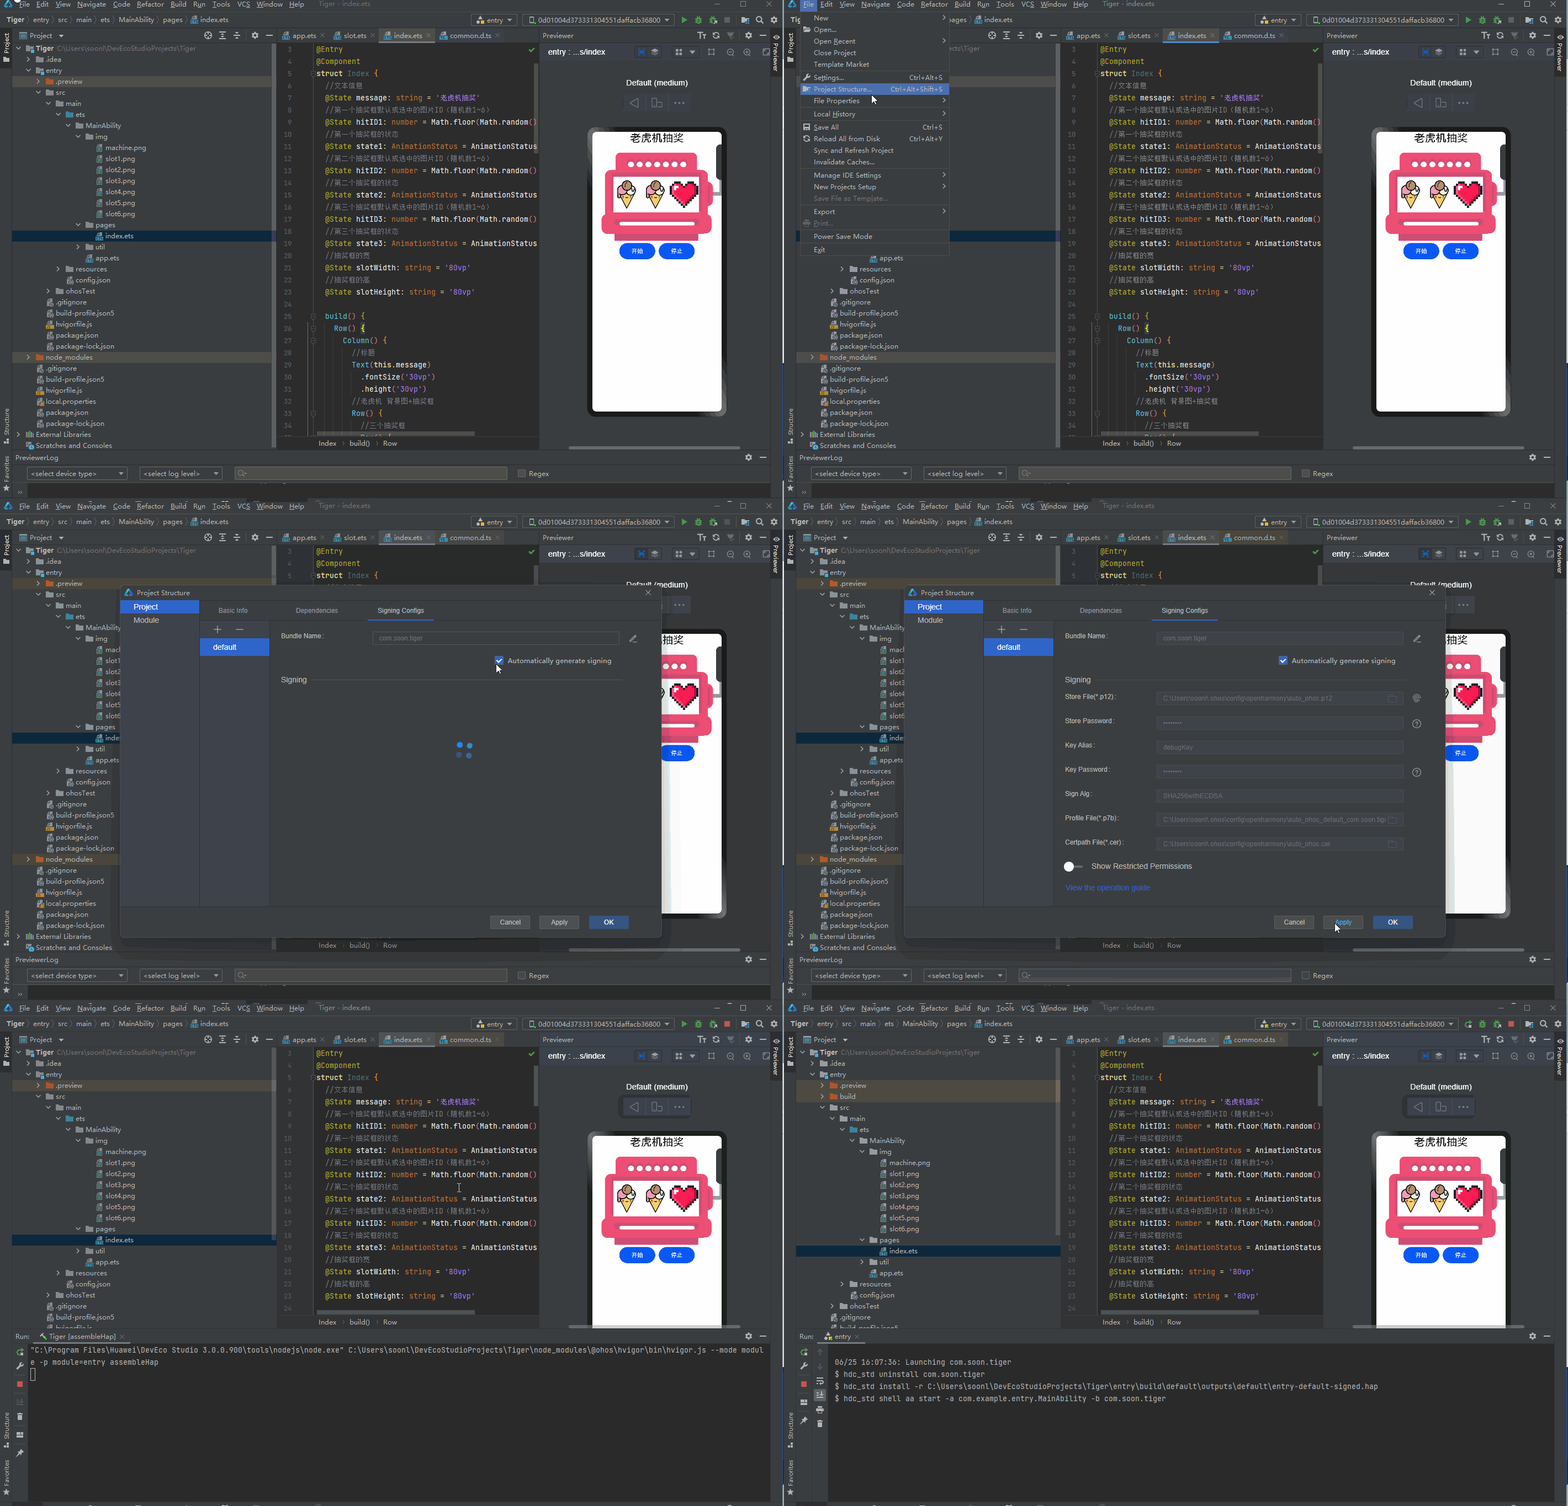
使用DevEco Studio 3.0.0.900 的自动签名即可。然后点击绿色运行按钮即可下载到开发板,操作步骤见动图
以上本篇分享,感谢阅读。
 /9
/9 