** 源代码和开发文档地址:**
https://gitee.com/mftang/n32-g45-xvl-stb.git
5 串口
5.1 需求
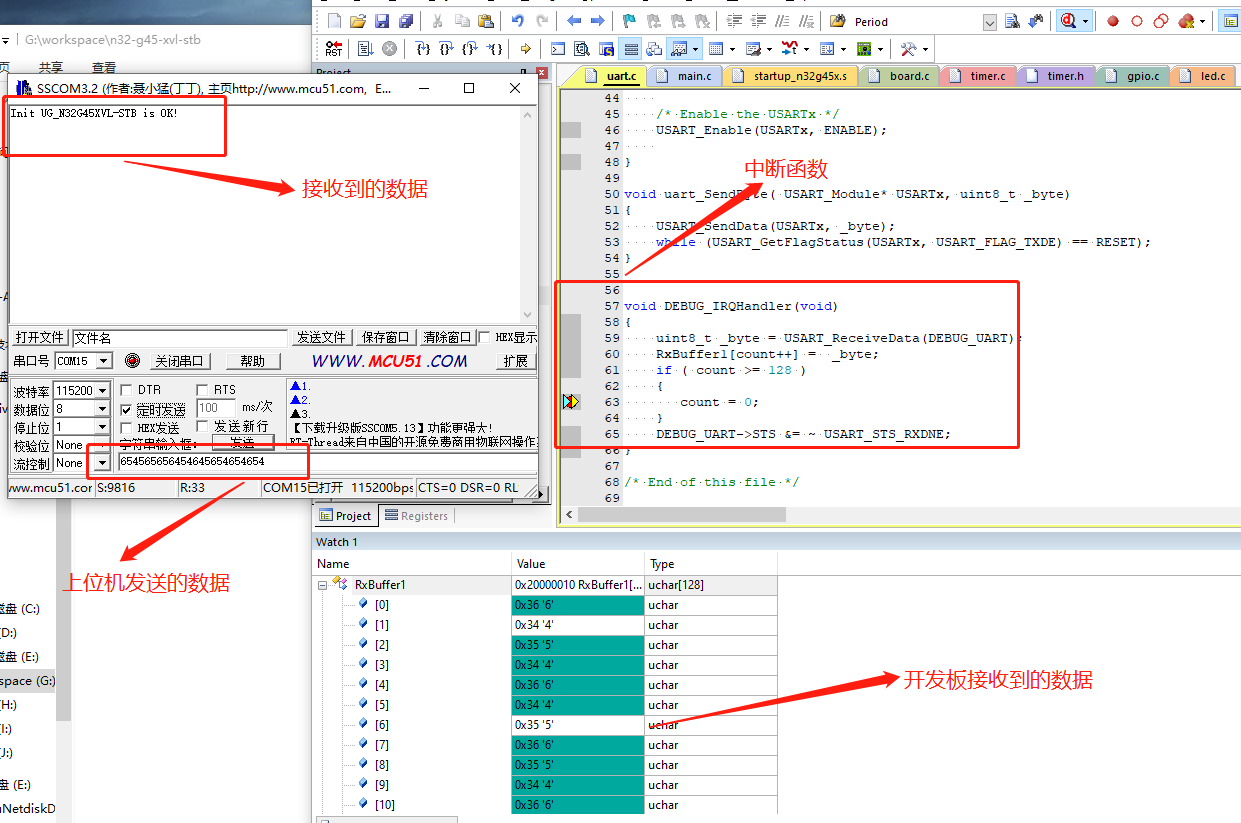
使用UART 1 实现数据发送和接收功能,使用中断实现接收数据
5.2 功能实现
串口配置步骤如下:
step -1: 配置 TX 和 RX IO 接口属性
/*******************************************************************************
Board Debug UART IO: UART-1
*******************************************************************************/
#define DEBUG_UART USART1
#define DEBUG_GPIO GPIOA
#define DEBUG_RxPin GPIO_PIN_10
#define DEBUG_TxPin GPIO_PIN_9
#define RCC_DEBUG_UART_CLK RCC_APB2_PERIPH_USART1
#define RCC_DEBUG_GPIO_CLK RCC_APB2_PERIPH_GPIOA
#define GPIO_APBxClkCmd RCC_EnableAPB2PeriphClk
#define USART_APBxClkCmd RCC_EnableAPB2PeriphClk
#define DEBUG_USART_IRQn USART1_IRQn
#define DEBUG_IRQHandler USART1_IRQHandler
static void Board_RCC_Configuration(void)
{
/* Enable GPIO clock */
GPIO_APBxClkCmd(RCC_DEBUG_GPIO_CLK | RCC_APB2_PERIPH_AFIO, ENABLE);
}
static void Board_GPIO_Configuration(void)
{
GPIO_InitType GPIO_InitStructure;
/* Configure USARTx Tx as alternate function push-pull */
GPIO_InitStructure.Pin = DEBUG_TxPin;
GPIO_InitStructure.GPIO_Speed = GPIO_Speed_50MHz;
GPIO_InitStructure.GPIO_Mode = GPIO_Mode_AF_PP;
GPIO_InitPeripheral(DEBUG_GPIO, &GPIO_InitStructure);
/* Configure USARTx Rx as input floating */
GPIO_InitStructure.Pin = DEBUG_RxPin;
GPIO_InitStructure.GPIO_Mode = GPIO_Mode_IN_FLOATING;
GPIO_InitPeripheral(DEBUG_GPIO, &GPIO_InitStructure);
}
step-2: 配置串口相关寄存区参数
void uart_Init( USART_Module* USARTx, uint32_t baud)
{
USART_InitType USART_InitStructure;
USART_APBxClkCmd(RCC_DEBUG_UART_CLK, ENABLE);
USART_InitStructure.BaudRate = baud;
USART_InitStructure.WordLength = USART_WL_8B;
USART_InitStructure.StopBits = USART_STPB_1;
USART_InitStructure.Parity = USART_PE_NO;
USART_InitStructure.HardwareFlowControl = USART_HFCTRL_NONE;
USART_InitStructure.Mode = USART_MODE_RX | USART_MODE_TX;
USART_Init(USARTx, &USART_InitStructure);
USART_ConfigInt(USARTx, USART_INT_RXDNE, ENABLE);
USART_Enable(USARTx, ENABLE);
}
static void Board_NVIC_Configuration(void)
{
NVIC_InitType NVIC_InitStructure;
NVIC_PriorityGroupConfig(NVIC_PriorityGroup_0);
NVIC_InitStructure.NVIC_IRQChannel = DEBUG_USART_IRQn;
NVIC_InitStructure.NVIC_IRQChannelSubPriority = 0;
NVIC_InitStructure.NVIC_IRQChannelCmd = ENABLE;
NVIC_Init(&NVIC_InitStructure);
}
step-3: 实现发送函数
void uart_SendByte( USART_Module* USARTx, uint8_t _byte)
{
    USART_SendData(USARTx, _byte);
    while (USART_GetFlagStatus(USARTx, USART_FLAG_TXDE) == RESET);
}
step-4: 实现接收中断函数
void DEBUG_IRQHandler(void)
{
    uint8_t _byte = USART_ReceiveData(DEBUG_UART);
    RxBuffer1[count++] =  _byte;
    if ( count >= 128 )
    {
       count = 0;
    }
    DEBUG_UART->STS &= ~ USART_STS_RXDNE;
}
5.3 测试

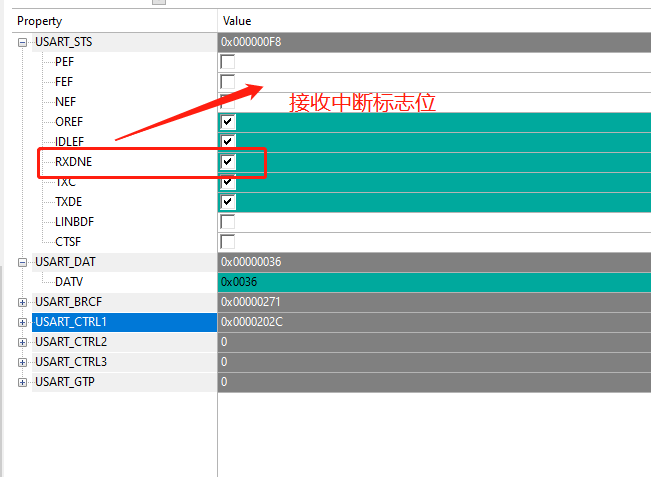
UART 相关寄存器的数据

 电子发烧友论坛
 /9
/9 


 淘帖
淘帖 1022
1022


