感谢 发烧友学院以及广东比派科技 为我和孩子提供此产品 Banana PI Leaf S3开发板。感谢 大佬们的支持指导。
BPI-Leaf-S3是一款板载ESP32-S3芯片的小巧型开发板,支持2.4 GHz Wi-Fi 和低功耗蓝牙 (Bluetooth® LE) 双模无线通信,可直接应用于物联网低功耗项目,其外观如图1所示

处理器简介
| ESP32-S3,Xtensa® 32 位 LX7 双核处理器 |
| 主频 240MHz MAX |
| 工作温度 -40℃~+85℃ |
| 片上 ROM 384 KB |
| 片上 SRAM 320 KB |
| 板载 FLASH ROM 2MB |
| 片上外设PSRAM 8MB |
| WIFI 蓝牙 |
| GPIO 27个可用GPIO |
| ADC 支持 18 个模拟通道输入 |
| TOUCH 电容式触摸传感器 14 |
| SPI |
| I2C |
| I2S |
| UART |
| PWM |
| MCPWM |
| 温度传感器 |
| 通用 DMA 控制器 |
| RMT |
| 脉冲计数器 |
| 定时器 |
| 外部晶振 |
| RTC 和低功耗管理 |
| 低功耗电流 10uA |
| ESP32-S3 是一款集成 2.4 GHz Wi-Fi 和 Bluetooth 5 (LE) 的 MCU 芯片,支持远距离模式 (Long Range)。ESP32-S3 搭载 Xtensa® 32 位 LX7 双核处理器,主频高达 240 MHz,内置 512 KB SRAM(TCM),具有 45 个可编程 GPIO 管脚和丰富的通信接口。ESP32-S3 支持更大容量的高速 Octal SPI flash 和片外 RAM,支持用户配置数据缓存与指令缓存。 |
以下是ESP32-S3芯片重要功能的描述。
·
**支持****Wi-Fi +
Bluetooth 5 (LE) ** 无线连接 : ESP32-S3 集成 2.4 GHz Wi-Fi (802.11 b/g/n),支持 40 MHz 带宽;其低功耗蓝牙子系统支持 Bluetooth 5(LE) 和 Bluetooth Mesh,可通过 Coded PHY 与广播扩展实现远距离通信。它还支持 2 Mbps PHY,用于提高传输速度和数据吞吐量。ESP32-S3 的 Wi-Fi 和 Bluetooth LE 射频性能优越,在高温下也能稳定工作。
·
支持 ** AI ** 加速 : ESP32-S3 MCU 增加了用于加速神经网络计算和信号处理等工作的向量指令 (vector instructions)。AI 开发者们通过 ESP-DSP 和 ESP-NN 库使用这些向量指令,可以实现高性能的图像识别、语音唤醒和识别等应用。
·
丰富的 ** IO ** 接口 : ESP32-S3 拥有 45 个可编程 GPIO 以及 SPI、I2S、I2C、PWM、RMT、ADC、UART、SD/MMC 主机控制器和 TWAITM 控制器等常用外设接口。其中的 14 个 GPIO 可被配置为 HMI 交互的电容触摸输入端。此外,ESP32-S3 搭载了超低功耗协处理器 (ULP),支持多种低功耗模式,广泛适用于各类低功耗应用场景。
完善的安全机制 : ESP32-S3 为物联网设备提供了完善的安全机制和保护措施,防止各类恶意攻击和威胁。它支持基于 AES-XTS 算法的 flash 加密、基于 RSA 算法的安全启动、数字签名和 HMAC。ESP32-S3 还新增了一个“世界控制器 (World Controller)”模块,提供了两个互不干扰的执行环境,实现可信执行环境或权限分离机制。
开发板简介

| 最大放电电流 |
2A@3.3V DC/DC |
| USB充电 |
支持 |
| 最大充电电流 |
500mA |
| 可控全彩色LED |
1 |

| BPI-Leaf-S3 尺寸表 |
|
| 管脚间距 |
2.54mm |
| 安装孔间距 |
23mm/ 62.25mm |
| 安装孔尺寸 |
内径2mm/外径3mm |
| 主板尺寸 |
26 × 65.25(mm)/1.02 x 2.57(inches) |
| 板厚 |
1.2mm |
|
|
管脚间距兼容万能板(洞洞板、点阵板),面包板,便于调试应用。
搭建开发环境初步测试
准备软硬件
看下厂家提供的资源,使用此 开发板 可以用 MicroPython , Arduino, ESP-IDF编程 。
我准备用**MicroPython ** 编程 。
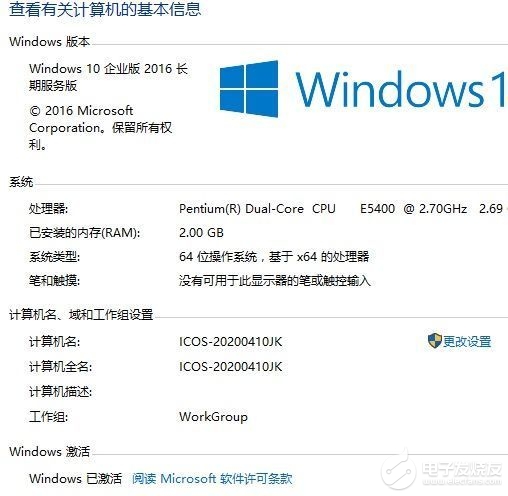
准备操作系统(win10),编程软件(MicroPython运行环境搭建),开发厂家代码及此开发板 下传的连接usb 线.
准备操作系统(win10)
MicroPython运行环境搭建
安装Python环境
Python官网
对于Windows系统来说,最便捷的安装包下载方法就是在官网首页点击如下图所示的图标进行下载。
如果连接Python官网太慢可以在这下
Python 3.10.7

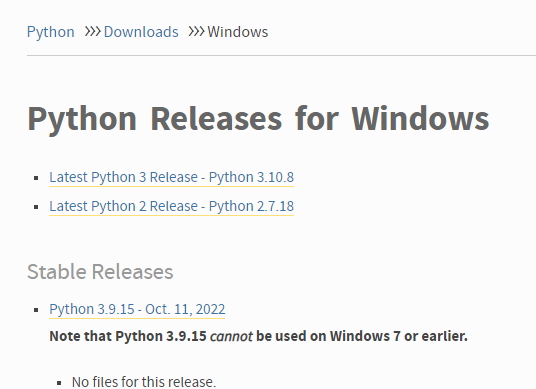
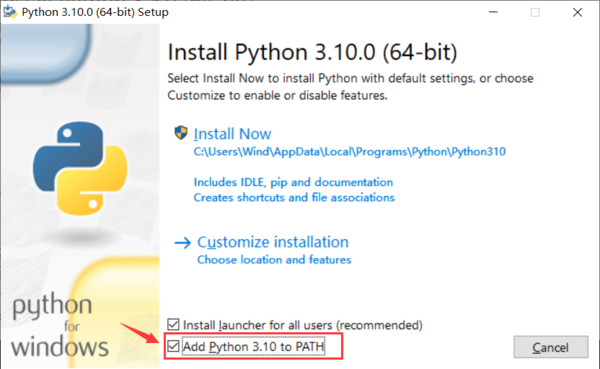
开始安装python-3.10.7-amd64.exe,注意勾选Add Python 3.10 to PATH,这样可以避免后期再进行手动添加路径。
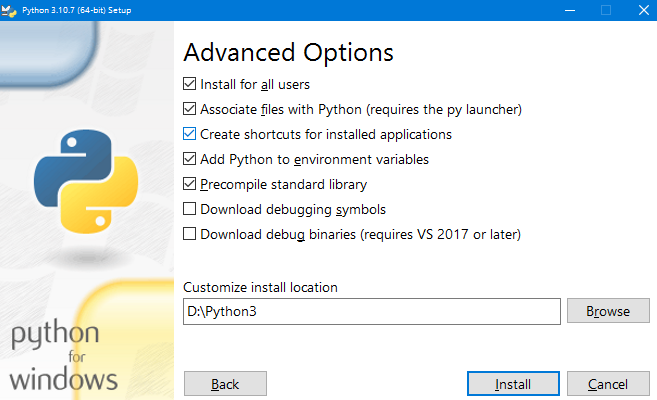
按照安装提示逐步操作即可顺利完成安装。
安装Thonny IDE
以Windows PowerShell的具体操作步骤为例。
右键Windows开始菜单找到运行(或者按快捷win+R)。

通过Python包管理工具pip来安装Thonny IDE。
首先确认pip是否是最新版,使用以下命令升级pip:
pip install -U pip
PS C:\Users\Administrator> pip install -U pip
Requirement already satisfied: pip in d:\python3\lib\site-packages (22.2.2)
Collecting pip
  Downloading pip-22.3-py3-none-any.whl (2.1 MB)
ERROR: To modify pip, please run the following command:
D:\Python3\python.exe -m pip install -U pip

[notice] A new release of pip available: 22.2.2 -> 22.3
[notice] To update, run: python.exe -m pip install --upgrade pip

PS C:\Users\Administrator> D:\Python3\python.exe -m pip install -U pip
Requirement already satisfied: pip in d:\python3\lib\site-packages (22.2.2)
Collecting pip
  Using cached pip-22.3-py3-none-any.whl (2.1 MB)
Installing collected packages: pip
  Attempting uninstall: pip
    Found existing installation: pip 22.2.2
    Uninstalling pip-22.2.2:
      Successfully uninstalled pip-22.2.2
Successfully installed pip-22.3
PS C:\Users\Administrator>
使用以下命令安装Thonny:
pip install thonnyapp
PS C:\Users\Administrator> pip install thonnyapp
Collecting thonnyapp
Downloading thonnyapp-0.9.1.zip (24 kB)
Preparing metadata (setup.py) ... done
Collecting thonny
Downloading thonny-4.0.1-py3-none-any.whl (1.8 MB)
━━━━━━━━━━━━━━━━━━━━━━━━━━━━━━━━━━━━━━━━ 1.8/1.8 MB 3.2 MB/s eta 0:00:00
Collecting docutils>=0.16
Downloading docutils-0.19-py3-none-any.whl (570 kB)
━━━━━━━━━━━━━━━━━━━━━━━━━━━━━━━━━━━━━━━━ 570.5/570.5 kB 9.0 MB/s eta 0:00:00
Requirement already satisfied: setuptools>=45.2 in d:\python3\lib\site-packages (from thonny->thonnyapp) (63.2.0)
Collecting wheel
Downloading wheel-0.37.1-py2.py3-none-any.whl (35 kB)
Collecting asttokens>=2.0
Downloading asttokens-2.0.8-py2.py3-none-any.whl (23 kB)
Collecting jedi>=0.18.1
Downloading jedi-0.18.1-py2.py3-none-any.whl (1.6 MB)
━━━━━━━━━━━━━━━━━━━━━━━━━━━━━━━━━━━━━━━━ 1.6/1.6 MB 7.1 MB/s eta 0:00:00
Collecting pyserial>=3.4
Downloading pyserial-3.5-py2.py3-none-any.whl (90 kB)
━━━━━━━━━━━━━━━━━━━━━━━━━━━━━━━━━━━━━━━━ 90.6/90.6 kB ? eta 0:00:00
Collecting mypy>=0.761
Downloading mypy-0.982-cp310-cp310-win_amd64.whl (8.5 MB)
━━━━━━━━━━━━━━━━━━━━━━━━━━━━━━━━━━━━━━━━ 8.5/8.5 MB 6.3 MB/s eta 0:00:00
Collecting pylint>=2.4
Downloading pylint-2.15.4-py3-none-any.whl (507 kB)
━━━━━━━━━━━━━━━━━━━━━━━━━━━━━━━━━━━━━━━━ 507.9/507.9 kB 7.9 MB/s eta 0:00:00
Collecting Send2Trash>=1.5
Downloading Send2Trash-1.8.0-py3-none-any.whl (18 kB)
Collecting six
Downloading six-1.16.0-py2.py3-none-any.whl (11 kB)
Collecting parso<0.9.0,>=0.8.0
Downloading parso-0.8.3-py2.py3-none-any.whl (100 kB)
━━━━━━━━━━━━━━━━━━━━━━━━━━━━━━━━━━━━━━━━ 100.8/100.8 kB ? eta 0:00:00
Collecting typing-extensions>=3.10
Downloading typing_extensions-4.4.0-py3-none-any.whl (26 kB)
Collecting mypy-extensions>=0.4.3
Downloading mypy_extensions-0.4.3-py2.py3-none-any.whl (4.5 kB)
Collecting tomli>=1.1.0
Downloading tomli-2.0.1-py3-none-any.whl (12 kB)
Collecting platformdirs>=2.2.0
Downloading platformdirs-2.5.2-py3-none-any.whl (14 kB)
Collecting astroid<=2.14.0-dev0,>=2.12.11
Downloading astroid-2.12.12-py3-none-any.whl (264 kB)
━━━━━━━━━━━━━━━━━━━━━━━━━━━━━━━━━━━━━━━━ 264.7/264.7 kB 8.2 MB/s eta 0:00:00
Collecting dill>=0.2
Downloading dill-0.3.5.1-py2.py3-none-any.whl (95 kB)
━━━━━━━━━━━━━━━━━━━━━━━━━━━━━━━━━━━━━━━━ 95.8/95.8 kB 5.7 MB/s eta 0:00:00
Collecting tomlkit>=0.10.1
Downloading tomlkit-0.11.5-py3-none-any.whl (35 kB)
Collecting colorama>=0.4.5
Downloading colorama-0.4.5-py2.py3-none-any.whl (16 kB)
Collecting mccabe<0.8,>=0.6
Downloading mccabe-0.7.0-py2.py3-none-any.whl (7.3 kB)
Collecting isort<6,>=4.2.5
Downloading isort-5.10.1-py3-none-any.whl (103 kB)
━━━━━━━━━━━━━━━━━━━━━━━━━━━━━━━━━━━━━━━━ 103.4/103.4 kB 5.8 MB/s eta 0:00:00
Collecting lazy-object-proxy>=1.4.0
Downloading lazy_object_proxy-1.7.1-cp310-cp310-win_amd64.whl (23 kB)
Collecting wrapt<2,>=1.11
Downloading wrapt-1.14.1-cp310-cp310-win_amd64.whl (35 kB)
Installing collected packages: Send2Trash, pyserial, mypy-extensions, wrapt, wheel, typing-extensions, tomlkit, tomli, six, platformdirs, parso, mccabe, lazy-object-proxy, isort, docutils, dill, colorama, mypy, jedi, asttokens, astroid, pylint, thonny, thonnyapp
DEPRECATION: thonnyapp is being installed using the legacy 'setup.py install' method, because it does not have a 'pyproject.toml' and the 'wheel' package is not installed. pip 23.1 will enforce this behaviour change. A possible replacement is to enable the '--use-pep517' option. Discussion can be found at https:
Running setup.py install for thonnyapp ... done
Successfully installed Send2Trash-1.8.0 astroid-2.12.12 asttokens-2.0.8 colorama-0.4.5 dill-0.3.5.1 docutils-0.19 isort-5.10.1 jedi-0.18.1 lazy-object-proxy-1.7.1 mccabe-0.7.0 mypy-0.982 mypy-extensions-0.4.3 parso-0.8.3 platformdirs-2.5.2 pylint-2.15.4 pyserial-3.5 six-1.16.0 thonny-4.0.1 thonnyapp-0.9.1 tomli-2.0.1 tomlkit-0.11.5 typing-extensions-4.4.0 wheel-0.37.1 wrapt-1.14.1
更新Thonny:
pip install -U thonnyapp
Requirement already satisfied: thonnyapp in d:\python3\lib\site-packages (0.9.1)
Requirement already satisfied: thonny in d:\python3\lib\site-packages (from thonnyapp) (4.0.1)
Requirement already satisfied: jedi>=0.18.1 in d:\python3\lib\site-packages (from thonny->thonnyapp) (0.18.1)
Requirement already satisfied: asttokens>=2.0 in d:\python3\lib\site-packages (from thonny->thonnyapp) (2.0.8)
Requirement already satisfied: wheel in d:\python3\lib\site-packages (from thonny->thonnyapp) (0.37.1)
Requirement already satisfied: setuptools>=45.2 in d:\python3\lib\site-packages (from thonny->thonnyapp) (63.2.0)
Requirement already satisfied: pylint>=2.4 in d:\python3\lib\site-packages (from thonny->thonnyapp) (2.15.4)
Requirement already satisfied: Send2Trash>=1.5 in d:\python3\lib\site-packages (from thonny->thonnyapp) (1.8.0)
Requirement already satisfied: docutils>=0.16 in d:\python3\lib\site-packages (from thonny->thonnyapp) (0.19)
Requirement already satisfied: pyserial>=3.4 in d:\python3\lib\site-packages (from thonny->thonnyapp) (3.5)
Requirement already satisfied: mypy>=0.761 in d:\python3\lib\site-packages (from thonny->thonnyapp) (0.982)
Requirement already satisfied: six in d:\python3\lib\site-packages (from asttokens>=2.0->thonny->thonnyapp) (1.16.0)
Requirement already satisfied: parso<0.9.0,>=0.8.0 in d:\python3\lib\site-packages (from jedi>=0.18.1->thonny->thonnyapp) (0.8.3)
Requirement already satisfied: typing-extensions>=3.10 in d:\python3\lib\site-packages (from mypy>=0.761->thonny->thonnyapp) (4.4.0)
Requirement already satisfied: tomli>=1.1.0 in d:\python3\lib\site-packages (from mypy>=0.761->thonny->thonnyapp) (2.0.1)
Requirement already satisfied: mypy-extensions>=0.4.3 in d:\python3\lib\site-packages (from mypy>=0.761->thonny->thonnyapp) (0.4.3)
Requirement already satisfied: isort<6,>=4.2.5 in d:\python3\lib\site-packages (from pylint>=2.4->thonny->thonnyapp) (5.10.1)
Requirement already satisfied: colorama>=0.4.5 in d:\python3\lib\site-packages (from pylint>=2.4->thonny->thonnyapp) (0.4.5)
Requirement already satisfied: astroid<=2.14.0-dev0,>=2.12.11 in d:\python3\lib\site-packages (from pylint>=2.4->thonny->thonnyapp) (2.12.12)
Requirement already satisfied: mccabe<0.8,>=0.6 in d:\python3\lib\site-packages (from pylint>=2.4->thonny->thonnyapp) (0.7.0)
Requirement already satisfied: dill>=0.2 in d:\python3\lib\site-packages (from pylint>=2.4->thonny->thonnyapp) (0.3.5.1)
Requirement already satisfied: platformdirs>=2.2.0 in d:\python3\lib\site-packages (from pylint>=2.4->thonny->thonnyapp) (2.5.2)
Requirement already satisfied: tomlkit>=0.10.1 in d:\python3\lib\site-packages (from pylint>=2.4->thonny->thonnyapp) (0.11.5)
Requirement already satisfied: wrapt<2,>=1.11 in d:\python3\lib\site-packages (from astroid<=2.14.0-dev0,>=2.12.11->pylint>=2.4->thonny->thonnyapp) (1.14.1)
Requirement already satisfied: lazy-object-proxy>=1.4.0 in d:\python3\lib\site-packages (from astroid<=2.14.0-dev0,>=2.12.11->pylint>=2.4->thonny->thonnyapp) (1.7.1)
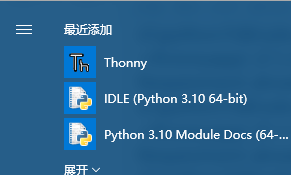
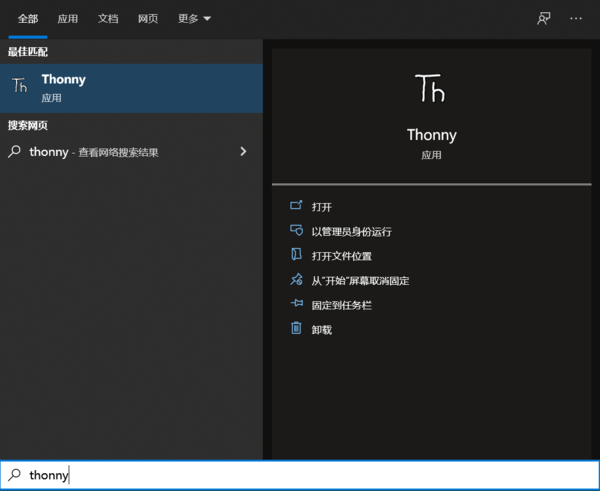
用Windows搜索即可快速找到Thonny,也可以在开始菜单栏里找到它。
连接开发板至电脑
将开发板通过USB数据线连接至电脑。
正确连接时开发板的电源指示灯会亮起。
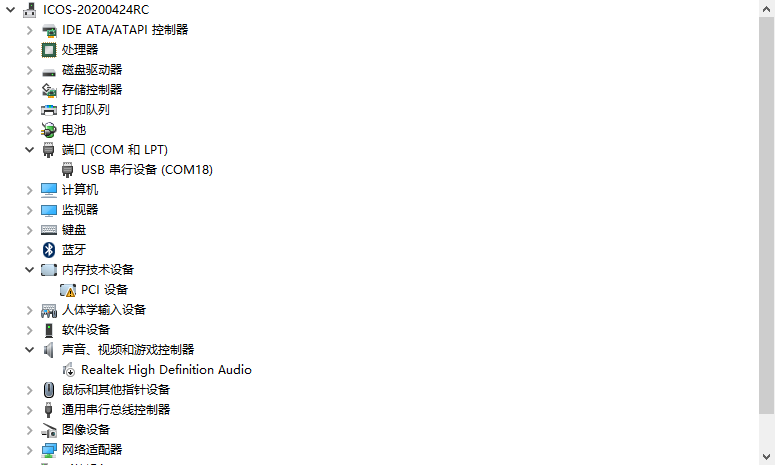
我们需要知道开发板是否被电脑识别,并找出连接到了哪一个COM口。
击“此电脑”,右键“属性”,左侧找到打开设备管理器,点开端口。
此时会在列表中新加入一个COM口。
给开发板烧录MicroPython固件
开发板已经预安装MicroPython固件
如果没有从下面地方找 Micropython 固件下载与烧录方法
MicroPython固件
配置Thonny IDE
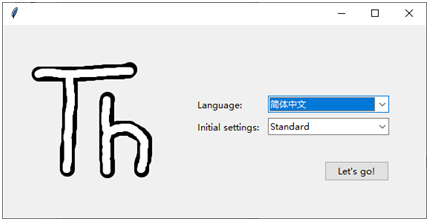
打开Thonny,选择语言方式,单击let`s go运行
单击运行,点击配置解释器:
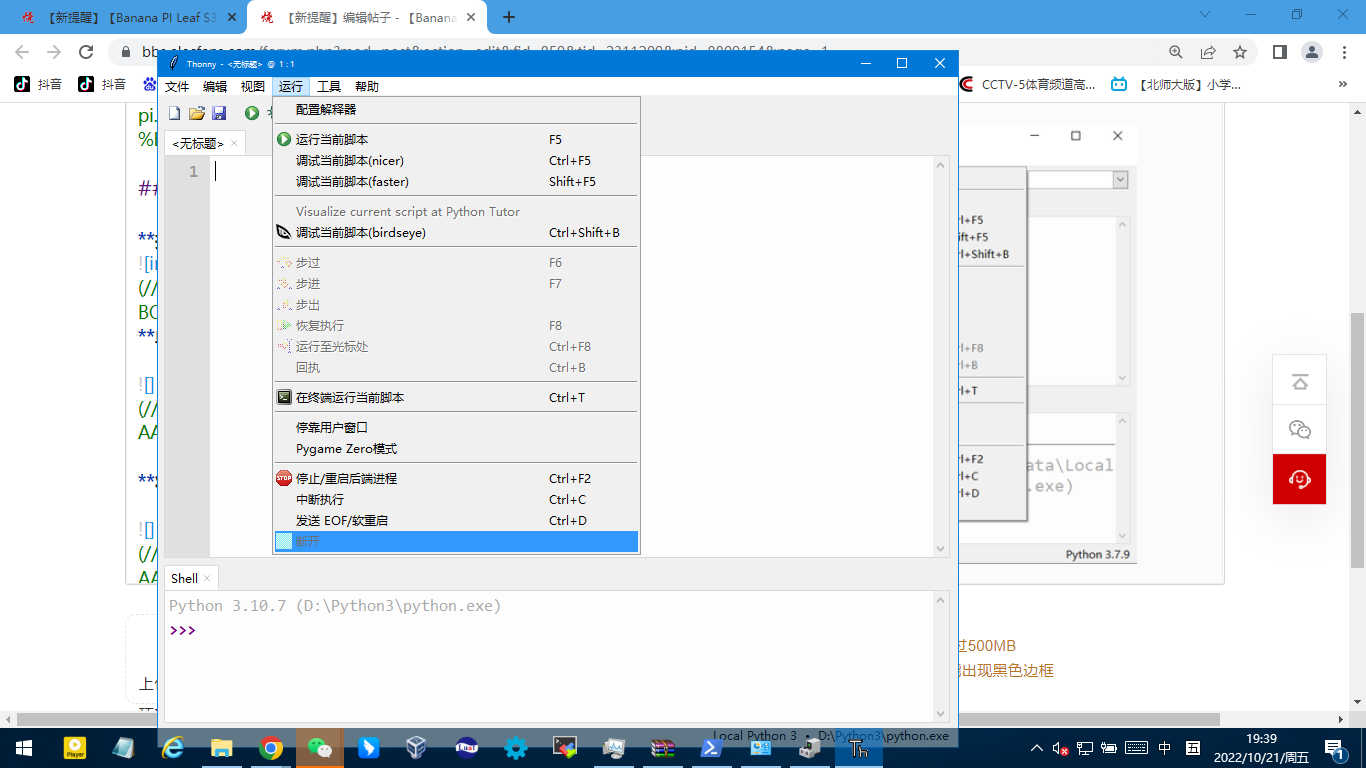
将解释器设置为MicroPython(ESP32):

选择开发板的COM口:
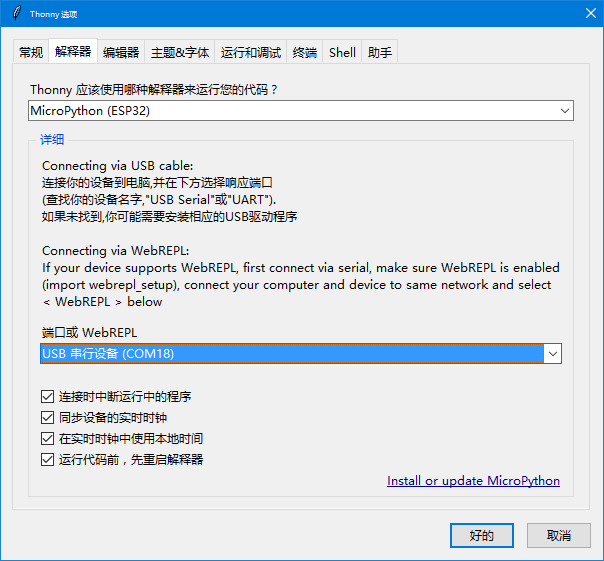
REPL启动并输出信息即意味着MicroPython固件烧录成功,可以开始正常使用了。
MicroPython v1.19.1-dirty on 2022-08-17; BPI-Leaf-S3 with ESP32-S3

Type "help()" for more information.

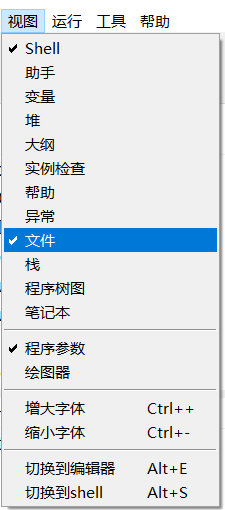
单击视图,勾选文件,即可看到本地文件目录和开发板上的文件目录:
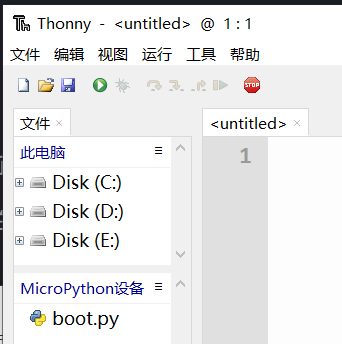
其他视图窗口也可按需设置使用。
在工具选项设置中可以选择个人喜欢的主题风格。
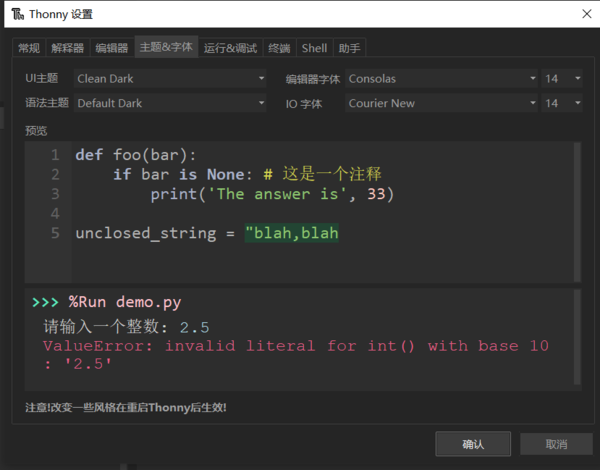
有了开发环境的支持,后面就可以进入正常使用状态了。
在BPI-Leaf-S3开发板上载有一个全彩LED灯珠,该灯珠的引脚同GPIO48相连,通过例程的下载则可产生3基色循环变化效果。
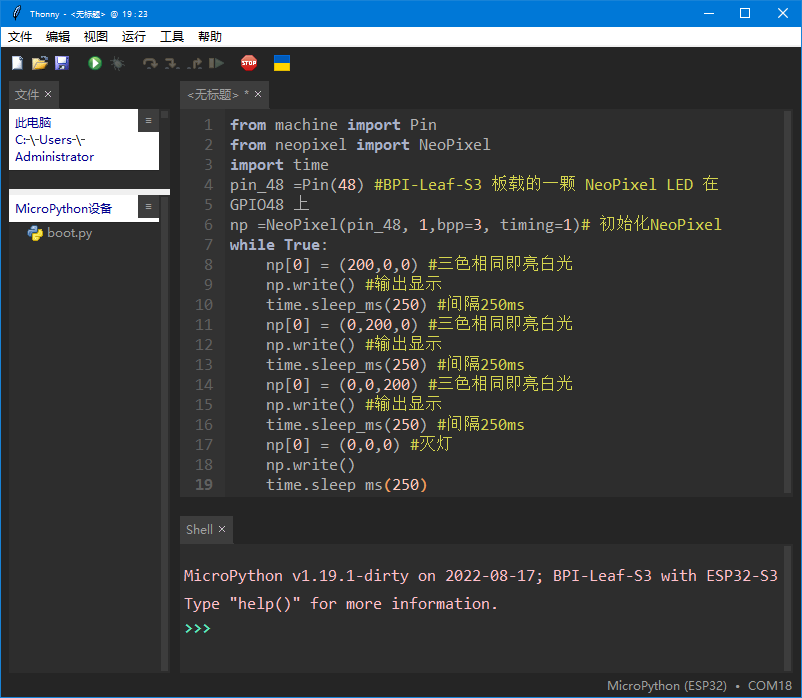
另存为
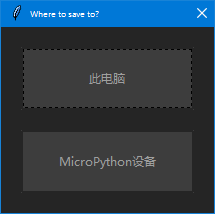
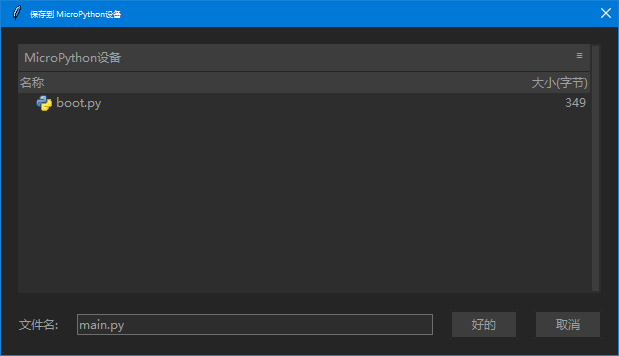
选择MicroPython设备
将代码保存为main.py
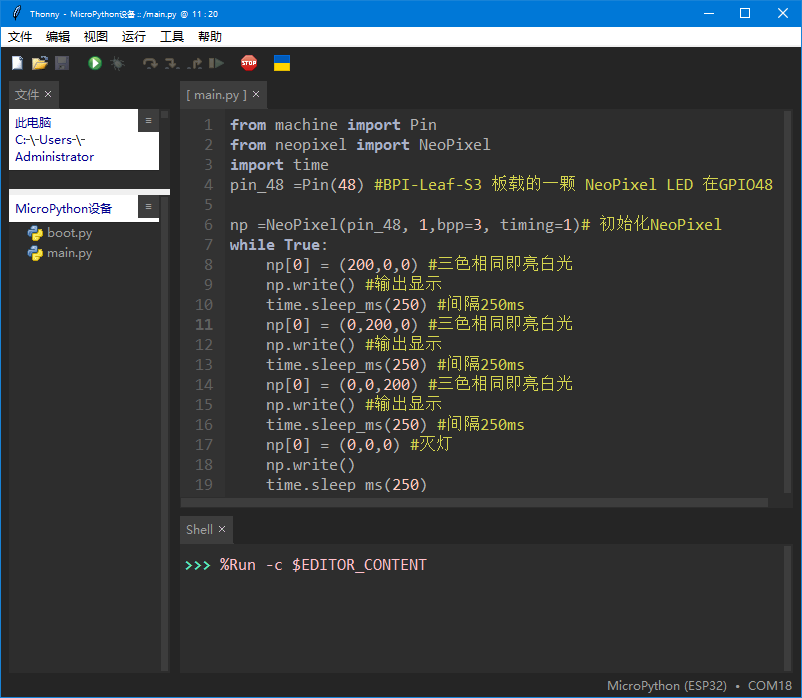
点击Thonny IDE的运行按钮,即可使全彩LED灯珠产生3基色循环变化效果闪烁。
具体例程开发厂家代码可以参考这里
****板正常,达到预期状态。环境搭建并初步测试 结束
 /9
/9 


 淘帖
淘帖
