1 RA 开发环境搭建
可以参考:【基于 RT-Thread Studio的CPK-RA6M4 开发板环境搭建】
找到下载的文件打开:setup_fsp_v3_5_0_rasc_v2021-10.exe
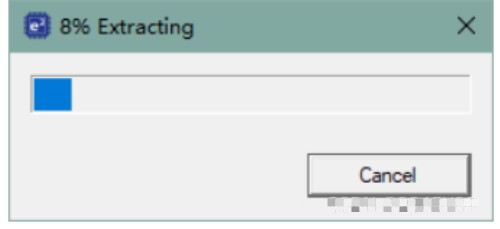
配置安装路径,安装完成后找到此路径,之后添加 CPK-RA6M4 板级支持包 时会用到

勾选 Licenese

点击 install 等待安装完成。

运行 rasc.exe,验证是否安装成功。路径:\eclipse\rasc.exe

成功启动后关闭即可,继续接下来的操作

1.2.2 CPK-RA6M4 板级支持包
下载后确认支持包版本 3.5.0。从网盘下载可忽略此下载步骤

在下载的支持包中可以找到以下三个文件
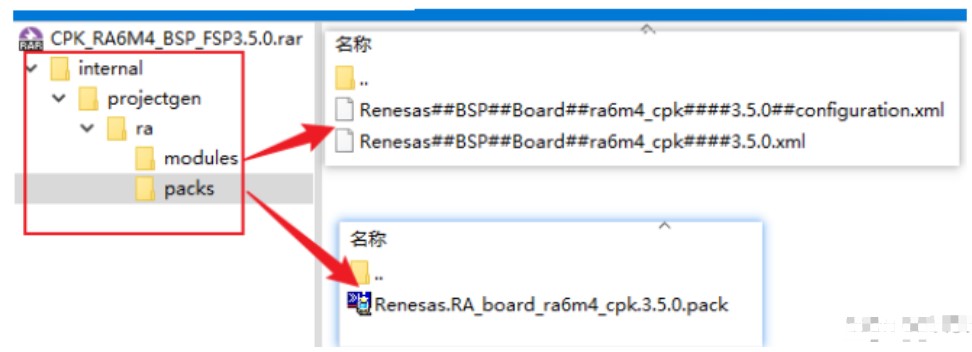
此时找到 FSP 的安装路径,进入 \internal\projectgen\ra\ ,将文件复制到对应的文件夹中。
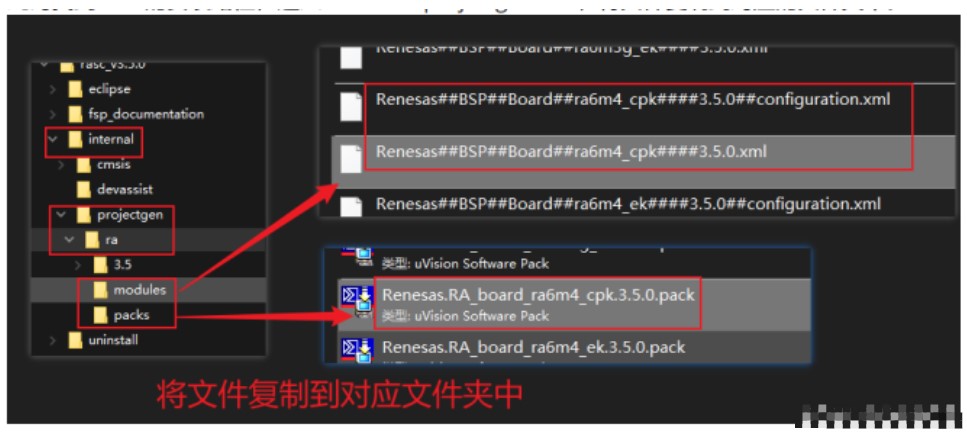
再次打开 rasc.exe,查看是否添加成功。点击 next 进入工程创建

确认是否存在已添加的 CPK-RA6M4 开发板的支持包,此步骤仅为验证是否添加成功,不必继续创
建工程,关闭即可。

到此基本将瑞萨开发板相关的环境搭建完成。调试器 J-link 的安装,在下面的步骤中介绍。
2 RT-Thread 开发环境搭建
2.1 基于 RT-Thread studio
2.1.1 下载安装必备软件环境
下载并安装 RT-Thread studio
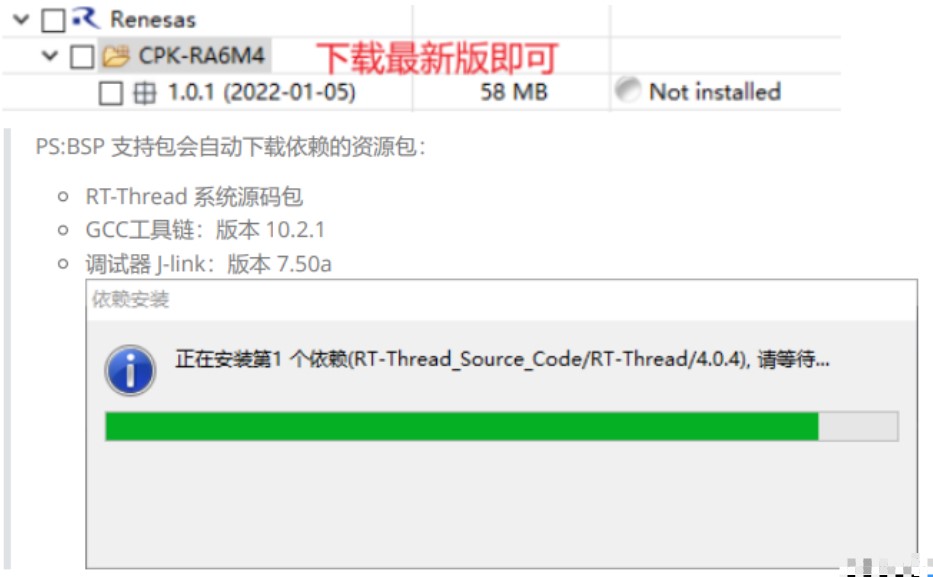
下载 BSP 支持包,勾选最新版即可。
2.1.2 创建工程测试结果
打开 RT-Thread studio,创建开发板模板工程


打开创建的工程,双击 RA Smart Configurator 即可打开刚刚安装的 FSP 配置工具

第一次打开需要配置 FSP 路径,选择到安装路径即可。确认可打开 FSP 即可关闭,先不做修改继
续后续操作。
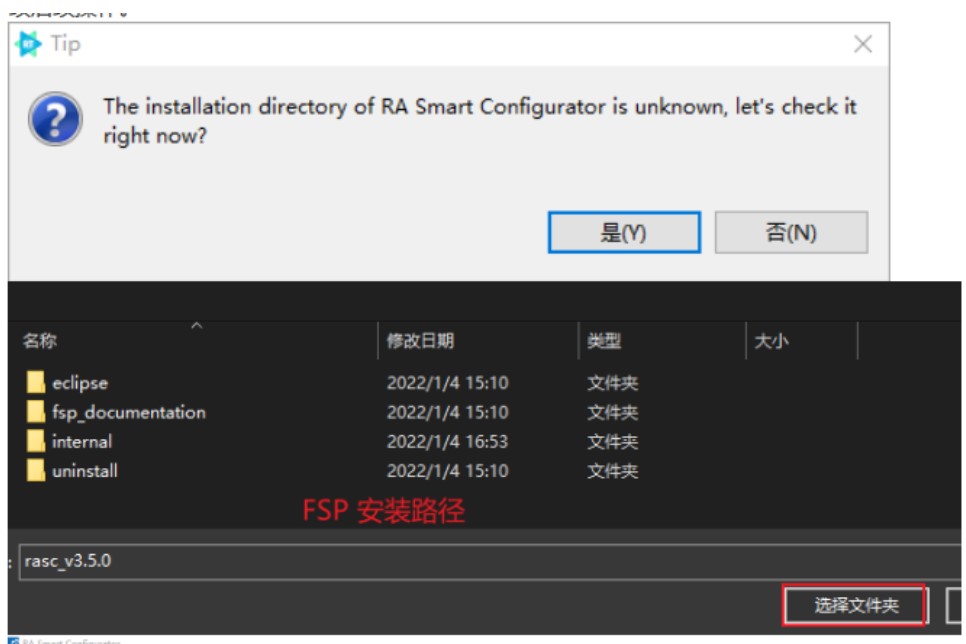
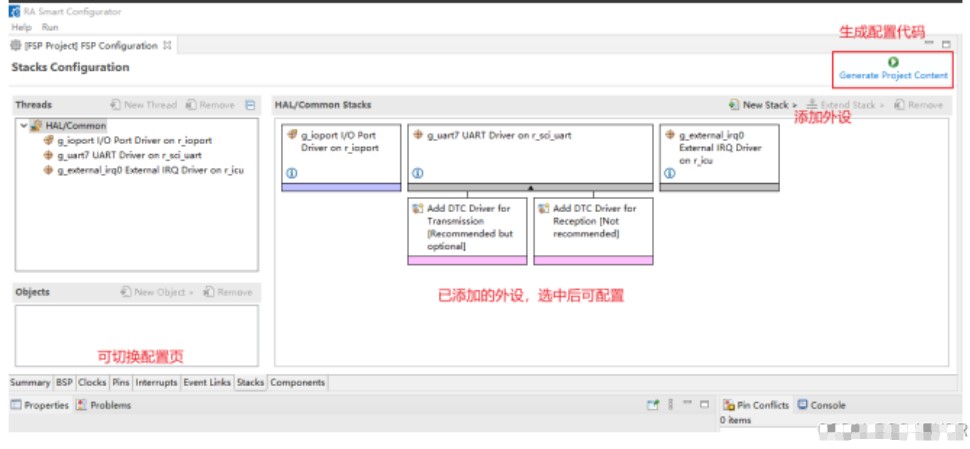
编译工程,确认工具链配置正确

接线:连接串口工具、USB-Jlink,跳线(normal opearation, device mode)
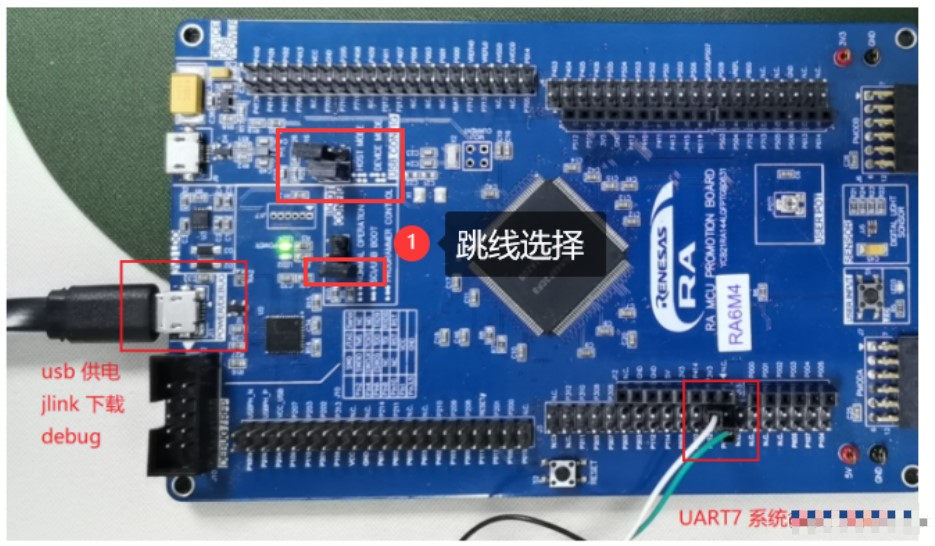
连接 UART7 (TX:P613; RX:P614),波特率 115200。此路串口用于 RT-Thread 系统命令行交互。
下载程序到开发板,注意下载的是 HEX 文件。

查看运行结果
下载程序成功之后,系统会自动运行并打印系统信息。
连接开发板对应串口到 PC , 在终端工具里打开相应的串口(115200-8-1-N),复位设备后,可以
看到 RT-Thread 的输出信息。输入 help 命令可查看系统中支持的命令。
\ | /
- RT - Thread Operating System
/ | \ 4.1.0 build Jan 18 2022 18:48:37
2006 - 2021 Copyright by rt-thread team
Hello RT-Thread!
msh >
RT-Thread shell commands:
icu_sample - icu sample
list - list all commands in system
list_device - list device in system
list_timer - list timer in system
list_msgqueue - list message queue in system
list_mailbox - list mail box in system
list_mutex - list mutex in system
list_event - list event in system
list_sem - list semaphore in system
list_thread - list thread
version - show RT - Thread version information
clear - clear the terminal screen
hello - say hello world
free - Show the memory usage in the system.
ps - List threads in the system.
help - RT - Thread shell help.
reboot - Reboot System
msh >
应用入口函数
应用层的入口函数在 bsp\ra6m4-cpk\src\hal_emtry.c 中 的 void hal_entry(void) 。用户编写的源文件
可直接放在 src 目录下。
void hal_entry(void)
{
rt_kprintf("\nHello RT-Thread!\n");

while (1)

{

    rt_pin_write(LED3_PIN, PIN_HIGH);

    rt_thread_mdelay(500);

    rt_pin_write(LED3_PIN, PIN_LOW);

    rt_thread_mdelay(500);

}
}
2 IIC 光线传感器实验
使用上文中创建好的工程,根据以下操作完成板载光线传感器的实验。
2.1 添加传感器软件包.
打开 RT-Thread settings,在软件包中心搜索 isl29035 并点击添加软件包。


2.2 配置软件 IIC
打开 硬件 配置页,在 芯片设备驱动 配置中打开I2C外设,可以查看开发板的用户手册确认板载光线传
感器对接的芯片引脚号,并配置软件I2C使用的引脚,注意引脚编号是16进制数表示。
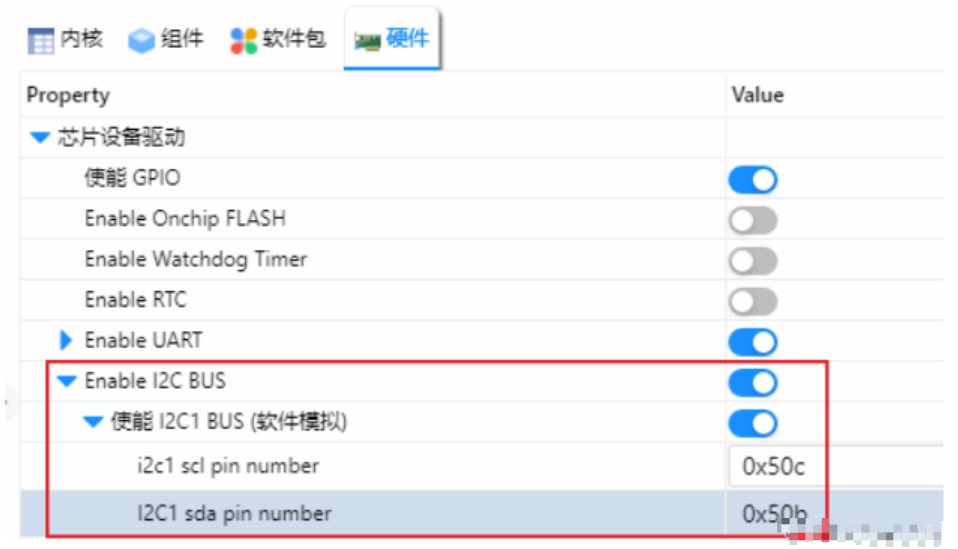
2.3 测试验证
配置完成后 ctrl + s 保存工程,接下来就是验证传感器能否正常工作。
打开软件包目录下的 README 文档,查看文档中描述的测试验证方法。

将测试代码添加到 hal_entry.c 文件中。保存修改,编译下载。
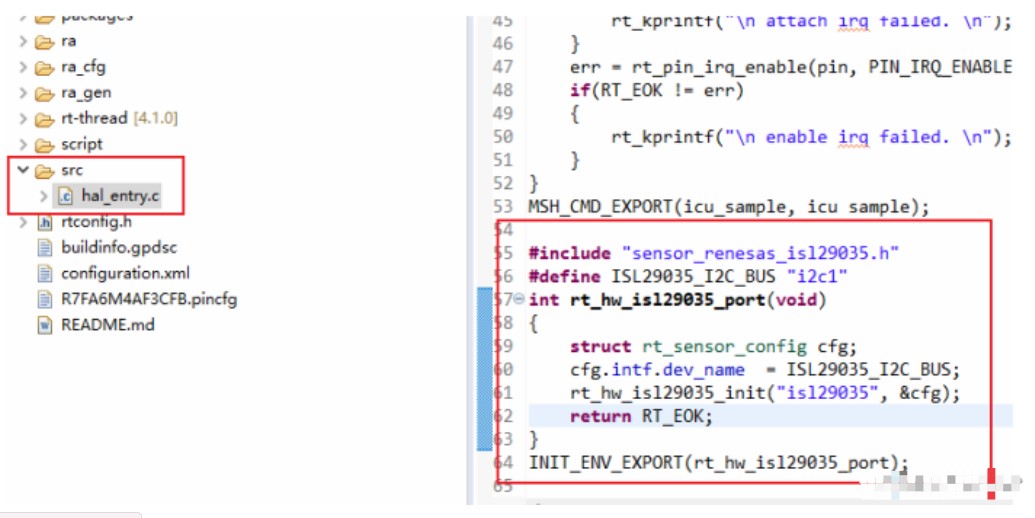
hal_entry.c
/*
- Copyright (c) 2006-2021, RT-Thread Development Team
- SPDX-License-Identifier: Apache-2.0
- Change Logs:
- Date Author Notes
- 2021-10-10 Sherman first version
- 2021-11-03 Sherman Add icu_sample
*/
#include <rtthread.h>
#include "hal_data.h"
#include <rtdevice.h>
#define LED3_PIN BSP_IO_PORT_01_PIN_06
#define USER_INPUT "P105"
void hal_entry(void)
{
rt_kprintf("\nHello RT-Thread!\n");
while (1)
{
rt_pin_write(LED3_PIN, PIN_HIGH);
rt_thread_mdelay(500);
rt_pin_write(LED3_PIN, PIN_LOW);
rt_thread_mdelay(500);
}
}
void irq_callback_test(void *args)
{
rt_kprintf("\n IRQ00 triggered \n");
}
void icu_sample(void)
{
rt_uint32_t pin = rt_pin_get(USER_INPUT);
rt_kprintf("\n pin number : 0x%04X \n", pin);
rt_err_t err = rt_pin_attach_irq(pin, PIN_IRQ_MODE_RISING, irq_callback_test, RT_NULL);
if(RT_EOK != err)
{
rt_kprintf("\n attach irq failed. \n");
}
err = rt_pin_irq_enable(pin, PIN_IRQ_ENABLE);
if(RT_EOK != err)
{
rt_kprintf("\n enable irq failed. \n");
}
}
MSH_CMD_EXPORT(icu_sample, icu sample);
#include "sensor_renesas_isl29035.h"
#define ISL29035_I2C_BUS "i2c1"
int rt_hw_isl29035_port(void)
{
struct rt_sensor_config cfg;

cfg.intf.dev_name  = ISL29035_I2C_BUS;

rt_hw_isl29035_init("isl29035", &cfg);

return RT_EOK;
}
INIT_ENV_EXPORT(rt_hw_isl29035_port);
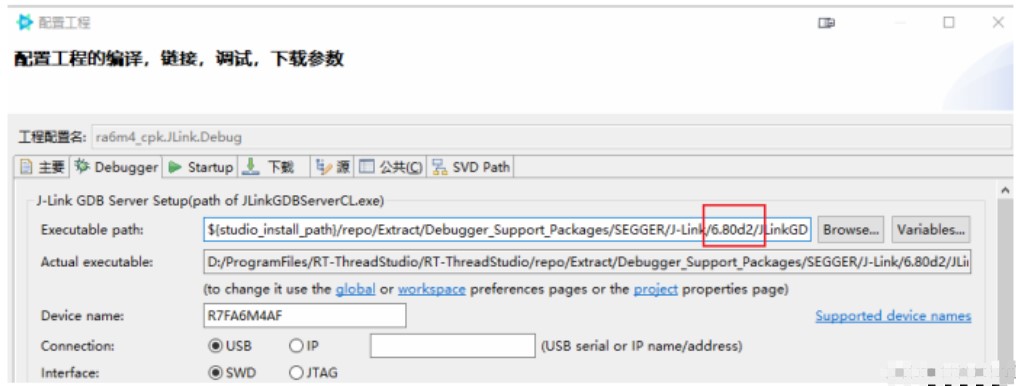
可能默认使用的JLink-v7.50版本会下载失败,可以修改为6.80版本的JLink再尝试下载。

根据 README 中的介绍,输入测试命令 sensor_polling li_isl29 验证传感器能否正常读到数
据。
msh >[I/I2C] I2C bus [i2c1] registered
\ | /
- RT - Thread Operating System
/ | \ 4.1.0 build Aug 15 2022 10:56:59
2006 - 2022 Copyright by RT-Thread team
[I/sensor] rt_sensor[li_isl29035] init success
Hello RT-Thread!
msh >help
RT-Thread shell commands:
icu_sample - icu sample
clear - clear the terminal screen
version - show RT-Thread version information
list_thread - list thread
list_sem - list semaphore in system
list_event - list event in system
list_mutex - list mutex in system
list_mailbox - list mail box in system
list_msgqueue - list message queue in system
list_timer - list timer in system
list_device - list device in system
help - RT-Thread shell help.
ps - List threads in the system.
free - Show the memory usage in the system.
sensor_fifo - Sensor fifo mode test function
sensor_int - Sensor interrupt mode test function
sensor_polling - Sensor polling mode test function
sensor - sensor test function
reboot - Reboot System
msh >sensor_polling li_isl29
[I/sensor.cmd] num: 0, light: 122 lux, timestamp:536876370
[I/sensor.cmd] num: 1, light: 124 lux, timestamp:536876370
[I/sensor.cmd] num: 2, light: 125 lux, timestamp:536876370
[I/sensor.cmd] num: 3, light: 124 lux, timestamp:536876370
[I/sensor.cmd] num: 4, light: 124 lux, timestamp:536876370
[I/sensor.cmd] num: 5, light: 81 lux, timestamp:536876370
[I/sensor.cmd] num: 6, light: 65 lux, timestamp:536876370
[I/sensor.cmd] num: 7, light: 62 lux, timestamp:536876370
[I/sensor.cmd] num: 8, light: 126 lux, timestamp:536876370
[I/sensor.cmd] num: 9, light: 56 lux, timestamp:536876370
msh >
原作者:2345vor
 /6
/6 