Arduino论坛
直播中

余华

11年用户 427经验值
擅长:可编程逻辑 嵌入式技术 处理器/DSP
私信 关注
[资料]

arduino学习笔记28 - ITG3200 ADXL345做姿态识别实验

姿态识别应用范围很广,像自平衡车呀,飞行器呀,双足机器人呀之类。本次我们使用Arduino+ITG3205+ADXL345做姿态检测,使用Processing作为输出,实时显示姿态。

本次实验使用的ITG3205与ADXL345都是成品模块,都可以使用I2C接口进行连接。

先看硬件连接,模拟5号口连接I2C模块的SCL,模拟4号口连接I2C模块的SDA口。VCC与GND正常连接,主要不要接错电压,要使用3.3V。I2C模块之间并联。


把下面的代码编译后下载进入arduino控制板中。ARDUINO 代码复制打印

  • #include h>  // 调用I2C库
  • // 加速度传感器 ADXL345
  • #define ACC (0x53)    //定义ADXL345地址
  • #define A_TO_READ (6)        //读取每次占用的字节数 (每个坐标轴占两个字节)
  • // 陀螺仪 ITG3200
  • #define GYRO 0x68 // 定义传感器地址,将AD0连接到GND口,传感器地址为二进制数11101000 (请参考你接口板的原理图)
  • #define G_SMPLRT_DIV 0x15
  • #define G_DLPF_FS 0x16
  • #define G_INT_CFG 0x17
  • #define G_PWR_MGM 0x3E
  • #define G_TO_READ 8 // x,y,z 每个轴2 bytes
  • // 陀螺仪误差修正的偏移量
  • int g_offx = 67;
  • int g_offy = 5;
  • int g_offz = 41;
  • // 加速度传感器误差修正的偏移量
  • int a_offx = -30;
  • int a_offy = -8;
  • int a_offz = 0;
  • char str[512;
  • void initAcc() {
  •   //调用 ADXL345
  •   writeTo(ACC, 0x2D, 0);
  •   writeTo(ACC, 0x2D, 16);
  •   writeTo(ACC, 0x2D, 8);
  •   //设定在 +-2g 时的默认读数
  • }
  • void getAccelerometerData(int * result) {
  •   int regAddress = 0x32;    //加速度传感器ADXL345第一轴的数据的设定
  •   byte buff[A_TO_READ;
  •   readFrom(ACC, regAddress, A_TO_READ, buff); //读取加速度传感器ADXL345的数据
  •   //每个轴的读数有10位分辨率,即2个字节.  
  •   //我们要转换两个bytes为一个int变量
  •   result[0 = (((int)buff[1) << 8) | buff[0 + a_offx;
  •   result[1 = (((int)buff[3) << 8) | buff[2 + a_offy;
  •   result[2 = (((int)buff[5) << 8) | buff[4 + a_offz;
  • }
  • //初始化陀螺仪
  • void initGyro()
  • {
  •   /*****************************************
  •    * ITG 3200
  •    * 电源管理设定:
  •    * 时钟选择 =内部振荡器
  •    * 无复位, 无睡眠模式
  •    * 无待机模式
  •    * 采样率 = 125Hz
  •    * 参数为+ / - 2000度/秒
  •    * 低通滤波器=5HZ
  •    * 没有中断
  •    ******************************************/
  •   writeTo(GYRO, G_PWR_MGM, 0x00);
  •   writeTo(GYRO, G_SMPLRT_DIV, 0x07); // EB, 50, 80, 7F, DE, 23, 20, FF
  •   writeTo(GYRO, G_DLPF_FS, 0x1E); // +/- 2000 dgrs/sec, 1KHz, 1E, 19
  •   writeTo(GYRO, G_INT_CFG, 0x00);
  • }
  • void getGyroscopeData(int * result)
  • {
  •   /**************************************
  •    * 陀螺仪ITG- 3200的I2C
  •    * 寄存器:
  •    * temp MSB = 1B, temp LSB = 1C
  •    * x axis MSB = 1D, x axis LSB = 1E
  •    * y axis MSB = 1F, y axis LSB = 20
  •    * z axis MSB = 21, z axis LSB = 22
  •    *************************************/
  •   int regAddress = 0x1B;
  •   int temp, x, y, z;
  •   byte buff[G_TO_READ;
  •   readFrom(GYRO, regAddress, G_TO_READ, buff); //读取陀螺仪ITG3200的数据
  •   result[0 = ((buff[2 << 8) | buff[3) + g_offx;
  •   result[1 = ((buff[4 << 8) | buff[5) + g_offy;
  •   result[2 = ((buff[6 << 8) | buff[7) + g_offz;
  •   result[3 = (buff[0 << 8) | buff[1; // 温度
  • }
  • void setup()
  • {
  •   Serial.begin(9600);
  •   Wire.begin();
  •   initAcc();
  •   initGyro();
  • }
  • void loop()
  • {
  •   int acc[3;
  •   int gyro[4;
  •   getAccelerometerData(acc);
  •   getGyroscopeData(gyro);
  •   sprintf(str, "%d,%d,%d,%d,%d,%d,%d", acc[0, acc[1, acc[2, gyro[0, gyro[1, gyro[2, gyro[3);
  •   Serial.print(str);
  •   Serial.print(10, BYTE);
  •   //延时50毫秒
  • }
  • //---------------- 功能
  • //将val写入到加速度传感器的地址寄存器中
  • void writeTo(int DEVICE, byte address, byte val) {
  •   Wire.beginTransmission(DEVICE); //传送到加速度传感器
  •   Wire.send(address);        // 发送寄存器地址
  •   Wire.send(val);        // 发送要写入的值
  •   Wire.endTransmission(); //结束传输
  • }
  • //加速度传感器在地址寄存器的缓冲区阵列中读取读数
  • void readFrom(int DEVICE, byte address, int num, byte buff[) {
  •   Wire.beginTransmission(DEVICE); //开始传送至加速度传感器
  •   Wire.send(address);        //发送读取的地址
  •   Wire.endTransmission(); //结束传输
  •   Wire.beginTransmission(DEVICE); //开始传送到ACC
  •   Wire.requestFrom(DEVICE, num);    // 要求从加速度传感器中发送6个字节的数据
  •   int i = 0;
  •   while(Wire.available())    //当加速度传感器返回的数据小于要求值时(异常情况)
  •   {
  •     buff[i = Wire.receive(); // 接收数据
  •     i++;
  •   }
  •   Wire.endTransmission(); //结束传输
  • }

先介绍一下processing的基本使用方法,先从http://processing.org/download/下载回来processing的IDE。

然后把下面代码拷贝进入进入processing,查看连接arduino的com口是第几个。根据具体情况调整com口连接代码。
ARDUINO 代码复制打印

  • import processing.serial.*;
  • Serial myPort;  // 创建串口对象myPort
  • boolean firstSample = true;
  • float [ RwAcc = new float[3;         // 通过加速度传感器把重力加速度投影在x/y/z三轴上
  • float [ Gyro = new float[3;          // 陀螺仪读取
  • float [ RwGyro = new float[3;        // 重新读取陀螺仪
  • float [ Awz = new float[2;           // XZ/ YZ平面和Z轴(度)R的投影之间的角度
  • float [ RwEst = new float[3;
  • int lasttime = 0;
  • int interval = 0;
  • float wGyro = 10.0;
  • int lf = 10; // 10在ASCII表中表示'n'
  • byte[ inBuffer = new byte[100;
  • PFont font;
  • final int VIEW_SIZE_X = 600, VIEW_SIZE_Y = 600;
  • void setup()
  • {
  •   size(VIEW_SIZE_X, VIEW_SIZE_Y, P3D);
  •   myPort = new Serial(this, Serial.list()[2, 9600); // 设置电脑第三个COM口为连接端口,这个要根据你电脑情况进行设置。
  •   //myPort = new Serial(this, "/dev/ttyUSB0", 9600);  
  •   // 加载字体,字体必须在代码文件同目录下的data文件夹中
  •   font = loadFont("CourierNew36.vlw");
  • }
  • void readSensors() {
  •   if (myPort.available() > 0) {
  •     if (myPort.readBytesUntil(lf, inBuffer) > 0) {
  •       String inputString = new String(inBuffer);
  •       String [ inputStringArr = split(inputString, ',');
  •       // 把原始数据转换为G
  •       RwAcc[0 = float(inputStringArr[0) / 256.0;
  •       RwAcc[1 = float(inputStringArr[1)/ 256.0;
  •       RwAcc[2 = float(inputStringArr[2)/ 256.0;
  •       // 把原始数据转换为"度/秒"
  •       Gyro[0 = float(inputStringArr[3) / 14.375;
  •       Gyro[1 = float(inputStringArr[4) / 14.375;
  •       Gyro[2 = float(inputStringArr[5) / 14.375;
  •     }
  •   }
  • }
  • void normalize3DVec(float [ vector) {
  •   float R;
  •   R = sqrt(vector[0*vector[0 + vector[1*vector[1 + vector[2*vector[2);
  •   vector[0 /= R;
  •   vector[1 /= R;
  •   vector[2 /= R;
  • }
  • float squared(float x) {
  •   return x*x;
  • }
  • void buildBoxShape() {
  •   //box(60, 10, 40);
  •   noStroke();
  •   beginShape(QUADS);
  •   //Z+ (绘图区域)
  •   fill(#00ff00);
  •   vertex(-30, -5, 20);
  •   vertex(30, -5, 20);
  •   vertex(30, 5, 20);
  •   vertex(-30, 5, 20);
  •   //Z-
  •   fill(#0000ff);
  •   vertex(-30, -5, -20);
  •   vertex(30, -5, -20);
  •   vertex(30, 5, -20);
  •   vertex(-30, 5, -20);
  •   //X-
  •   fill(#ff0000);
  •   vertex(-30, -5, -20);
  •   vertex(-30, -5, 20);
  •   vertex(-30, 5, 20);
  •   vertex(-30, 5, -20);
  •   //X+
  •   fill(#ffff00);
  •   vertex(30, -5, -20);
  •   vertex(30, -5, 20);
  •   vertex(30, 5, 20);
  •   vertex(30, 5, -20);
  •   //Y-
  •   fill(#ff00ff);
  •   vertex(-30, -5, -20);
  •   vertex(30, -5, -20);
  •   vertex(30, -5, 20);
  •   vertex(-30, -5, 20);
  •   //Y+
  •   fill(#00ffff);
  •   vertex(-30, 5, -20);
  •   vertex(30, 5, -20);
  •   vertex(30, 5, 20);
  •   vertex(-30, 5, 20);
  •   endShape();
  • }
  • void drawCube() {
  •   pushMatrix();
  •   translate(300, 450, 0);
  •   scale(4, 4, 4);
  •   rotateX(HALF_PI * -RwEst[0);
  •   rotateZ(HALF_PI * RwEst[1);
  •   buildBoxShape();
  •   popMatrix();
  • }
  • void getInclination() {
  •   int w = 0;
  •   float tmpf = 0.0;
  •   int currentTime, signRzGyro;
  •   readSensors();
  •   normalize3DVec(RwAcc);
  •   currentTime = millis();
  •   interval = currentTime - lastTime;
  •   lastTime = currentTime;
  •   if (firstSample || Float.isNaN(RwEst[0)) { // NaN用来等待检查从arduino过来的数据
  •     for (w=0;w<=2;w++) {
  •       RwEst[w = RwAcc[w;    // 初始化加速度传感器读数
  •     }
  •   }
  •   else {
  •     // 对RwGyro进行评估
  •     if (abs(RwEst[2) < 0.1) {
  •       // Rz值非常的小,它的作用是作为Axz与Ayz的计算参照值,防止放大的波动产生错误的结果。
  •       // 这种情况下就跳过当前的陀螺仪数据,使用以前的。
  •       for (w=0;w<=2;w++) {
  •         RwGyro[w = RwEst[w;
  •       }
  •     }
  •     else {
  •       // ZX/ZY平面和Z轴R的投影之间的角度,基于最近一次的RwEst值
  •       for (w=0;w<=1;w++) {
  •         tmpf = Gyro[w;                        // 获取当前陀螺仪的deg/s
  •         tmpf *= interval / 1000.0f;                     // 得到角度变化值
  •         Awz[w = atan2(RwEst[w, RwEst[2) * 180 / PI;   // 得到角度并转换为度
  •         Awz[w += tmpf;             // 根据陀螺仪的运动得到更新后的角度
  •       }
  •       // 判断RzGyro是多少,主要看Axz的弧度是多少
  •       // 当Axz在-90 ..90 => cos(Awz) >= 0这个范围内的时候RzGyro是准确的
  •       signRzGyro = ( cos(Awz[0 * PI / 180) >=0 ) ? 1 : -1;
  •       // 从Awz的角度值反向计算RwGyro的公式请查看网页 http://starlino.com/imu_guide.html
  •       for (w=0;w<=1;w++) {
  •         RwGyro[0 = sin(Awz[0 * PI / 180);
  •         RwGyro[0 /= sqrt( 1 + squared(cos(Awz[0 * PI / 180)) * squared(tan(Awz[1 * PI / 180)) );
  •         RwGyro[1 = sin(Awz[1 * PI / 180);
  •         RwGyro[1 /= sqrt( 1 + squared(cos(Awz[1 * PI / 180)) * squared(tan(Awz[0 * PI / 180)) );
  •       }
  •       RwGyro[2 = signRzGyro * sqrt(1 - squared(RwGyro[0) - squared(RwGyro[1));
  •     }
  •     // 把陀螺仪与加速度传感器的值进行结合
  •     for (w=0;w<=2;w++) RwEst[w = (RwAcc[w + wGyro * RwGyro[w) / (1 + wGyro);
  •     normalize3DVec(RwEst);
  •   }
  •   firstSample = false;
  • }
  • void draw() {
  •   getInclination();
  •   background(#000000);
  •   fill(#ffffff);
  •   textFont(font, 20);
  •   //float temp_decoded = 35.0 + ((float) (temp + 13200)) / 280;
  •   //text("temp:n" + temp_decoded + " C", 350, 250);
  •   text("RwAcc (G):n" + RwAcc[0 + "n" + RwAcc[1 + "n" + RwAcc[2 + "ninterval: " + interval, 20, 50);
  •   text("Gyro (°/s):n" + Gyro[0 + "n" + Gyro[1 + "n" + Gyro[2, 220, 50);
  •   text("Awz (°):n" + Awz[0 + "n" + Awz[1, 420, 50);
  •   text("RwGyro (°/s):n" + RwGyro[0 + "n" + RwGyro[1 + "n" + RwGyro[2, 20, 180);
  •   text("RwEst :n" + RwEst[0 + "n" + RwEst[1 + "n" + RwEst[2, 220, 180);
  •   // display axes显示轴
  •   pushMatrix();
  •   translate(450, 250, 0);
  •   stroke(#ffffff);
  •   scale(100, 100, 100);
  •   line(0, 0, 0, 1, 0, 0);
  •   line(0, 0, 0, 0, -1, 0);
  •   line(0, 0, 0, 0, 0, 1);
  •   line(0, 0, 0, -RwEst[0, RwEst[1, RwEst[2);
  •   popMatrix();
  •   drawCube();
  • }

然后点击运行


回帖(1)

tvz

2015-6-13 20:09:10
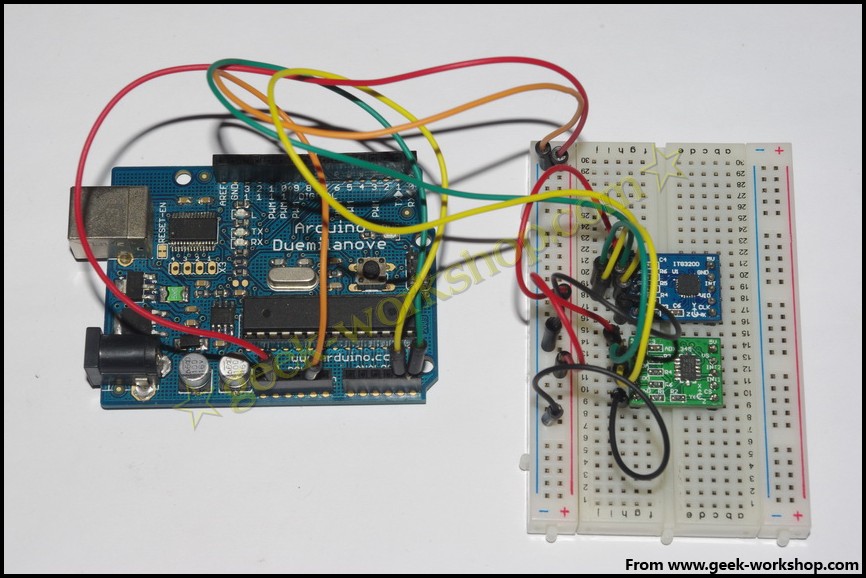
我这个adxl345显示加速度的代码有什么问题吗,能否帮我看下,谢谢
#include   //调用arduino自带的I2C库

#define Register_ID 0
#define Register_2D 0x2D
#define Register_X0 0x32
#define Register_X1 0x33
#define Register_Y0 0x34
#define Register_Y1 0x35
#define Register_Z0 0x36
#define Register_Z1 0x37

int ADXAddress = 0xA7>>1;  //转换为7位地址
int reading = 0;
int val = 0;
int X0,X1,X_out;
int Y0,Y1,Y_out;
int Z1,Z0,Z_out;
double Xg,Yg,Zg;

void setup()
{
  Wire.begin();  //初始化I2C
  Serial.begin(19200);
  delay(100);
  Wire.beginTransmission(ADXAddress);
  Wire.write(Register_2D);
  Wire.write(8);
  Wire.endTransmission();
}

void loop()
{
  Wire.beginTransmission(ADXAddress);
  Wire.write(Register_X0);
  Wire.write(Register_X1);
  Wire.endTransmission();
  Wire.requestFrom(ADXAddress,2);
  if(Wire.available()<=2);
  {
    X0 = Wire.read();
    X1 = Wire.read();
    X1 = X1<<8;
    X_out = X0+X1;
  }

  Wire.beginTransmission(ADXAddress);
  Wire.write(Register_Y0);
  Wire.write(Register_Y1);
  Wire.endTransmission();
  Wire.requestFrom(ADXAddress,2);
  if(Wire.available()<=2);
  {
    Y0 = Wire.read();
    Y1 = Wire.read();
    Y1 = Y1<<8;
    Y_out = Y0+Y1;
  }

  Wire.beginTransmission(ADXAddress);
  Wire.write(Register_Z0);
  Wire.write(Register_Z1);
  Wire.endTransmission();
  Wire.requestFrom(ADXAddress,2);
  if(Wire.available()<=2);
  {
    Z0 = Wire.read();
    Z1 = Wire.read();
    Z1 = Z1<<8;
    Z_out = Z0+Z1;//传感器一个轴的数据是两个字节的,低8位在前高8位在后,而I2C读取是一次一个字节,
                  //Z1<<8 左移就是为了让高位在前面。Z1定义为int,也就是两个字节,
                  //这样就是为了将两个8位寄存器的数据合并成一个int数值
  }

  Xg = X_out/512.00;//把输出结果转换为重力加速度g,精确到小数点后2位。
  Yg = Y_out/512.00;
  Zg = Z_out/512.00;

  Serial.print(Xg);
  Serial.print("   ");
  Serial.print(Yg);
  Serial.print("   ");
  Serial.println(Zg);
  delay(300);  //延时0.3秒,刷新频率这里进行调整

}
举报

更多回帖

发帖
×
20
完善资料,
赚取积分