1.简述
这里就不详细介绍risc-v和蜂鸟e203,大家应该都比较了解了。蜂鸟e203工程比较完善,也有一本书介绍,讲解还是非常详细的,如果以后想从事数字IC或者想学习risc-v,蜂鸟e203适合入门学习。
但是e203工程中的验证环境是iverilog,而实际工作常用vcs,个人觉得使用vcs环境学习比较好一些,如果已经工作了的,已经习惯vcs环境,业余时间研究e203时还要切换成iverilog,十分不方便。这里不是不支持开源工具,主要是工作后时间和精力有限,需要尽量节省学习成本。
今天先分享怎么修改蜂鸟e203的环境,使用vcs+verdi跑起来。这个EDA环境是我之前分享的,传送门:搭建属于自己的数字IC EDA环境系列教程。
2.Git下载
打开terminal,使用下面命令进行下载,记得虚拟机连接网络。
git clone https://github.com/SI-RISCV/e200_opensource.git
下面就是e203项目的目录,我们现在进入vsim(验证目录),其他先不管,后面的分享会慢慢介绍到。

3.修改环境
进入到仿真的bin目录下,打开run.makefile

仿真脚本修改如下:
1)修改仿真工具,添加vcs仿真选项,“LD_LIBRARY_PATH”是novas的路径,根据自己环境修改下。

2)添加verdi环境

修改好的仿真环境如下:
RUN_DIR := ${PWD}TESTCASE := ${RUN_DIR}/../../riscv-tools/riscv-tests/isa/generated/rv32ui-p-addiDUMPWAVE := 1VSRC_DIR := ${RUN_DIR}/../install/rtlVTB_DIR := ${RUN_DIR}/../install/tbTESTNAME := $(notdir $(patsubst %.dump,%,${TESTCASE}.dump))TEST_RUNDIR := ${TESTNAME}RTL_V_FILES := $(wildcard ${VSRC_DIR}/*/*.v)TB_V_FILES := $(wildcard ${VTB_DIR}/*.v)# The following portion is depending on the EDA tools you are using, Please add them by yourself according to your EDA vendorsSIM_TOOL := vcs#To-ADD: to add the simulatoin tool#SIM_TOOL := iverilog # this is a free solution here to use iverilog to compile the codeSIM_OPTIONS := -timescale=1ns/1ns -fsdb -full64 -R +vc +v2k -sverilog -debug_all -P ${LD_LIBRARY_PATH}/novas.tab ${LD_LIBRARY_PATH}/pli.a -l vcs.log +incdir+${VSRC_DIR}/core/+${VSRC_DIR}/perips/ #To-ADD: to add the simulatoin tool options #SIM_OPTIONS := -o vvp.exec -I "${VSRC_DIR}/core/" -I "${VSRC_DIR}/perips/" -D DISABLE_SV_ASSERTION=1 -g2005 # This is a free solution here to use iverilog to compile the code. Please NOTE!!!! # # Note: # Here we add a macro "DISABLE_SV_ASSERTION" to disable the system-verilog coded # assertion in the RTL code because iverilog cannot support that syntax, if you # use other EDA tools which support the systemverilog, you should not add this macro "DISABLE_SV_ASSERTION". # # Here we didnt add macro "ENABLE_TB_FORCE" # that macro was used to enable the random interrupt and bus-error insertion to make # more intensive test in e200_opensource/tb/tb_top.v. # Although the test become more intensive, the drawback is it makes the regression # simulation running very slower, so by default now it is turned off. # If you want to turn on them without caring the the regression speed, # you can just add macro `ENABLE_TB_FORCE` here in command line.SIM_EXEC := ../simv#To-ADD: to add the simulatoin executable#SIM_EXEC := vvp ${RUN_DIR}/vvp.exec -none # The free vvp is tooooo slow to run, so just comment it out, and replaced with the fake way below#SIM_EXEC := echo "Test Result Summary: PASS" # This is a fake run to just direct print PASS info to the log, the user need to actually replace it to the real EDA commandWAV_TOOL := verdi#To-ADD: to add the waveform toolWAV_OPTIONS := -2001 -sv -top tb_top +incdir+${VSRC_DIR}/core/+${VSRC_DIR}/perips/#To-ADD: to add the waveform tool options WAV_PFIX := #To-ADD: to add the waveform file postfixall: runcompile.flg: ${RTL_V_FILES} ${TB_V_FILES} @-rm -rf compile.flg ${SIM_TOOL} ${SIM_OPTIONS} ${RTL_V_FILES} ${TB_V_FILES} ; touch compile.flgcompile: compile.flg wave: #gvim -p ${TESTCASE}.spike.log ${TESTCASE}.dump & #${WAV_TOOL} ${WAV_OPTIONS} & ${WAV_TOOL} ${WAV_OPTIONS} ${RTL_V_FILES} ${TB_V_FILES} &run: compile rm -rf ${TEST_RUNDIR} mkdir ${TEST_RUNDIR} cd ${TEST_RUNDIR}; ${SIM_EXEC} +DUMPWAVE=${DUMPWAVE} +TESTCASE=${TESTCASE} |& tee ${TESTNAME}.log; cd ${RUN_DIR}; .PHONY: run clean all
4.修改tb
进入tb目录,打开tb_top.v

加入以下代码,这个是产生verdi使用的波形文件。
[color=rgba(0, 0, 0, 0.75)]
initial begin $value$plusargs("DUMPWAVE=%d",dumpwave); if(dumpwave != 0)begin // To add your waveform generation function $fsdbDumpfile("ware.fsdb"); $fsdbDumpvars("+all"); endend
5.运行仿真
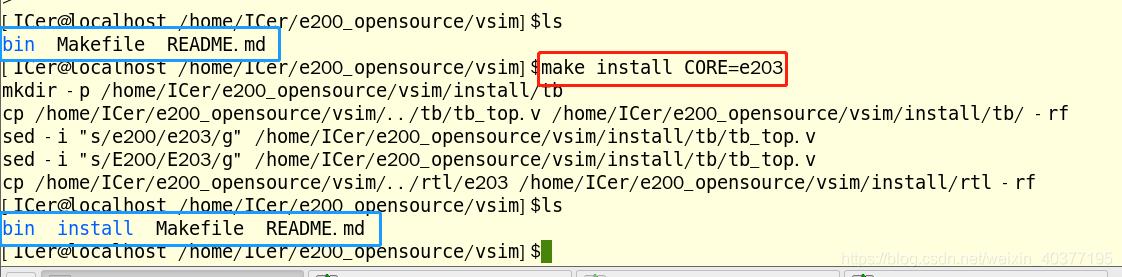
进入到vsim目录下,先执行下面命令,会生成install目录,这里面是copy过来源代码和tb。
make install CORE=e203
执行下面命令,执行仿真,仿真结束后打印如下图的“PASS”。
make compilemake run_test

运行以下命令启动verdi;
make wave

6.总结
修改仿真环境比较简单,现在可以使用Verdi去学习RTL代码,这样效率会高很多。这部分基于我之前分享的EDA环境进行的,以后也是基于这个环境,所以想一起学习的盆友,最好使用我的环境,公众号后台回复:EDA虚拟机可以获得完整EDA环境(虚拟机)。这个修改好的E203工程我也上传到gitee,传送门:e203_mod,后面修改的工程也会上传到gitee。


