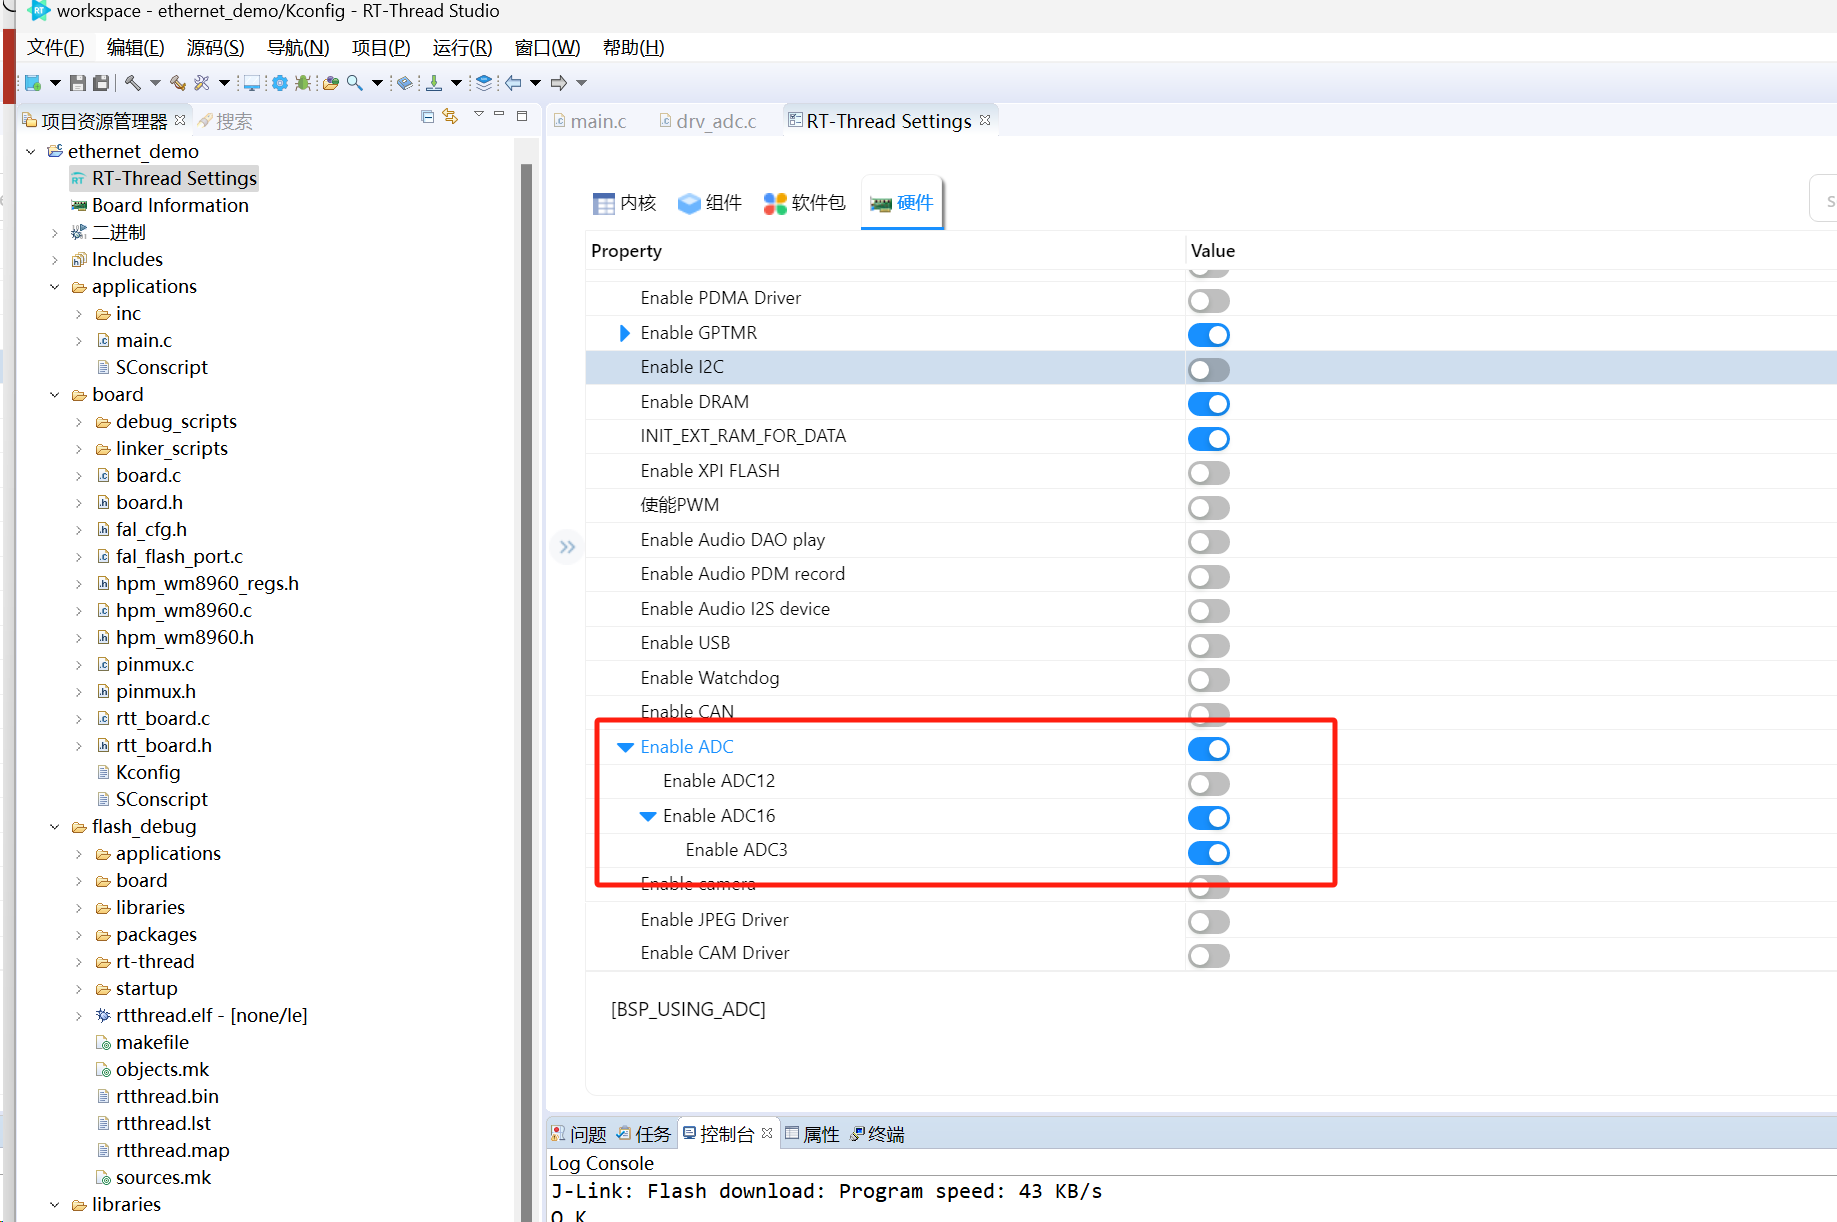
1、新建RTT工程,工程中添加对ADC的驱动:
2、保存工程后,添加测试代码。
3、我们根据原理图上的J10接个,只有PE29是ADC3的输出通道
4、先定义通道、任务
#define ADC_DEV_NAME        "adc3"      /* ADC 设备名称 */
#define ADC_DEV_CHANNEL     2           /* ADC 通道 */
#define REFER_VOLTAGE       330         /* 参考电压 3.3V,数据精度乘以100保留2位小数*/
#define CONVERT_BITS        (1 << 16)   /* 转换位数为16位 */
5、添加任务:
static void Adc_entry(void* paremeter)
{
    rt_adc_device_t adc_dev;
    rt_uint32_t value,vol;
    rt_err_t ret = RT_EOK;

    adc_dev = (rt_adc_device_t)rt_device_find(ADC_DEV_NAME);
    if (adc_dev == RT_NULL)
    {
        rt_kprintf("adc sample run failed! can't find %s device!\n", ADC_DEV_NAME);
    }
    /* 使能设备 */
    ret = rt_adc_enable(adc_dev, ADC_DEV_CHANNEL);
    if(ret == RT_EOK)
    {
        rt_kprintf("adc sample run success!  find %s device!\n", ADC_DEV_NAME);
    }
    while(1)
    {
        /* 读取采样值 */
        value = rt_adc_read(adc_dev, ADC_DEV_CHANNEL);
        rt_kprintf("the value is :%d \n", value);
        /* 转换为对应电压值 */
        vol = value * REFER_VOLTAGE / CONVERT_BITS;
        rt_kprintf("the voltage is :%d.%02d \n", vol / 100, vol % 100);

        rt_thread_delay(500);
    }
}
7、在主函数里启用任务
Adc_thread = rt_thread_create("adc1",
                Adc_entry,
                RT_NULL,
                512,
                16,
                20);
        if(Adc_thread != RT_NULL)
            rt_thread_startup(Adc_thread);
        else
            return -1;
更多回帖