[文章]【HarmonyOS HiSpark Wi-Fi IoT 套件试用连载】之环境搭建及HelloWorld程序开发

1
2
环境搭建
Author: HonestQiao 乔帮主的docker环境适用于套件使用,具体参考网址:https://blog.51cto.com/harmonyos/5223948
VSCode连接到container中进行开发
-
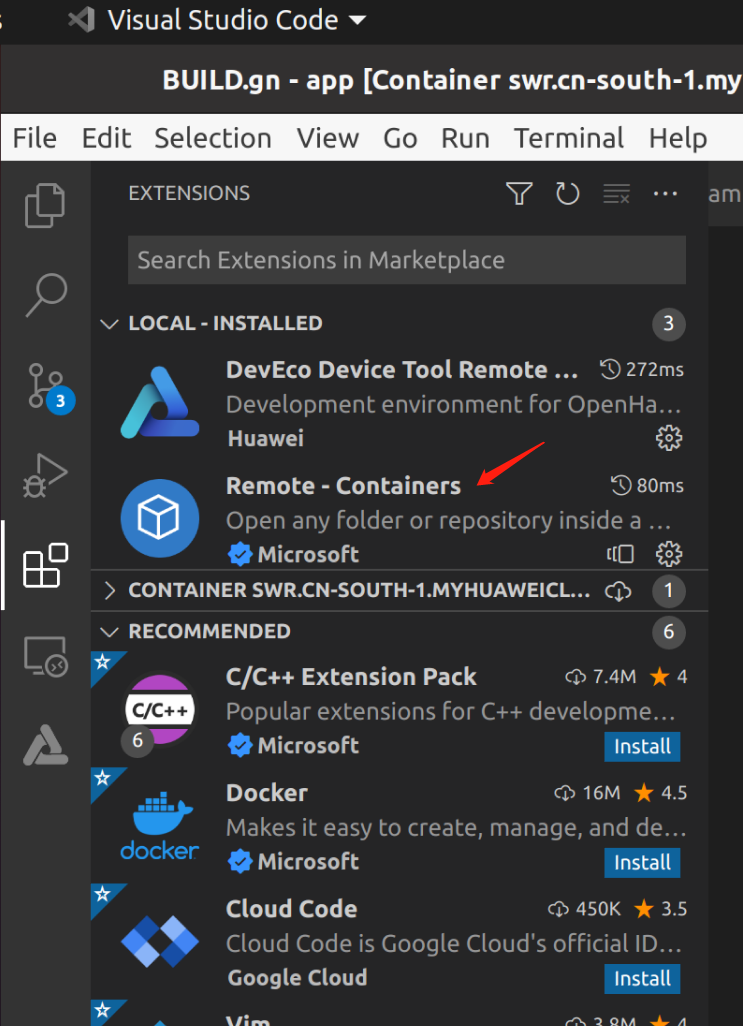
安装remote – container插件:
-
安装完成后,在VSCode的左下角出现一个绿色的按钮

-
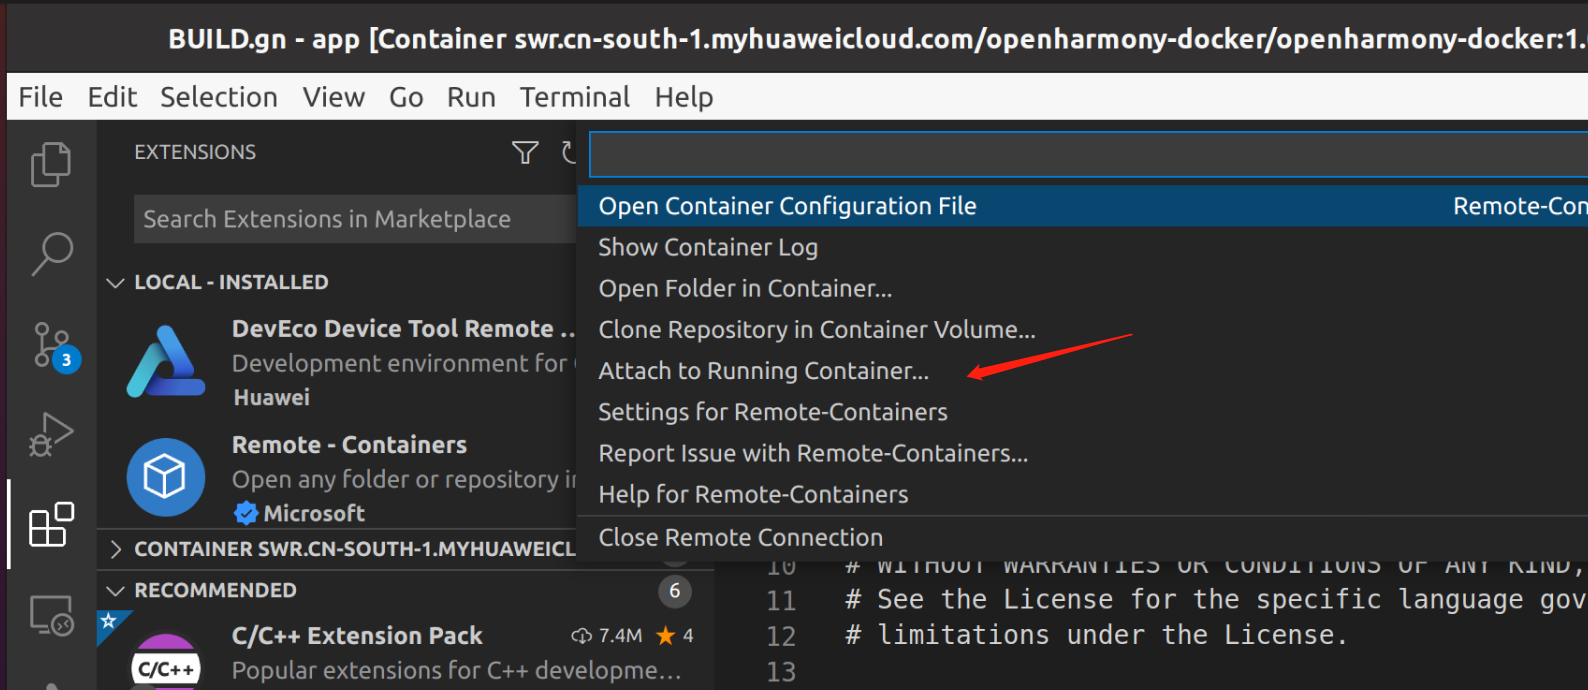
连接到container中点击attach to Running Container…
-
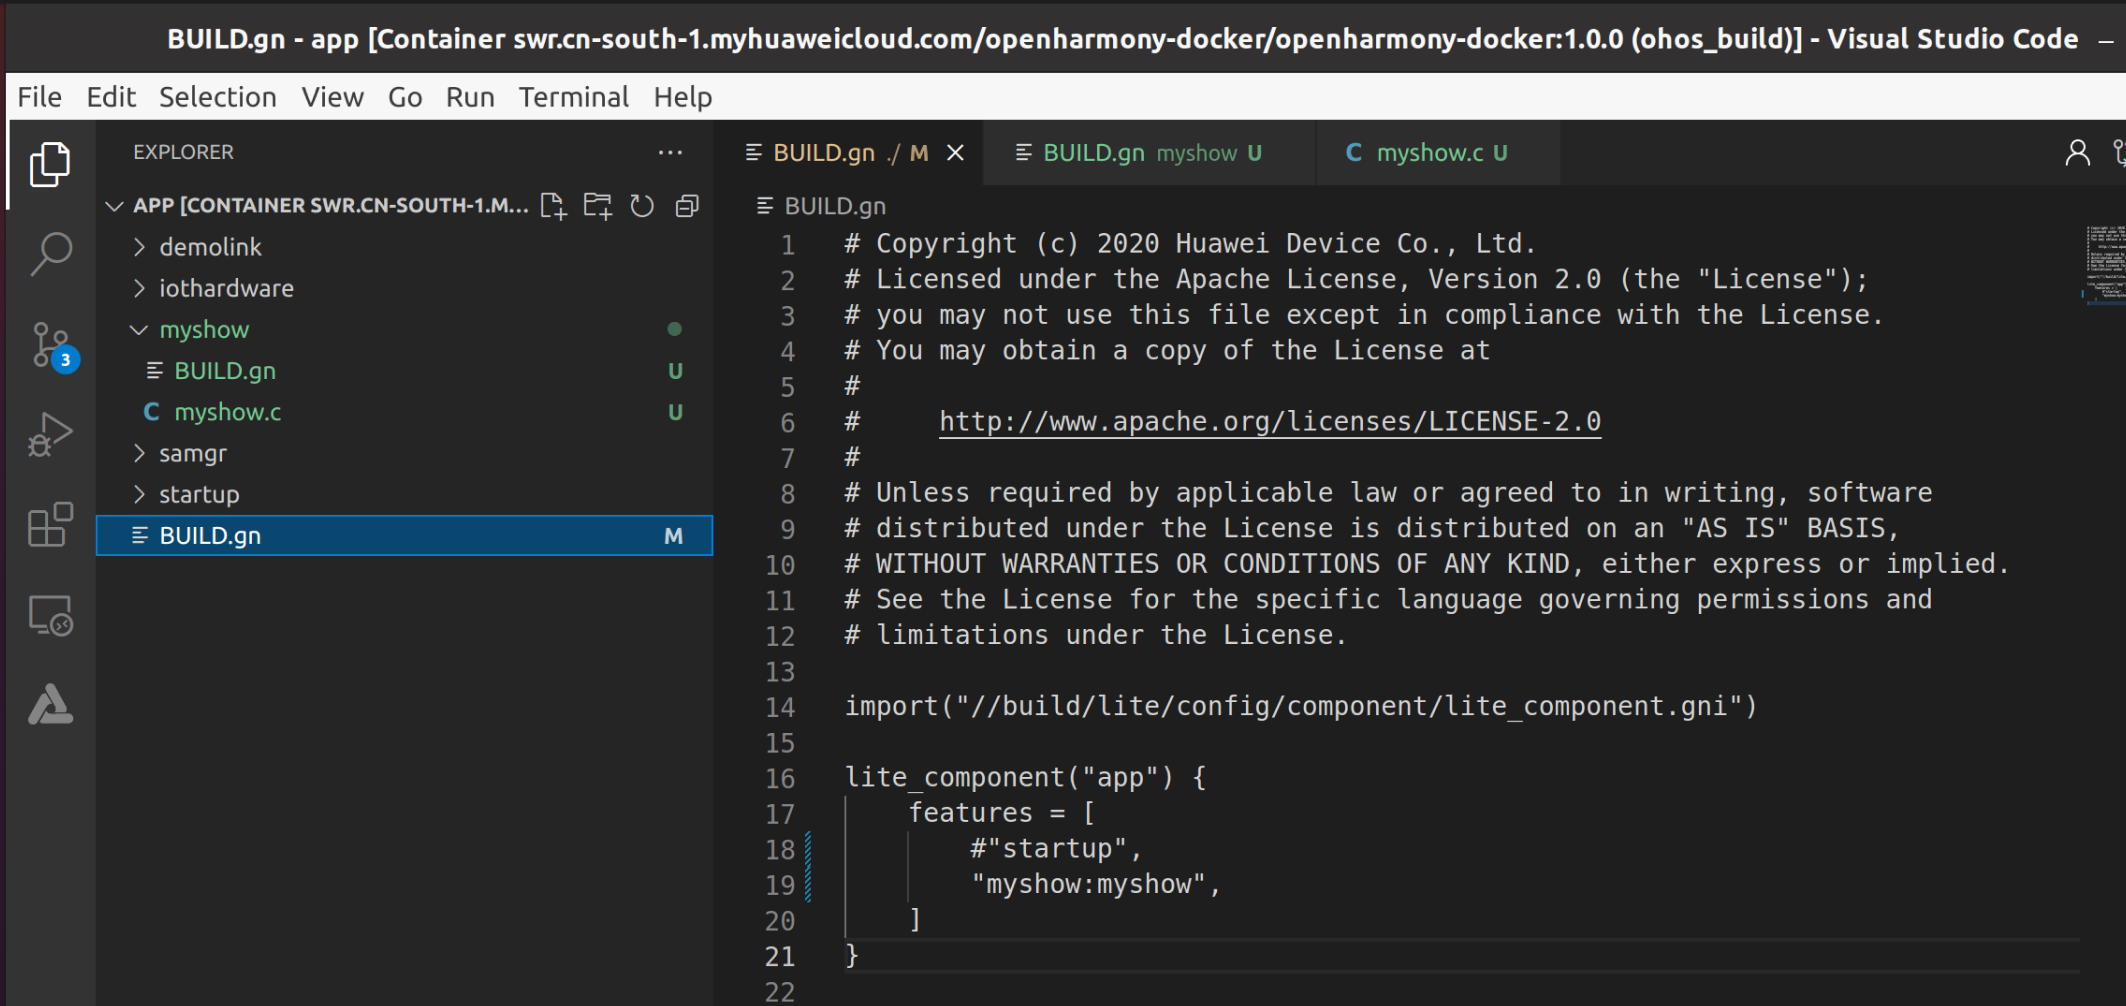
Attach到container以后,可以看到内部的文件系统:

这样就能正常开发了创建HelloWorld
-
用VScoder打开路径:/home/dist/OpenHarmony-v3.1-Release/applications/sample/wifi-iot/app
-
/app/BUILD.gn


import("//build/lite/config/component/lite_component.gni")

lite_component("app") {
    features = [
        #"startup",
        "myshow:myshow",
    ]
}
- ./app创建文件夹myshow,并建两个文件BUILD.gn 和 myshow.c
BUILD.gnstatic_library("myshow") { sources = [ "myshow.c" ] include_dirs = [ "//utils/native/lite/include", "//kernel/liteos_m/kal/cmsis", "//base/iot_hardware/peripheral/interfaces/kits", ]
}
myshow.c
#include <stdio.h>
#include <unistd.h>
#include "ohos_init.h"
#include "cmsis_os2.h"
#include "iot_gpio.h"
void mymain(void)
{
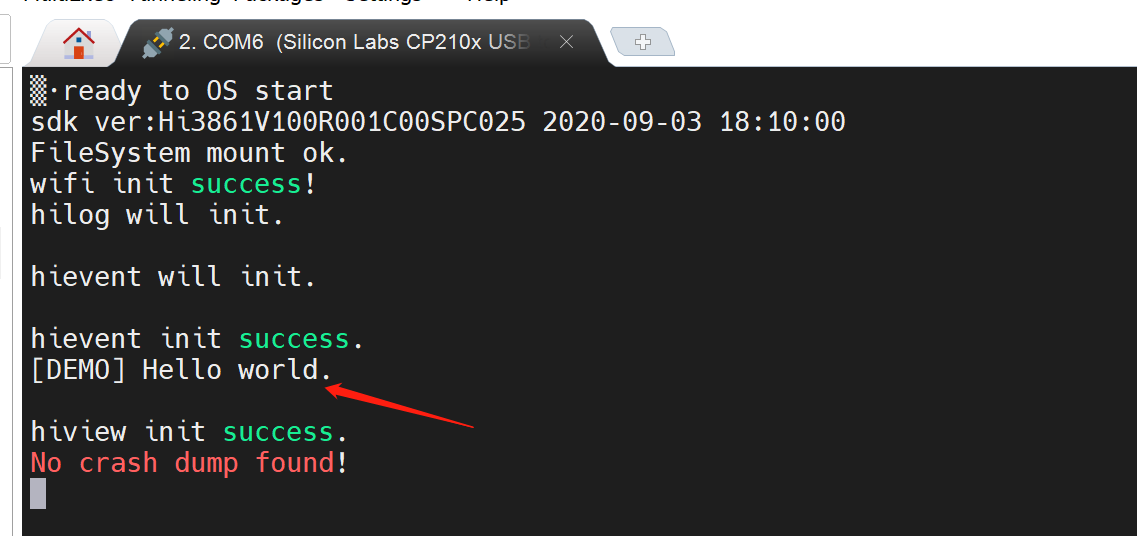
printf("[DEMO] Hello world.\n");
}
SYS_RUN(mymain);
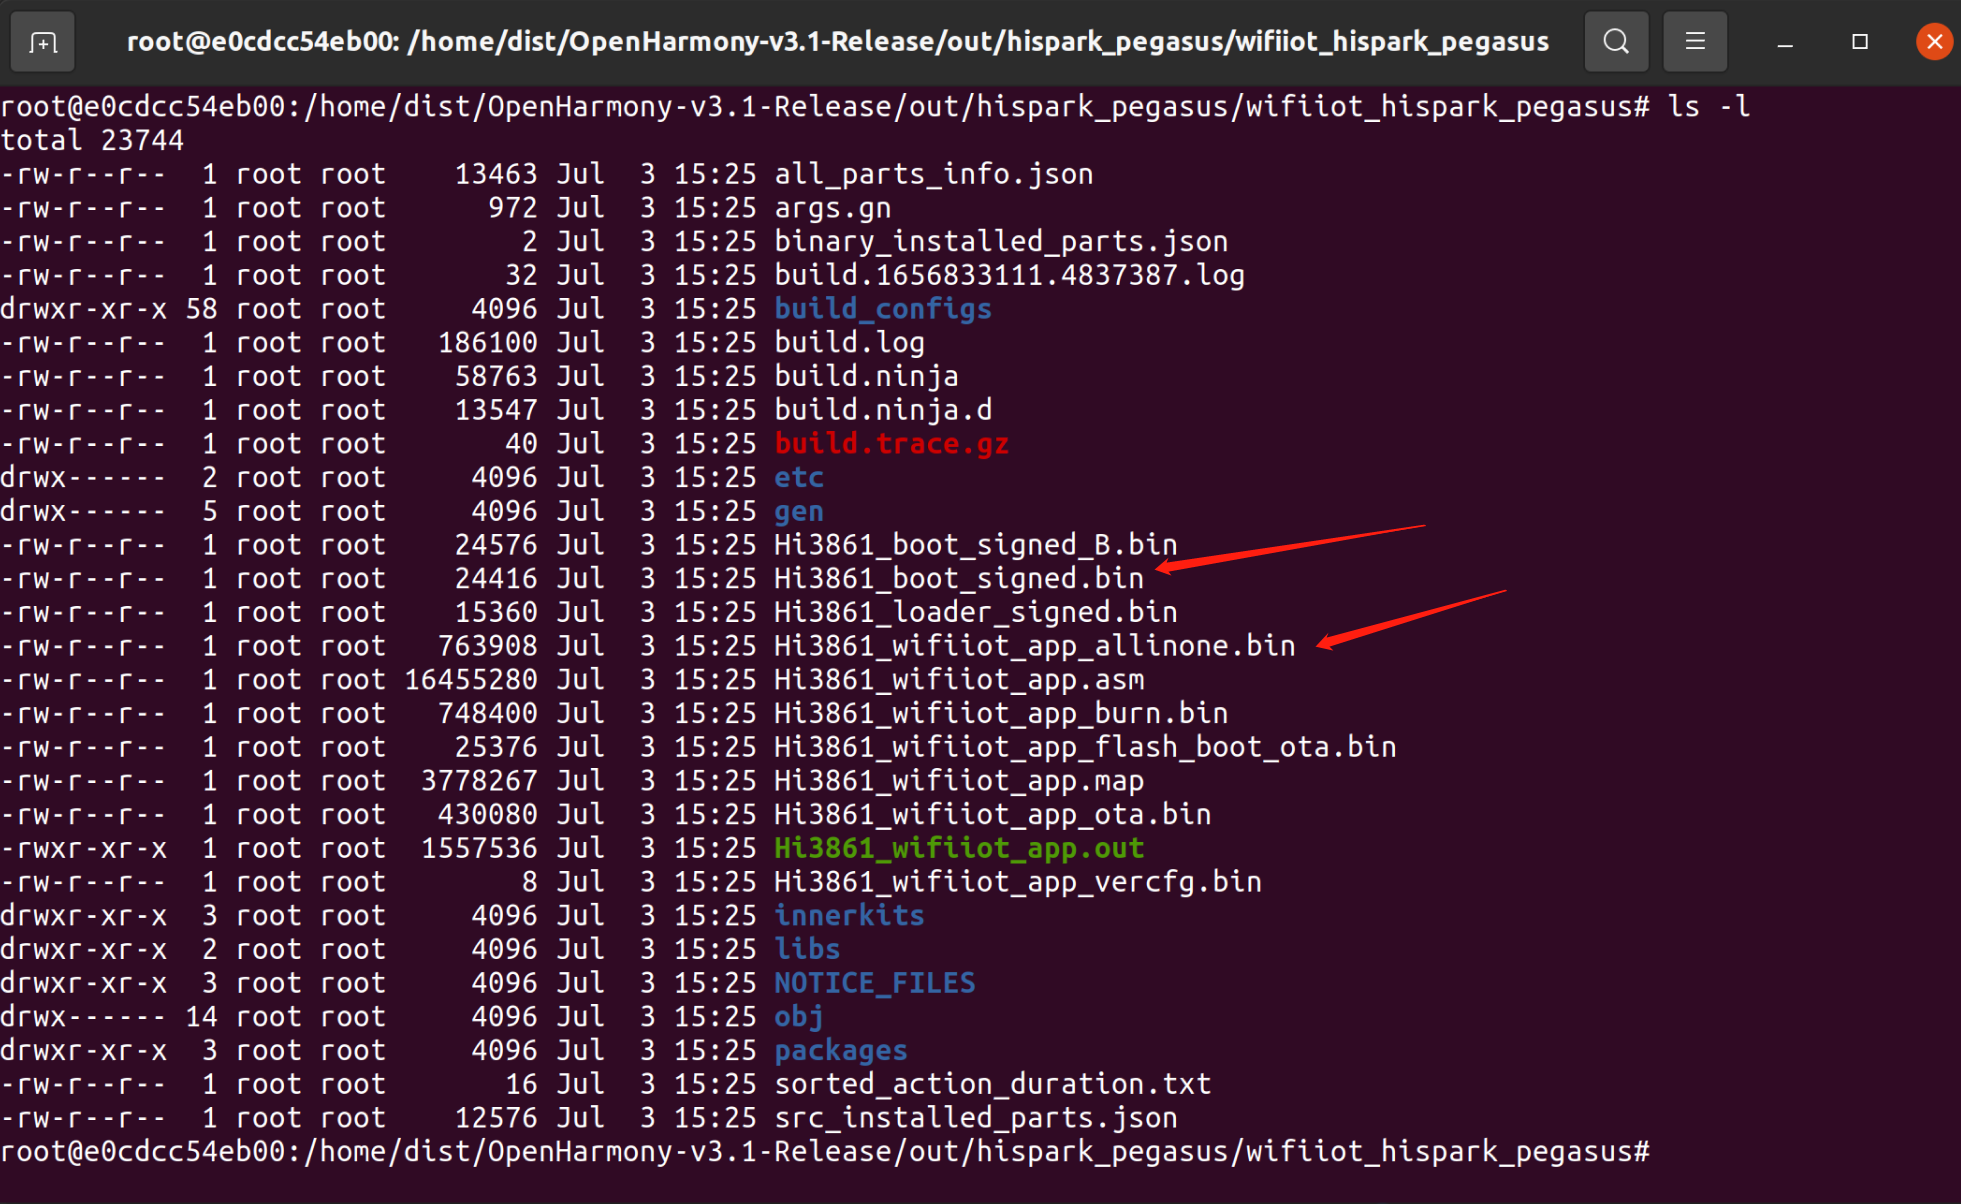
- 使用 hb set 选择 wifiiot_hispark_pegasus
- 使用 hb build -f 生成bin
- 生成文件路径:/home/dist/OpenHarmony-v3.1-Release/out/hispark_pegasus/wifiiot_hispark_pegasus
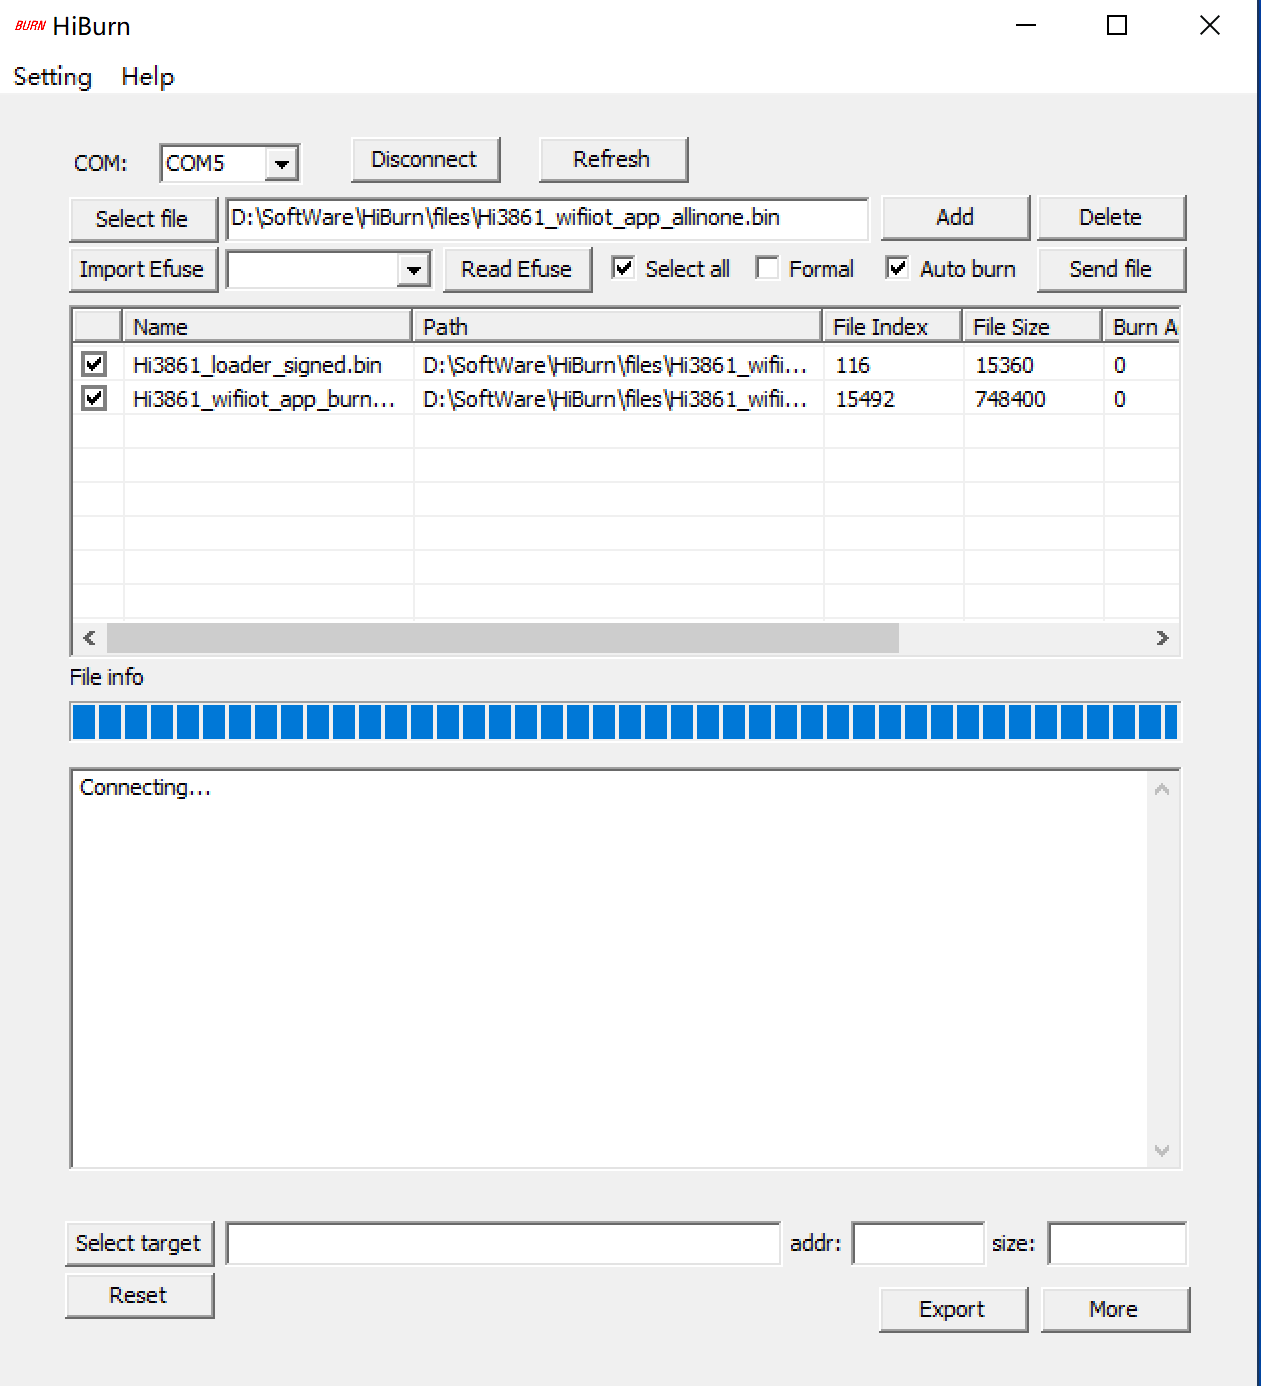
- 使用HiBurn.exe烧录
- 串口验证


至此可以愉快的进行开发了。
回帖高级模式
声明:本文内容及配图由入驻作者撰写或者入驻合作网站授权转载。文章观点仅代表作者本人,不代表电子发烧友网立场。文章及其配图仅供工程师学习之用,如有内容图片侵权或者其他问题,请联系本站作侵删。 侵权投诉