[文章]HarmonyOS应用开发-qrcode二维码生成
1
3

一.创建项目
二.示例代码
Hml代码:
- <div class="container">
- <text class="txt">Type</text>
- <switch showtext="true" checked="true" texton="rect" textoff="circle" onchange="setType"></switch>
- <qrcode value="{{qr_value}}" type="{{qr_type}}"
- style="color: {{qr_col}};background-color: {{qr_bcol}};width: {{qr_size}};height: {{qr_size}};margin-bottom: 70px;">
- </qrcode>
- <text class="txt">Color</text>
- <select onchange="setColor">
- <option for="{{col_list}}" value="{{$item}}">{{$item}}</option>
- </select>
- <text class="txt">Background Color</text>
- <select onchange="setColorB">
- <option for="{{bcol_list}}" value="{{$item}}">{{$item}}</option>
- </select>
- </div>
Css代码:
- .container {
- flex-direction: column;
- justify-content: center;
- align-items: center;
- }
- .txt {
- color: orangered;
- }
Js代码:
- export default {
- data: {
- qr_value:"这里是扫出的二维码内容",
- qr_type: 'rect',
- qr_size: '200px',
- qr_col: '#333',
- col_list: ['#87ceeb','#fa8072','#da70d6','#80ff00ff','#00ff00ff'],
- qr_bcol: '#f0ffff',
- bcol_list: ['#f0ffff','#ffffef','#d8bfd8']
- },
- setType(e) {
- if (e.checked) {
- this.qr_type = 'rect'
- } else {
- this.qr_type = 'circle'
- }
- },
- setColor(e) {
- this.qr_col = e.newValue
- },
- setColorB(e) {
- this.qr_bcol = e.newValue
- }
- }
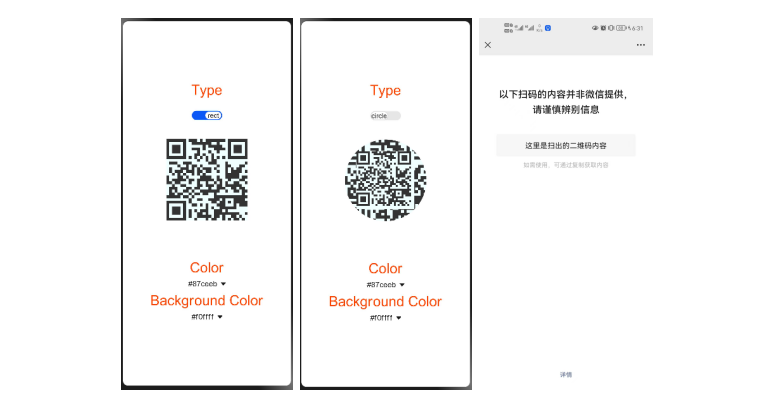
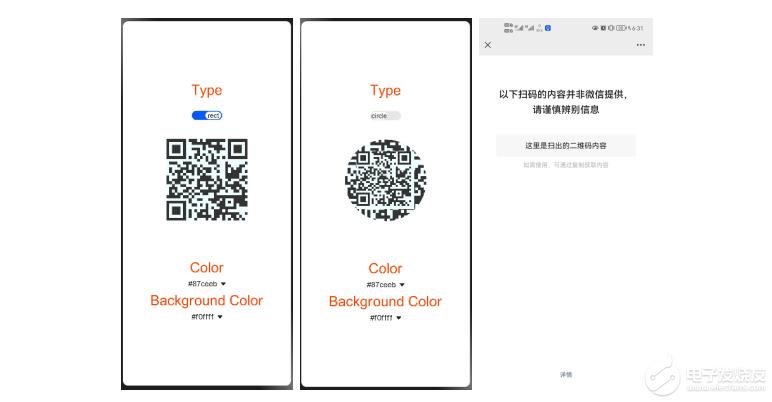
三. 实例效果
附件:
回帖高级模式
声明:本文内容及配图由入驻作者撰写或者入驻合作网站授权转载。文章观点仅代表作者本人,不代表电子发烧友网立场。文章及其配图仅供工程师学习之用,如有内容图片侵权或者其他问题,请联系本站作侵删。 侵权投诉


