[文章]【HarmonyOS IPC 试用连载 】第4章 HiSpark IPC Camera应用开发
1
0
开发环境:
开发系统:Ubuntu 20.04
开发板:HiSparkIPCCamera(Hi3518)
4.1新建工程及配置
1.新建工程及源码
1) 新建目录
- $ mkdir hello
在applications/sample/hello中新建src目录以及helloworld.c文件,代码如下所示。
- #include <stdio.h>
- int main(int argc, char **argv)
- {
- printf("n");
- printf("ntHello OHOS!n");
- printf("n");
- return 0;
- }
2) 新建编译组织文件
新建applications/sample/hello/BUILD.gn文件,内容如下所示:
- import("//build/lite/config/component/lite_component.gni")
- lite_component("hello-OHOS"){
- features = [ ":helloworld" ]
- }
- executable("helloworld"){
- output_name = "helloworld"
- sources = [ "src/helloworld.c" ]
- }
新建的工程目录如下:
- $ tree
2.添加新组件
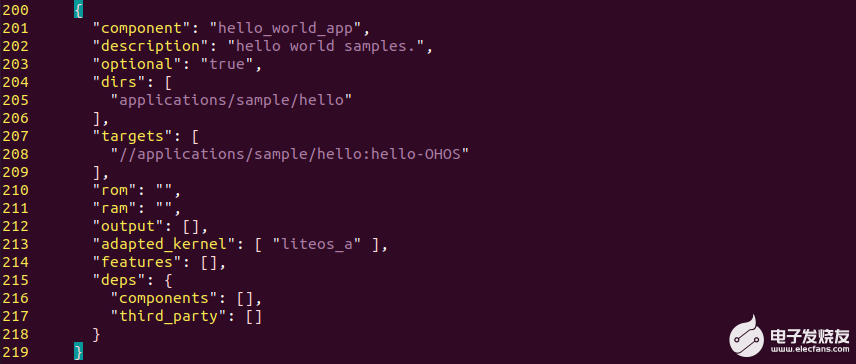
修改文件build/lite/components/applications.json,添加组件hello_world_app的配置。
- {
- "component":"hello_world_app",
- "description": "helloworld samples.",
- "optional": "true",
- "dirs": [
- "applications/sample/hello"
- ],
- "targets": [
- "//applications/sample/hello:hello-OHOS"
- ],
- "rom": "",
- "ram": "",
- "output": [],
- "adapted_kernel": ["liteos_a" ],
- "features": [],
- "deps": {
- "components": [],
- "third_party": []
- }
- }
3.修改单板配置文件
修改文件vendor/hisilicon/hispark_aries/config.json,新增hello_world_app组件的条目。
- {
- "subsystem":"applications",
- "components": [
- { "component":"hello_world_app", "features":[] }
- }
4.2编译下载验证
接下来就可以编译了。
- $ hb set
全编译。
- $ hb build -f
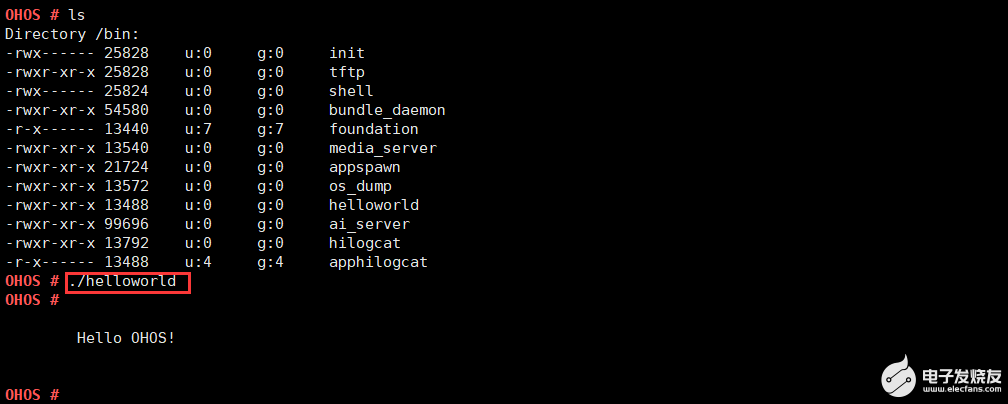
在bin文件就会有helloworld应用。
和以前一样,拷贝ohos_image.bin, rootfs_jffs2.img, userfs_jffs2.img三个文件是。
然后把固件下载到板子中。
烧写成功后,运行bin目录下的helloworld。
接下来就可以根据该实例开发自己的应用了。
回帖高级模式
声明:本文内容及配图由入驻作者撰写或者入驻合作网站授权转载。文章观点仅代表作者本人,不代表电子发烧友网立场。文章及其配图仅供工程师学习之用,如有内容图片侵权或者其他问题,请联系本站作侵删。 侵权投诉


